
Are you tired of dealing with inconsistent temperatures in your home? A properly wired thermostat can make all the difference, especially when it comes to heat pumps. Whether you’re upgrading your system or replacing an old thermostat, getting the wiring right is crucial for optimal performance.
Key Takeaways
- Heat Pump Types: Understanding different types of heat pumps—air source, ground source, water source, and mini-split—is essential for selecting the right system that suits your home’s heating and cooling needs.
- Essential Tools: Gather necessary tools including a screwdriver, wire stripper, drill, voltage tester, and leveling tool to ensure a smooth and efficient thermostat wiring process.
- Wiring Steps: Follow specific steps such as powering off the system, removing the old thermostat, identifying wiring connections, and securely connecting the new thermostat to ensure optimal functionality.
- Common Issues: Be aware of common wiring issues like incorrect connections or a non-responsive system; verifying connections and checking the power supply can prevent operational problems.
- Safety Precautions: Always turn off the power before starting work and use proper tools to enhance safety and efficiency during the installation process.
Understanding Heat Pumps
Heat pumps serve as efficient heating and cooling systems, using energy from the outside air or ground to regulate indoor temperatures. This method enhances energy efficiency, saving on utility bills and reducing environmental impact.
What Is a Heat Pump?
A heat pump is a device that transfers heat between indoor and outdoor environments. During colder months, it extracts heat from the outside and moves it indoors. In warmer months, the process reverses, taking heat from inside and releasing it outside. This process relies on electricity, making heat pumps an eco-friendly alternative to combustion-based heating systems.
- Air Source Heat Pumps
Air source heat pumps extract heat from the air, making them the most common type. They function well in moderate climates and operate efficiently down to about 28°F. Some models can handle even lower temperatures. - Ground Source Heat Pumps (Geothermal)
Ground source heat pumps utilize the stable temperatures of the earth. They are highly efficient and can provide consistent heating and cooling all year round. Installation costs may be higher due to excavation, but long-term savings often offset this. - Water Source Heat Pumps
Water source heat pumps draw energy from nearby water bodies. They work well in locations with access to ponds or lakes, providing efficient heating and cooling. These systems require specific conditions to be effective. - Mini-Split Heat Pumps
Mini-split heat pumps consist of an indoor unit and an outdoor compressor, allowing for zoned heating and cooling. They’re ideal for homes without ductwork and can provide customized comfort in different rooms.
Understanding these types of heat pumps helps you choose the right system for your home, ensuring effective energy use and optimal temperature control.
Tools and Materials Needed
Wiring a thermostat for a heat pump requires specific tools and materials. Having everything on hand simplifies the process and ensures efficiency.
Recommended Products

About the Aprilaire 8466 programmable dual powered Universal thermostat: 2Heat/1cool managing your home's heating and cooling system has never been easier or more efficient
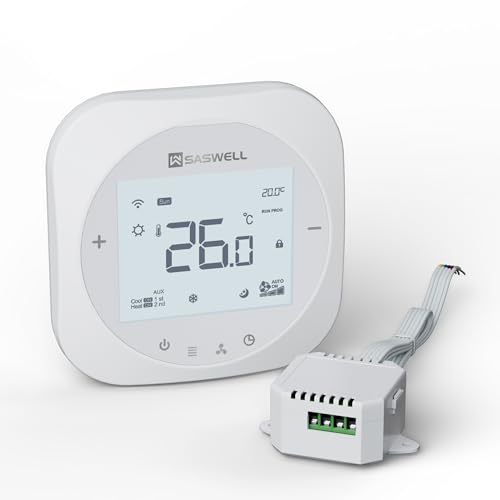
【Wide Application】 This smart wifi thermostat is compatible with various heating and cooling systems, including 3H/2C heat pump and conventional multi-stage systems. Whether you're upgrading an existing system or installing a new one, this thermostat can adapt to meet your needs, providing reliable temperature control across different setups.

Product Features: Temperature is a critical factor affecting water heater performance. Our rheem chamber sensor AP19299 provides real-time temperature feedback, which helps optimize the combustion process, thereby enhancing energy efficiency and water temperature stability.
Essential Tools
- Screwdriver: A flathead or Phillips screwdriver secures or removes the thermostat cover and screws.
- Wire Stripper: This tool strips the insulation from the thermostat wires, allowing for proper connections.
- Drill: A drill helps create holes for new mounting if needed.
- Voltage Tester: Check for live wires to ensure safety before starting work.
- Level: Ensures proper placement and alignment of the thermostat.
- Thermostat: Choose one compatible with heat pump systems; look for models with separate settings for heating and cooling.
- Thermostat Wiring: Use 18-gauge thermostat wire, typically with 5 to 7 wires for multi-stage heating and cooling systems.
- Wire Connectors: These secure connections between wires, ensuring stability and minimizing the risk of shorts.
- Electrical Tape: Wrap connections for insulation, providing additional safety and durability.
- Mounting Hardware: Screws and anchors are crucial for securely fastening the thermostat to the wall.
Gathering these tools and materials ensures you’re fully equipped for a successful thermostat wiring project.
Steps to Wire Thermostat for Heat Pump
Wiring a thermostat for a heat pump involves specific steps to ensure proper functionality. Follow these clear instructions for a successful installation.
Power Off the System
- Turn off the power to your heating and cooling system at the circuit breaker. This step ensures safety during the wiring process and prevents accidental electrical shocks.
- Double-check that the power is off using a voltage tester. This extra precaution helps confirm there’s no electricity running through the wires.
Remove Old Thermostat
- Carefully take off the cover of the existing thermostat. Most covers snap off, but some may require a gentle twist.
- Unscrew the thermostat from the wall. Keep the screws in a safe location for the new thermostat installation.
- Take note of the wiring configuration or take a photo. This documentation assists with accurately connecting the new thermostat.
Identify Wiring Connections
- Examine the wires connected to the old thermostat. Common color codes include:
- Red (R): Power
- White (W): Heat
- Yellow (Y): Cooling
- Green (G): Fan
- Blue (C): Common (for continuous power)
- Label the wires using tape if needed. Labeling simplifies the connection process when installing the new thermostat.
- Follow the manufacturer’s wiring diagram specific to your new thermostat model. Each model may have different terminals for wire connections.
- Connect the wires to the corresponding terminals. Firmly insert each wire and securely tighten the screws to prevent loose connections.
- Attach the new thermostat to the wall, using the screws you set aside earlier. Ensure it’s level for a clean, professional look.
Following these steps ensures an effective wiring process for your heat pump thermostat. Proper installation enhances your system’s performance and efficiency.
Troubleshooting Common Issues
Several common issues may arise when wiring a thermostat for a heat pump. Identifying and addressing these problems can enhance the system’s performance and efficiency.
Recommended Products

· Not Compatible: Two transformer systems, Conventional multi-stage systems, Dual fuel/hybrid heating, Electric baseboard heat (110-240 volts), Line voltage, Convectors, Radiant-ceiling heat, Mini split systems and 12V RV systems.

· High Compatibility: Heat pump multi-stage systems or conventional single-stage systems, Forced air (gas, oil or electric), Electric furnace, Hot water steam or gravity radiant heat, Heat only systems, Heat pump w/o or with auxiliary or emergency heat, Millivolt conventional systems, Gas fireplaces (24V), Floor or wall furnaces, Cool only systems.

· High Compatibility: Heat pump multi-stage systems or conventional single-stage systems, Forced air (gas, oil or electric), Electric furnace, Hot water steam or gravity radiant heat, Heat only systems, Heat pump w/o or with auxiliary or emergency heat, Millivolt conventional systems, Gas fireplaces (24V), Floor or wall furnaces, Cool only systems.(TIP: Before purchasing, check to see if this thermostat is compatible with your system.)
Incorrect Wiring Problems
Incorrect wiring can lead to improper thermostat operation. Verify all connections match the color codes typically used:
- R Red Wire: Power from the transformer.
- Y Yellow Wire: Cooling signal.
- G Green Wire: Fan operation.
- W White Wire: Heating signal.
- O/B Orange/Blue Wire: Heat pump reversing valve.
Ensure each wire is securely connected to the corresponding terminal. If the system operates erratically or not at all, double-check the connections against the manufacturer’s diagram. A visual inspection can help identify loose wires or corrosion.
System Not Responding
If your system doesn’t respond, first check the power supply. Ensure the circuit breaker is on and there are no blown fuses. Examine the thermostat display for any error messages or blank screens. If there’s an issue, resetting the thermostat might help.
If resetting doesn’t work, investigate the batteries, if applicable. Change the batteries if they’re low or dead. If the system continues to remain unresponsive, consider consulting an HVAC technician for further diagnosis, as there may be deeper electrical or system-level issues.
Safety Tips When Wiring
Wiring a thermostat for your heat pump requires careful attention to safety to ensure a smooth process. Follow these tips to protect yourself and your equipment.
Turn Off Power Before Beginning
Always turn off the power to your heating and cooling system at the circuit breaker. Doing this prevents electrical shocks and protects the thermostat from damage during installation. Verify that the power is off by using a voltage tester on the wires before you start working on them.
Use Proper Tools and Equipment
Using the right tools increases both safety and efficiency. Gather these essential tools for your project:
- Screwdriver: A flat-head or Phillips screwdriver, depending on your thermostat model.
- Wire stripper: For removing insulation from wires to connect them securely.
- Drill: If you need to mount the thermostat on the wall.
- Voltage tester: To ensure the power is off before working on the wires.
- Level: To make sure your thermostat is mounted straight.
Select high-quality materials as well. Use 18-gauge thermostat wire to ensure proper conductivity, and choose a reputable brand for your thermostat to guarantee compatibility with your system. Maintain organization by keeping your workspace tidy to avoid losing tools or wires during installation.
Conclusion
Wiring your thermostat for a heat pump can seem daunting but with the right tools and a bit of patience you can achieve it. By following the steps outlined and ensuring proper connections you’ll set yourself up for an efficient and comfortable home environment.
Don’t forget to prioritize safety by turning off the power before you start and double-checking your work. If you run into any issues along the way remember that it’s always okay to reach out for professional help. Enjoy the benefits of your hard work and the cozy temperatures that come with a well-functioning heat pump system.
Frequently Asked Questions
Why is proper wiring important for a heat pump thermostat?
Proper wiring is crucial for a heat pump thermostat to ensure consistent temperature control and optimal performance. Incorrect wiring can lead to inefficiencies, increased energy bills, and system malfunctions.
What types of heat pumps are there?
There are several types of heat pumps, including air source, ground source (geothermal), water source, and mini-split heat pumps. Each type offers unique benefits depending on the climate and energy needs of your home.
What tools do I need to wire a thermostat for a heat pump?
Essential tools include a screwdriver, wire stripper, drill, voltage tester, and level. Gathering these tools before starting your project will help ensure a smoother and more efficient installation process.
How do I begin wiring a thermostat for my heat pump?
Start by turning off the power to your heating and cooling system at the circuit breaker for safety. Next, remove the old thermostat and document the wiring configuration for reference.
What are the common troubleshooting steps for thermostat wiring issues?
If your system isn’t responding, first check the power supply and examine the thermostat display for errors. Make sure all wiring connections are correct and replace batteries if needed.
What safety tips should I follow when wiring a thermostat?
Always turn off the power at the circuit breaker before starting. Use proper tools, work in an organized area, and avoid using low-quality materials to ensure a safe installation process.

Hi, I’m Charlie, and I cover all things laundry here at Appliance Mastery.
I’ve spent over eight years working on washing machines, dryers, and dishwashers. I also have a degree in mechanical engineering, which helps me understand how these appliances really work.
I try to make every guide clear and practical. If you’re stuck with a noisy dryer or a leaking washer, I’ll help you figure out what’s wrong and how to fix it.