
Have you noticed water pooling around the top of your water heater? It’s a frustrating situation that can lead to bigger problems if not addressed quickly. You’re not alone—many homeowners face this issue, and it can be a bit overwhelming to figure out what to do next.
Key Takeaways
- Identify Common Leak Causes: Water heater leaks often occur due to loose connections, corroded tanks, faulty pressure relief valves, and drain valve issues. Understanding these can help address problems quickly.
- Recognize Leak Signs: Look out for water accumulation, rusty water, and decreased hot water supply, as these indicate potential leaks that require immediate attention.
- Immediate Actions: If a leak is discovered, promptly turn off the power and water supply, and reach out to a licensed plumber for a professional assessment and repair.
- Regular Maintenance: Conduct regular inspections, flush the tank annually, and replace the anode rod every 3-5 years to prevent future leaks and prolong the life of your water heater.
- Use Leak Detection Systems: Installing devices that alert you to leaks early can help minimize water damage and ensure a timely response to any issues.
Overview of Water Heater Leaks
A water heater leak can stem from various sources, making it essential to identify the exact cause. Common issues include corrosion, loose connections, or faulty fittings. Understanding these factors helps you respond effectively.
Common Causes of Leaks
- Loose Fittings: Check the inlet and outlet pipes for loose connections. Tightening these can often resolve minor leaks.
- Corroded Tank: Inspect the tank for rust or corrosion. Over time, aluminum or steel tanks can wear, requiring replacement.
- Pressure Relief Valve: This valve releases excess pressure. A malfunction can lead to leaks. Inspect it regularly to ensure it operates correctly.
- Temperature and Pressure (T&P) Relief Valve: If water leaks from this valve, it might indicate high pressure or temperature within the tank. Adjust settings as needed.
- Drain Valve Issues: A leaking drain valve can typically be fixed by tightening it or replacing the valve.
Signs of a Leak
Recognizing the signs of a water heater leak helps prevent extensive damage. Look for:
- Water Accumulation: Puddles or wet spots around the heater signal a problem.
- Rusty Water: Rusty water may indicate a corroded tank.
- Decreased Hot Water Supply: A sudden drop in hot water availability often correlates with a leak.
Immediate Actions to Take
If you discover a leak, follow these steps:
- Turn Off Power: If you have an electric water heater, turn off the power supply. For gas units, turn the gas valve to the off position.
- Shut Off Water Supply: Locate the cold water shut-off valve and turn it off to prevent additional water from flowing.
- Call a Professional: Contact a licensed plumber to assess the situation. Professional evaluation ensures proper diagnosis and repair.
Preventative Measures
Prevent future leaks with these maintenance tips:
- Regular Inspections: Frequently check connections, valves, and the tank for signs of wear.
- Flush the Tank: Annually flushing the tank removes sediment buildup, prolonging its life.
- Install a Leak Detection System: Consider devices that alert you to water leaks early, minimizing water damage.
By keeping an eye on your water heater and maintaining it well, you can reduce the likelihood of leaks and ensure consistent hot water supply.
Common Causes of Water Heater Leaking From Top
Identifying the causes of a water heater leak from the top helps you address the issue promptly. Here are some common reasons for leaks:
Recommended Products

Provides Protection: Helps protect your RV or home water heater from excess temperature and water pressure
CASH ACME RELIEF VALVE: Cash Acme NCLX Combination Temperature and Pressure Relief Valves are designed for the protection of water heaters and storage tanks; incorporate an inert thermal element coating that provides effective isolation from mineral deposits (liming) and galvanic corrosion
Loose Connections
Loose connections at the inlet or outlet pipes commonly cause leaks. A simple twist with a wrench can tighten these fittings. Regularly check them for any signs of movement or dripping. If you’re unsure of the tightness, gently re-tighten each connection to prevent more significant issues.
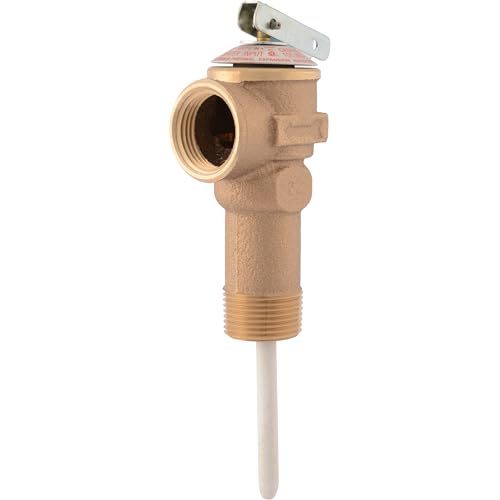
Faulty Pressure Relief Valve
A faulty pressure relief valve can cause water to leak from the top of your water heater. This valve releases excess pressure to prevent tank damage. If the valve malfunctions, it may stay open, resulting in continuous water flow. You can check the valve by lifting the lever to see if water escapes. If it leaks continuously, consider replacing it with a new one.
Corroded Tank Fittings
Corroded tank fittings can lead to leaks as well. Over time, mineral buildup and rust weaken the fittings, causing them to fail. Inspect the area around the fittings for signs of corrosion, which may appear as rust discoloration. If you notice this issue, replacing the fittings or calling a professional for help is a good idea. Regular maintenance can help spot these issues before they turn into leaks.
Diagnosing the Leak
Diagnosing the source of a leak in your water heater requires careful inspection and identification of the problem. Quickly addressing these leaks can prevent further damage and costly repairs.
Recommended Products

CASH ACME RELIEF VALVE: Cash Acme NCLX Combination Temperature and Pressure Relief Valves are designed for the protection of water heaters and storage tanks; incorporate an...
Inspecting the Area
Start by visually examining the top of the water heater. Look for signs of water pooling, rust, or corrosion. Check the connection points of the inlet and outlet pipes for any moisture. Use a flashlight to illuminate hard-to-see areas. Also, inspect the pressure relief valve, which is often located at the top of the tank. Look for drips or wetness around this valve. Document any visible issues for reference.
- Connections Inspection: Check all piping connections. Tighten loose fittings using an adjustable wrench. This quick fix may stop water from escaping.
- Pressure Relief Valve Testing: Lift the valve’s lever to release some water. If water flows continuously, the valve might be defective and require replacement.
- Corrosion Assessment: Look at the condition of the tank and fittings. Rust indicates corrosion, which may lead to leaks. Examine for flaking or pitting.
- Drain Valve Check: If the drain valve is leaking, tighten it with a wrench. If it persists, replacement may be necessary.
- Condensation Evaluation: Sometimes, what looks like a leak could be condensation. Ensure the surrounding environment isn’t too humid, and consider insulation for pipes if necessary.
Utilizing these tips helps pinpoint the exact cause of the leak, allowing for efficient repairs or replacement as needed.
Solutions for Water Heater Leaking From Top
When a water heater leaks from the top, quick solutions can minimize damage and restore function. Below are several options to address this issue based on common causes.
Tightening Connections
Loose connections often lead to leaks. You can start by identifying the inlet and outlet pipes at the top of the water heater.
- Inspect for Moisture: Look for signs of water around the pipe joints.
- Tighten Fittings: Use an adjustable wrench to tighten any loose nuts or fittings.
- Check Securely: Recheck the connections after a few days to ensure they remain secure.
Replacing the Pressure Relief Valve
A faulty pressure relief valve can cause continuous leaking. Follow these steps to replace it:
- Shut Off Power and Water: Turn off the water supply and power to the heater.
- Drain the Tank: Attach a garden hose to the drain valve and fill a bucket or drain outside.
- Remove the Old Valve: Unscrew the old valve from the top of the heater.
- Install the New Valve: Screw in the new valve, ensuring a tight fit to prevent leaks.
- Restore Water Supply: Turn on the water supply and check for leaks around the new valve.
Professional Repair Options
If your efforts don’t solve the problem, contacting a professional plumber can provide the right solutions.
- Choose Experienced Plumbers: Look for licensed plumbers with positive reviews.
- Request a Leak Inspection: Ask for a thorough examination of the heater and associated components.
- Discuss Repair or Replacement: Evaluate whether repairing or replacing parts, like the tank or fittings, is necessary.
By acting on the solutions above, you can manage a leaking water heater effectively and prevent further complications.
Preventive Measures
Taking preventive measures can reduce the risk of water heater leaks. Regular maintenance and monitoring provide an effective approach to keep your water heater functioning properly.
Regular Maintenance
Conduct regular inspections to identify potential issues early. Check for signs of leaks or corrosion around pipes and connections. Tighten any loose fittings you spot. Flushing the tank annually helps remove sediment buildup, which can lead to overheating and increased pressure. Replace the anode rod every 3-5 years to prevent corrosion of the tank. Document maintenance dates to track when each task was last performed.
Monitoring Temperature and Pressure
Keep an eye on the temperature and pressure settings of your water heater. The ideal water temperature is around 120°F (49°C) to reduce the risk of scalding and minimize stress on the unit. Adjust the temperature setting if needed. Regularly test the pressure relief valve by lifting its tab to ensure it operates correctly. A faulty valve can lead to dangerous pressure levels, resulting in leaks or worse. If you notice abnormal pressure fluctuations, contact a professional for assistance.
Conclusion
Dealing with a water heater leak can be stressful but staying proactive makes all the difference. By understanding the common causes and taking immediate action when you notice a problem, you can save yourself from bigger headaches down the road. Regular maintenance is key to keeping your water heater running smoothly and preventing leaks from occurring in the first place.
Remember to keep an eye on those fittings and valves and don’t hesitate to reach out to a professional if you’re unsure about anything. A little attention now can lead to a reliable hot water supply for years to come. You’ve got this!
Frequently Asked Questions
What causes water to pool around the top of my water heater?
Water pooling can be caused by loose connections, corroded tank fittings, or issues with the pressure relief and drain valves. Any of these problems can lead to water escaping from the top of the water heater.
How can I identify a leak in my water heater?
Signs of a leak include visible water accumulation, rusty water, or a decreased hot water supply. A thorough inspection of the top area, connection points, and any signs of moisture can help identify leaks.
What immediate actions should I take if my water heater is leaking?
Turn off the power and the water supply to the heater immediately. It’s crucial to contact a professional plumber for an assessment and potential repairs to avoid further water damage.
How can I prevent future water heater leaks?
Regular inspections, flushing the tank annually, and checking connections can help. Additionally, installing a leak detection system can provide early warnings to prevent further issues.
When should I replace the pressure relief valve?
If you notice persistent water flow from the valve or signs of corrosion, it’s likely malfunctioning. Shut off the power and water, drain the tank, and consider replacing it or calling a professional for help.
How often should I perform maintenance on my water heater?
It’s recommended to conduct maintenance at least once a year. This includes flushing the tank, inspecting for leaks or corrosion, and checking the pressure relief valve to ensure optimal performance.
How can I tighten loose connections on my water heater?
Inspect for moisture around pipe joints and use an adjustable wrench to secure any loose fittings. Be cautious and ensure the water supply is turned off before making adjustments.
What temperature should I set my water heater to prevent leaks?
Setting the water heater temperature to around 120°F (49°C) is ideal. This minimizes stress on the unit and can reduce the risk of leaks due to excessive pressure or thermal expansion.

Hey, I’m Jake. I focus on cooling systems at Appliance Mastery, like fridges, freezers, and air conditioners.
I’ve worked in appliance repair for more than ten years and I’m certified through NASTeC. I’ve seen just about every fridge issue you can imagine.
My goal is to help you fix problems without stress. Whether it’s a freezer that won’t cool or an AC that keeps beeping, I’m here to walk you through it.