
Have you noticed water pooling around your tankless water heater? You’re not alone. Many homeowners face the frustration of leaks from these efficient units, often without knowing the cause. It can be a hassle, but understanding the issue is the first step toward a solution.
Key Takeaways
- Understanding Operation: Tankless water heaters heat water on demand, offering energy efficiency and saving space compared to traditional tank models.
- Common Leak Causes:Leaks can result from internal component failures, corrosion, mineral buildup, or poor installation, emphasizing the importance of regular maintenance and professional installation.
- Signs of Leaks: Key indicators include water accumulation, damp spots, reduced water pressure, unusual noises, and error codes displayed on the unit.
- Inspection Steps: Inspect your system by turning off power and water, checking pipe connections, and looking for visible damage or mineral buildup to diagnose potential issues.
- DIY Repair Options: For minor leaks, turn off water and power, inspect for visible leaks, flush the system, and replace damaged components; however, consult a professional for complex issues or safety concerns.
- Preventative Maintenance: Regularly inspect, flush, and test components of your tankless water heater, and schedule annual professional inspections to minimize the risk of leaks and extend the unit’s lifespan.
Understanding Tankless Water Heaters
Tankless water heaters provide an efficient way to heat water on demand. They don’t store water like traditional tanks, which helps reduce energy costs and save space.
How They Work
Tankless water heaters heat water directly as it flows through the unit. When you turn on a hot water faucet, cold water travels through a pipe into the unit, where either gas or electric elements heat the water. This process means you get hot water continuously without the wait or energy loss associated with maintaining a tank of water.
- Energy Efficiency: Tankless models consume less energy since they operate only when needed. This efficiency can lead to significant savings on utility bills.
- Space Saving: Their compact size allows for installation in various locations, including closets or mounted on walls.
- Longer Lifespan: With proper maintenance, tankless heaters often last over 20 years, compared to 10-15 years for traditional tanks.
- Endless Hot Water: These units supply hot water continuously, perfect for households with high demand.
- Reduced Risk of Water Damage: As there’s no tank to burst, these units often pose a lower risk for water damage related to leaks.
Understanding how tankless water heaters function and their benefits can help address concerns, especially when facing leaks from inside the unit.
Common Causes of Leaks
Understanding common leak causes can help prevent further issues with your tankless water heater. Here are the main reasons these leaks occur.
Recommended Products

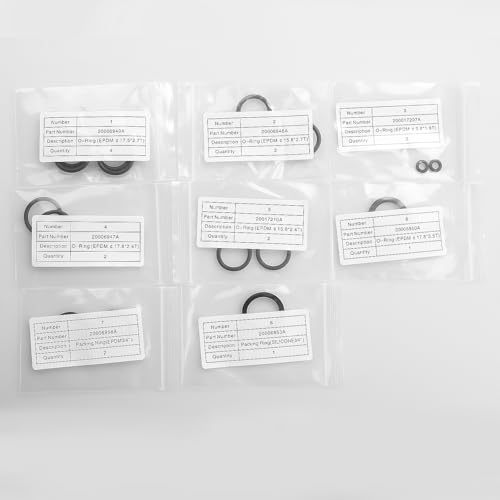
【Product Info】Used for navien tankless water heater, flow sensor, water adjustmengt valve, Space Heating Strainer, plumbing, machinery bearings, pumps, gas control valve,water fitting seal leak repair etc.
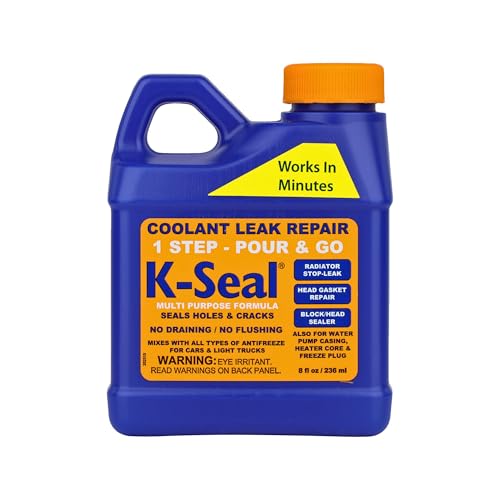
FIX IT FAST: Our multi-purpose solution works in minutes to quickly seal leaks in the radiator, head gasket, freeze plugs, block, heater matrix & water pump. Fixes most leaks in water-cooled engines
Internal Component Failures
Internal components can fail, leading to leaks inside your tankless water heater. For instance, a malfunctioning heating element or a damaged heat exchanger often results in water pooling around the unit. Regular maintenance, including inspections and prompt repairs, helps keep these vital parts in working order.
Corrosion and Mineral Buildup
Corrosion and mineral buildup can occur over time, especially if your area has hard water. These conditions can lead to rust or scale forming inside the unit, creating cracks or weak spots. Flushing your system at least once a year can remove buildup and prolong the lifespan of your heater.
Poor Installation
Poor installation practices can significantly increase the risk of leaks. For example, incorrect pipe fittings or inadequate sealing can cause water to escape from joints or connections. Ensuring professional installation with high-quality materials minimizes this risk and guarantees your unit operates efficiently. Always choose certified technicians for installation projects.
Diagnosing the Issue
Identifying the source of a leak in your tankless water heater can save you time and money. Several signs can indicate a problem, and proper inspection of your system helps pinpoint the cause.
Signs of a Leak
Watch for these common indicators of a leak:
- Water Accumulation: Observe for pooling water around the unit. Small puddles can signal minor leaks, while larger pools indicate significant issues.
- Damp Spots: Check for water stains or damp areas on walls or floors near the heater. These can suggest that water is escaping from the unit.
- Reduced Water Pressure: Notice a drop in water pressure while faucets are running. Leaks can affect water delivery.
- Unusual Noises: Listen for dripping or running sounds coming from the unit. These noises often hint at internal leaks.
- Error Codes: Review your heater’s display for error codes. Some units will notify you about leaks or malfunctions.
Inspecting Your System
Follow these practical steps to inspect your tankless water heater:
- Turn Off Power and Water Supply: Ensure safety by turning off the power and water supply to the unit before starting your inspection.
- Examine Pipe Connections: Check all pipe fittings for loose connections or signs of wear. Tighten any loose fittings to prevent leaks.
- Inspect Internal Components: Remove the access panel and look for visible signs of corrosion, mineral buildup, or damage on heating elements and heat exchangers.
- Look for Cracks or Rust: Check the exterior of the unit for any cracks or rust spots. These can signal internal damage.
- Test for Condensate Leaks: If your unit has a condensate drain, ensure it’s clear. A clogged drain can lead to water pooling inside the unit.
- Check for Flow Restriction: Evaluate the water flow when turning on taps. If you notice reduced flow, it might indicate a blockage that could lead to leaks.
By being attentive to signs of leaks and performing regular checks on your system, you can address issues promptly and maintain the efficiency of your tankless water heater.
Repairing a Tankless Water Heater
Repairing a tankless water heater requires careful attention to detail. Identifying the leak’s source forms the first step toward effective repair.
Recommended Products

Durable Construction: Made from thick, forged Lead Free brass for strength and leak prevention. Each valve set is factory-tested for reliability and long service life.

Package include: 3/4 Inch Isolation Kit involves hot and cold valves 500WOG with 1/4 red and blue handles, equipped with full port ball valve for better flow rate

Premium Construction:The 3/4 inch IPS isolation tankless water heater service valve kit is meticulously crafted from thick, forged lead-compliant brass. This construction not only makes the valve kit can withstand significant pressure and wear but also significantly minimizes the potential for leaks, thereby enhancing the reliability of your water heating system
DIY Solutions
- Turn Off Water and Power: Start by shutting off the water supply and power or gas to the unit. This step prevents further water damage and ensures safety during repairs.
- Inspect for Visible Leaks: Look for any visible leaks around connections, valves, or the heater itself. Tighten loose fittings and replace worn-out seals or washers.
- Flush the System: If mineral buildup causes internal leaks, flush the system. Use a descaling solution and follow the manufacturer’s instructions for proper flushing.
- Replace Components: For leaks due to malfunctioning parts, such as the heating element or heat exchanger, purchase compatible replacements. Install them according to the manufacturer’s guidelines.
- Use Epoxy or Sealant: If temporary fixes are necessary, apply epoxy or a sealant around small cracks to slow the leak until a full repair can be made.
These solutions can help resolve minor issues without professional intervention, but it’s crucial to assess your comfort and skill level before attempting repairs.
- Complex Internal Issues: If leaks persist after DIY fixes, assign potential internal issues to a professional. They possess the tools and expertise to diagnose and address complex problems, such as a failing heat exchanger.
- Widespread Water Damage: If water damage spreads beyond the immediate area, seek professional help immediately. A technician can evaluate and repair any extensive water issues.
- Electrical or Gas Concerns: If the unit exhibits electrical or gas issues, call a professional. These can pose safety risks if not handled correctly.
- Uncertain About Repairs: If you’re uncertain about the repair process or lack the necessary tools, consulting a professional is a wise choice. They ensure repairs meet safety standards and codes.
Timely intervention by a professional can save you time and money while ensuring the longevity and performance of your tankless water heater.
Preventative Measures
Taking proactive steps can significantly reduce the risk of leaks in your tankless water heater. Implementing regular maintenance and following best practices contributes to the longevity and efficiency of your unit.
Regular Maintenance Tips
- Inspect Components: Check for signs of wear or corrosion in heating elements and heat exchangers every six months. Addressing small issues early can prevent larger problems later.
- Flush the System: Flush the water heater at least once a year, especially if you have hard water. This removes mineral buildup that can cause rust or cracks.
- Test Pressure Relief Valve: Test this valve quarterly to ensure it functions properly. A faulty valve can lead to pressure buildup, increasing the risk of leaks.
- Check Connections: Regularly examine the water and gas connections for tightness. Look for signs of leaks, such as moisture or corrosion.
- Schedule Professional Inspections: Have a qualified technician inspect your heater annually. They’ll spot potential problems and provide necessary maintenance.
- Use Water Softeners: Install a water softener if you live in a hard water area. This reduces mineral buildup, extending the life of your heater.
- Ensure Proper Venting: Make sure your heater has adequate ventilation. Improper venting can lead to overheating, causing internal damage.
- Adjust Temperature Settings: Set the temperature to 120°F for optimal performance and safety. Higher temperatures can stress internal components.
- Be Mindful of Demand: Don’t overload the system. Know the maximum flow rate of your heater and use hot water with that in mind.
- Choose Quality Installation: Select a certified professional for installation. Proper setup minimizes the risk of future leaks caused by installation errors.
Conclusion
Dealing with a leaking tankless water heater can be a hassle but understanding the causes and solutions makes it easier. By staying proactive with maintenance and inspections you can catch issues before they escalate.
Remember to keep an eye out for signs of leaks and address them promptly. Whether you choose to tackle minor repairs yourself or call in a professional it’s important to act quickly.
With the right care your tankless water heater can continue to provide you with reliable hot water for years to come. Enjoy the benefits of efficiency and peace of mind that come with a well-maintained system.
Frequently Asked Questions
What causes water pooling around tankless water heaters?
Water pooling can result from internal component failures, corrosion from hard water, or poor installation practices. Common causes include damaged heating elements, heat exchangers, and improper pipe fittings.
How does a tankless water heater work?
A tankless water heater heats water on demand, eliminating the need for a storage tank. This not only saves space but also reduces energy costs, providing continuous hot water without interruptions.
How can I diagnose a leak in my tankless water heater?
Look for signs like water accumulation, damp spots, or unusual noises. Inspect pipe connections and internal components for damage. Checking for error codes can also help determine the problem’s source.
What are some DIY repair strategies for tankless water heaters?
Turn off the water and power, inspect for visible leaks, flush the system, or replace malfunctioning components. For temporary fixes, use epoxy or sealant, but consult a professional for complex issues.
How can I prevent leaks in my tankless water heater?
Regular maintenance is key. Inspect components for wear, flush the system annually, and test pressure relief valves. Schedule professional inspections, use water softeners in hard water areas, and ensure proper installation.

Hey, I’m Jake. I focus on cooling systems at Appliance Mastery, like fridges, freezers, and air conditioners.
I’ve worked in appliance repair for more than ten years and I’m certified through NASTeC. I’ve seen just about every fridge issue you can imagine.
My goal is to help you fix problems without stress. Whether it’s a freezer that won’t cool or an AC that keeps beeping, I’m here to walk you through it.