
Have you ever noticed water pooling around your water heater? A leaking valve can be a frustrating problem that often goes unnoticed until it causes bigger issues. This common scenario can lead to water damage and costly repairs if not addressed quickly.
In this article, you’ll learn how to identify the signs of a leaking valve and what steps you can take to fix it. You’ll gain practical tips to help you troubleshoot the issue and, if necessary, know when to call in a professional. By the end, you’ll feel more confident in managing your water heater and preventing future leaks.
Key Takeaways
- Common Causes of Leaking Valves: Worn seals, corrosion, improper installation, high water pressure, and temperature fluctuations can all lead to valve leaks on water heaters.
- Early Warning Signs: Keep an eye out for visible water pooling, diminished water heater performance, unusual noises, and spikes in your water bill, which may indicate leaking valves.
- Inspection Techniques: Conduct regular inspections through visual examination, tactile checks for moisture, and monitoring pressure and temperature to quickly identify potential leaks.
- Repair Options: Address minor leaks by tightening connections, replacing worn washers or seals, clearing blockages, and checking water pressure. Always turn off water supply before starting any repair.
- When to Seek Professional Help: Engage a plumber for severe leaks, multiple valve issues, significant corrosion, uncertainty in repairs, or frequent activation of the pressure relief valve.
- Preventative Maintenance: Implement routine maintenance measures, such as checking connections, flushing the tank, replacing anode rods, and monitoring water pressure, to extend the lifespan of your water heater and prevent future leaks.
Understanding Valve Leaking on Water Heater
Valve leaking on a water heater can cause hazards and costly repairs. Recognizing causes and signs aids in early intervention and prevents further damage.
Common Causes of Valve Leaking
- Worn Seals: Seals wear out over time due to consistent temperature changes. This can lead to leaks around the valve.
- Corrosion: Water heaters often face rust and corrosion, especially in older units. Corroded valves result in failures and leaks.
- Improper Installation: A poorly installed valve might not seal correctly. This can permit water to escape, creating leaks.
- High Pressure: Excessively high water pressure can strain the valve, leading to leaks. Ensure the pressure remains at a safe level, typically between 40-60 psi.
- Temperature Fluctuations: Sudden temperature changes can stress the plumbing system and lead to leaks around valves.
- Visible Water: Water pooling around the valve indicates leakage. Catch leaks early to prevent further damage.
- Diminished Performance: If your water heater struggles to maintain temperature, it might signal supply issues caused by leaks.
- Corrosion Signs: Rust or discoloration on metal surfaces suggests potential leaks. Inspect regularly to catch early signs.
- Unusual Noises: Bubbling or hissing sounds coming from the tank may point to leaks or pressure build-up.
- Increased Water Bill: A sudden spike in your water bill can indicate leaks somewhere, including possible valve issues.
By understanding these causes and signs, you can take prompt action when facing valve leakage on your water heater.
Types of Valves in Water Heaters
Understanding the types of valves in water heaters helps you diagnose issues effectively. Below are the primary valves you’ll encounter.
Recommended Products

Provides Protection: Helps protect your RV or home water heater from excess temperature and water pressure
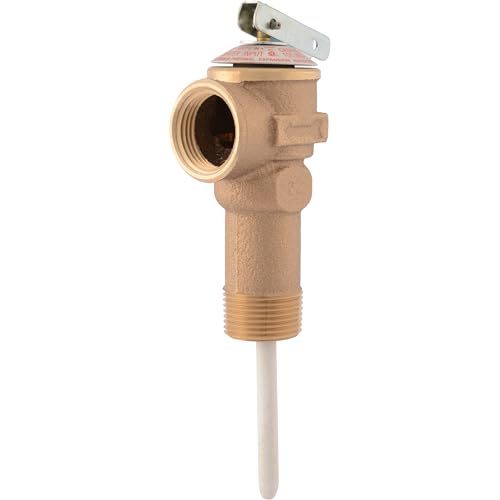
CASH ACME RELIEF VALVE: Cash Acme NCLX Combination Temperature and Pressure Relief Valves are designed for the protection of water heaters and storage tanks; incorporate an inert thermal element coating that provides effective isolation from mineral deposits (liming) and galvanic corrosion
Pressure Relief Valve
The pressure relief valve, often located on the top or side of the tank, prevents excess pressure buildup. If pressure reaches unsafe levels, this valve opens to release water and steam, protecting the heater from potential explosion. Regular inspection of this valve is crucial. Signs of malfunction can include water discharge or a hissing sound. For instance, if water consistently drips from the valve, immediate attention is necessary to prevent further damage.
Temperature and Pressure Relief Valve
The temperature and pressure relief (TPR) valve serves a dual purpose—it monitors both temperature and pressure in the water heater. If either the temperature or pressure exceeds safe limits, the TPR valve releases water to mitigate the risk of tank failure. Check this valve periodically for proper functioning. A leaking TPR valve indicates underlying issues, such as overheating or excessive pressure. Address these problems quickly to safeguard your water heater’s performance and longevity.
Assessing the Damage
Assessing damage from a leaking valve is crucial to prevent further issues. Quick action minimizes the risk of extensive damage and costly repairs.
Recommended Products

Size: Small.For best results, use only Rheem replacement parts for repairing your Rheem Water Heater Maximum Temperature Setting (Deg. F): 210, Maximum Pressure Setting...
Inspection Techniques
- Visual Examination: Start by checking the water heater for visible signs of leaks. Look for water pooling at the base or damp areas around the valve. Notice any discoloration or rust on the valve itself.
- Tactile Inspection: Run your hand around the valve. If you feel moisture or drops forming, a leak exists.
- Listen for Sounds: Pay attention to unusual sounds. Hissing or dripping near the valve indicates a potential issue.
- Check Pressure Levels: Use a pressure gauge to measure the pressure in the system. Excessive pressure can lead to leaks.
- Temperature Assessment: Monitor the temperature around the valve. Heat may indicate a malfunctioning temperature and pressure release valve.
- Water Damage: Allowing leaks to persist can result in significant water damage to surrounding areas, including flooring and walls.
- Structural Issues: Prolonged exposure to moisture can weaken the structure of your home. Mold and mildew growth poses serious health risks.
- Increased Energy Bills: A leaking valve forces the heater to work harder, raising your energy costs significantly over time.
- Equipment Failure: Ignoring a leak may lead to complete water heater failure, resulting in costly replacements and repairs.
- Safety Hazards: High pressure or malfunctioning valves can lead to bursts, causing injuries or property damage.
Repairing a Leaking Valve
Repairing a leaking valve is essential for preventing extensive water damage and maintaining your water heater’s efficiency. There are various approaches you can take, depending on the severity of the leak and your comfort level with DIY repairs.
Recommended Products
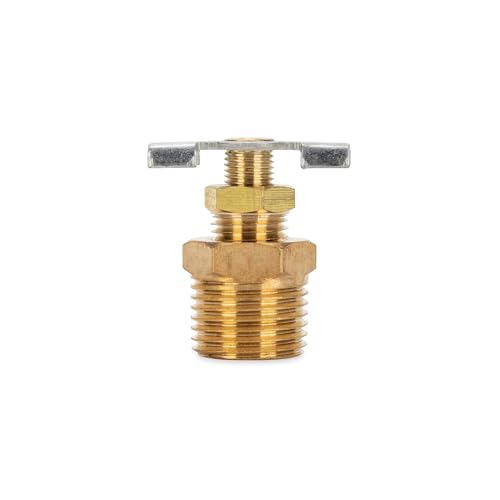
Reliable RV Water Heater Part: Camco’s Brass RV Water Heater Replacement Drain Valve is designed to replace faulty RV hot water heater drain valves, ensuring your water heater operates smoothly and efficiently.

Water Heater Maintenance: Allows the water heater to be drained for servicing or flushing of sediment

2025 New Arrival. This model HMP012 has Straight Spout with 2.5 inch long shank. Other options available.
DIY Repair Options
- Identify the Leak: First, locate the source of the leak. Check connections, seals, and the valve itself for moisture.
- Tighten Connections: If the leak comes from a joint, use a wrench to tighten it carefully. Avoid overtightening, as it may cause further damage.
- Replace Washers or Seals: If the valve leaks from the spout, replacing worn washers or seals often resolves the issue. Disassemble the valve, remove old seals, and install new ones.
- Clear Blockages: If a pressure relief valve doesn’t close properly, debris could be causing a blockage. Inspect, clean, or replace the valve if necessary.
- Check Water Pressure: High water pressure can cause valve leaks. Consider installing a pressure regulator if your home’s water pressure exceeds 80 psi.
For these DIY options, use basic tools like a wrench, screwdriver, and replacement parts from a hardware store. Always turn off the power and water supply before starting any repair.
When to Call a Professional
Call a professional if:
- Severe Leaks Occur: If water flows freely from the valve, immediate action is necessary, and a professional is best equipped to handle repairs.
- Multiple Leaks Appear: If several valves leak or if fixing one leads to another, it’s time for professional assistance.
- Corrosion Is Present: Significant rust or corrosion suggests underlying issues that require expertise.
- Uncertainty About Repair: If you’re unsure of how to proceed or lack the tools, don’t hesitate to seek help.
- Frequent Pressure Relief: If the pressure relief valve activates regularly, it indicates a bigger issue that experts can diagnose.
Professional plumbers can assess the problem quickly and ensure safety and compliance with local codes, providing peace of mind in managing a leaking valve.
Preventative Measures
Taking preventative measures helps maintain your water heater and avoid valve leaks. Regular care can enhance your unit’s lifespan and efficiency.
Routine Maintenance Tips
- Check Connections: Inspect all valve and pipe connections for tightness. Loose fittings can lead to leaks.
- Flush the Tank: Flush the water heater annually to remove sediment buildup. This prevents corrosion.
- Replace Anode Rods: Inspect and replace anode rods every 3-5 years. These rods help prevent tank corrosion.
- Monitor Water Pressure: Ensure your water pressure stays between 50-60 psi. High pressure can stress valves and lead to leaks.
- Adjust Temperature Settings: Set your water heater temperature to 120°F. This reduces stress on components and saves energy.
Importance of Regular Inspections
Regular inspections are vital for early leak detection and overall maintenance. Schedule inspections at least once a year to catch potential problems before they escalate.
- Look for Wear: During inspections, examine seals and valves for signs of wear. Replacing worn parts can prevent leaks.
- Listen for Sounds: Pay attention to any unusual noises, such as hissing or dripping. These sounds often indicate valve issues.
- Check for Moisture: Inspect the area around the heater for dampness. Water accumulation often signals a hidden leak.
- Test Valves: Periodically test the temperature and pressure relief (TPR) valve by lifting the lever. Water should discharge without hindrance.
By implementing these preventative measures, you can safeguard your water heater against valve leaks and maintain its performance.
Conclusion
Taking care of your water heater is essential for keeping your home safe and efficient. By staying vigilant for signs of a leaking valve and performing regular maintenance, you can prevent costly repairs down the road. Remember to inspect valves and connections periodically and address any issues as soon as they arise.
If you ever feel unsure about a repair or notice a significant leak, don’t hesitate to call in a professional. They can help ensure your water heater operates smoothly and safely. With a little attention and care, you can enjoy reliable hot water without the worry of leaks.
Frequently Asked Questions
What causes a leaking valve in a water heater?
A leaking valve can result from several factors, including worn seals, corrosion, improper installation, high water pressure, and temperature fluctuations. Regular inspection can help identify these issues early.
How can I detect a leaking valve in my water heater?
Look for signs such as visible water pooling around the heater, unusual noises, increased water bills, diminished performance, and corrosion. Regular checks can help in identifying potential leaks early on.
When should I seek professional help for a leaking valve?
Consider calling a professional if you experience severe leaks, multiple leaks, significant corrosion, uncertainty about repairs, or frequent pressure relief valve activation. Professionals can ensure the job is done safely and correctly.
What types of valves are found in water heaters?
Common valves include the pressure relief valve and the temperature and pressure relief (TPR) valve. These valves help manage excess pressure and temperature, ensuring safe operation of your water heater.
What are the consequences of ignoring a leaking valve?
Ignoring a leaking valve can lead to extensive water damage, structural issues, increased energy bills, equipment failure, and safety hazards. Timely action is essential to maintain your water heater’s integrity.
How can I repair a leaking valve?
DIY repairs may include tightening connections, replacing worn washers or seals, and clearing blockages. Ensure you have the right tools, follow safety precautions, and only attempt repairs if you’re confident.
What is the best way to prevent valve leaks in my water heater?
Regular maintenance is key. Check connections for tightness, flush the tank annually, replace anode rods every 3-5 years, monitor water pressure, and adjust temperature settings to 120°F to prevent leaks.
How often should I inspect my water heater for potential leaks?
It’s advisable to inspect your water heater at least once a year. Regular checks can help detect wear on seals and valves, unusual sounds, or moisture around the heater before issues escalate.

Hey, I’m Jake. I focus on cooling systems at Appliance Mastery, like fridges, freezers, and air conditioners.
I’ve worked in appliance repair for more than ten years and I’m certified through NASTeC. I’ve seen just about every fridge issue you can imagine.
My goal is to help you fix problems without stress. Whether it’s a freezer that won’t cool or an AC that keeps beeping, I’m here to walk you through it.