
Ever found yourself ready to enjoy a fresh cup of coffee only to be met with a blinking light on your Keurig? It’s frustrating when your machine signals that it needs water or is heating up, especially when you’re in a hurry. You’re not alone—many coffee lovers face this common issue.
Key Takeaways
- Common Issues: The blinking “Add Water” and heating light on your Keurig are often caused by empty reservoirs, air bubbles, or mineral buildup.
- Immediate Solutions: Refill the water reservoir, check for clogs, run a water cycle without a K-Cup, and perform a power cycle to troubleshoot effectively.
- Maintenance Tips: Regularly clean the water reservoir and needles, and descale your machine every 3 to 6 months to maintain optimal performance.
- Preventive Care: Use fresh water, regularly check water levels, and avoid overfilling the reservoir to prevent future issues.
- Resetting the Machine: If blinking persists, try resetting the machine by unplugging it, waiting a moment, and then plugging it back in.
- Professional Help: For ongoing issues related to malfunctioning sensors, consider contacting customer support for assistance.
Overview Of The Issue
The blinking “Add Water” and heating light on your Keurig can disrupt your coffee routine. Many users experience this issue, often leading to confusion or frustration.
Common Causes
- Empty Water Reservoir
If your water reservoir is empty, the machine cannot brew coffee. Check the water level and refill as necessary. - Air Bubbles in the System
Air bubbles may block water flow. This issue often occurs after filling the reservoir. To resolve this, try running a brew cycle with no K-Cup in place. - Mineral Buildup
Over time, mineral deposits can affect performance. Regular descaling helps prevent this. Aim to descale every 3 to 6 months, depending on water hardness.
Immediate Solutions
- Refill Water
Make sure to keep the water reservoir filled. Ensure it’s seated properly in the machine to avoid miscommunication. - Check for Obstructions
Inspect the entry and exit points for potential clogs. Clean any debris to restore proper function. - Run a Water Cycle
Run a water cycle without a K-Cup to clear air bubbles and check for proper operation.
- Power Cycle the Machine
Turn it off, unplug it, wait a minute, then plug it back in and turn it on. - Inspect the Brew Basket
Ensure the brew basket is clean and properly inserted. A misaligned or dirty brew basket can trigger warning lights. - Reset the Machine
Resetting your Keurig can eliminate minor glitches. Follow the instructions in the user manual for your model.
By understanding these common issues and solutions, you can quickly get back to enjoying your favorite coffee with minimal hassle.
Common Causes Of The Blinking Lights
You might see the blinking “Add Water” and heating light for several reasons. Understanding these causes helps you troubleshoot effectively.
Low Water Levels
Low water levels often trigger the blinking light. Ensure the water reservoir contains enough water. To check, simply remove the reservoir and inspect its contents. If it’s low, fill it with fresh water. Your Keurig machine won’t function correctly with insufficient water.
Clogged Needles
Clogged needles can prevent water flow, causing the lights to blink. To resolve this issue, perform regular maintenance. Use a paperclip or a specialized cleaning tool to gently clear debris from the needles. A clean needle allows water to flow smoothly, ensuring your coffee brews without interruptions.
Malfunctioning Sensors
Malfunctioning sensors may also lead to blinking lights. If the machine perceives incorrect water levels or temperature, it sends a warning. To fix this, power cycle your machine by unplugging it and waiting for about 30 seconds before plugging it back in. If the issue continues, consider contacting customer support for further assistance.
Troubleshooting Steps
When your Keurig shows blinking lights for “Add Water” and heating, follow these troubleshooting steps to get your machine back on track.
Recommended Products
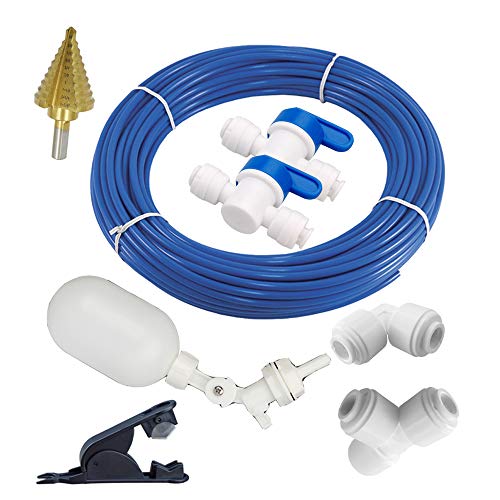
★WATER&FOOD USE: NSF Certified CCK 1/4 ro tubing , Food grade Plastic 1/4 Quick connect fittings and Valve , which are widely used in water purification,food/beverage system.


Water Filter Starter Kit for Keurig 2.0 K-Express Essentials, K Supreme (Plus), K-Cafe, K-Select, K-Elite Brewers, K-slim, K325, K350, K400, K425, K525, K575, K600.
Refilling The Water Reservoir
Ensure the water reservoir is filled to the proper level. Remove the reservoir from the machine. Check for the minimum fill line, and add water if it’s below that mark. After refilling, securely place the reservoir back. Ensure the lid is closed to prevent spills.
Cleaning The Needles
Clogged needles can lead to brewing issues. Start by unplugging the machine. Use a paperclip or specialized tool to gently clean the entrance and exit needles. Clean until there’s no debris blocking the water flow. Reassemble the machine and plug it back in. This step helps ensure smooth brewing.
Resetting The Machine
If the blinking lights persist, resetting the machine might help. Unplug the Keurig from the power outlet. Wait for 5 seconds before plugging it back in. Turn the machine on and check if the issue remains. This simple reset can often clear minor glitches.
Following these steps can help restore your coffee routine.
Preventative Measures
By taking a few simple steps, you can prevent the blinking “Add Water” and heating light issues in your Keurig machine. Here are some effective measures to keep your coffee routine running smoothly.
Recommended Products
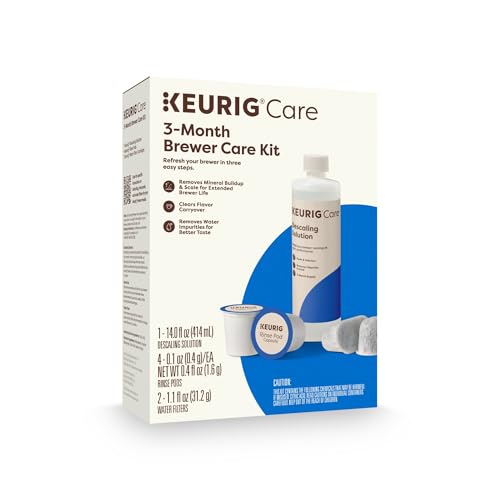
INCLUDES: 4 Keurig Rinse Pods, 1 Descale Solution, and 2 Water Filter Cartridge Refills

Bulk Coffeemaker Decalcifier Tablet: 24 Tablets Work out to a Year Supply or more. Compare to other products like powder, pods, sachet, packets. Choose ACTIVE Cleaning Tablets for better Values
![Quick & Clean [6-Pack] Keurig Cleaning Pods - K Cup Cleaner Pod For Keurig - 2.0 Coffee Machine Compatible, Removes Stains, Non-Toxic and Eco-Friendly](https://m.media-amazon.com/images/I/51LYutPIUJL._SL500_.jpg)
Get That Fresh Coffee Taste Back - Over time, Keurig (TM) machines build up old grinds and residues, tainting the flavor of your coffee and espresso. Quick and Clean Keurig cleaning pods use a proprietary cleaning formula that cuts through and eliminates these residues, bringing taste back to normal
Regular Maintenance Tips
- Clean The Water Reservoir: Regularly empty and clean the water reservoir to prevent mineral buildup. Use warm, soapy water and rinse thoroughly.
- Inspect The Needles: Periodically check the entrance and exit needles for clogging. Use a paperclip or needle cleaning tool to clear any blockages.
- Descale Your Keurig: Every three to six months, run a descaling solution through your machine. This process removes mineral deposits and helps maintain optimal performance.
- Store Properly: If you won’t use your Keurig for an extended period, empty the water reservoir and unplug the machine. This helps prevent any stuck debris and keeps the components dry.
- Use Freshwater: Always fill the reservoir with fresh, cold water. Avoid using distilled water or flavored waters, as they may cause residue buildup.
- Check Water Levels: Regularly ensure your water reservoir is filled above the minimum fill line. This simple check can prevent unexpected blinking alerts.
- Replace Water Regularly: Change the water every three days, especially in warmer climates. Stale water can lead to unwanted flavors and reduce brew efficiency.
- Avoid Overfilling: Fill the reservoir to the appropriate level. An overfilled reservoir can lead to spills or disrupt the brewing process.
By implementing these preventative measures, you can enjoy your coffee without interruptions from your Keurig.
Conclusion
Dealing with a blinking “Add Water” and heating light on your Keurig can be a real hassle but with a few simple steps you can get back to enjoying your favorite brew. Remember to keep your water reservoir filled and regularly clean those pesky needles to prevent clogs.
If you find yourself stuck don’t hesitate to reset the machine or reach out to customer support for help. By staying proactive with maintenance you can minimize interruptions and keep your coffee routine smooth. Happy brewing!
Frequently Asked Questions
Why does my Keurig keep blinking “Add Water” even when the reservoir is full?
If your Keurig indicates “Add Water,” it might be due to air bubbles in the system or a malfunctioning sensor. Check for obstructions in the reservoir and make sure it’s seated correctly. If the reservoir is full and the issue persists, try power cycling the machine by unplugging it for a few seconds.
How do I clean the needles on my Keurig machine?
To clean the needles, turn off and unplug your Keurig. Use a paperclip or specialized cleaning tool to carefully remove any debris from the needle openings. Regular cleaning can prevent clogs that may cause brewing issues.
What should I do if my Keurig won’t brew after troubleshooting?
If your Keurig still won’t brew after troubleshooting, consider resetting the machine by unplugging it for five seconds. If problems continue, contact the manufacturer’s customer support for further assistance or consider servicing the machine.
How often should I descale my Keurig?
It’s recommended to descale your Keurig every three to six months, depending on your water quality. Descaling helps remove mineral buildup, ensuring proper function and extending the life of your machine.
What can I do to prevent the “Add Water” and heating light issues?
Regular maintenance is key. Ensure the water reservoir is cleaned, needles are checked for clogs, and the machine is descaled every three to six months. Use fresh, cold water and check water levels frequently to prevent these issues.

Hey, I’m Jake. I focus on cooling systems at Appliance Mastery, like fridges, freezers, and air conditioners.
I’ve worked in appliance repair for more than ten years and I’m certified through NASTeC. I’ve seen just about every fridge issue you can imagine.
My goal is to help you fix problems without stress. Whether it’s a freezer that won’t cool or an AC that keeps beeping, I’m here to walk you through it.