
Is your GE stove’s bottom element refusing to heat up? You’re not alone. Many people face this frustrating issue, especially when they’re in the middle of cooking a favorite meal. It can turn a simple dinner into a stressful experience, leaving you wondering what went wrong.
Key Takeaways
- Common Symptoms: Look for signs like no heat, uneven heating, and burner flickering to identify issues with your GE stove’s bottom element.
- Potential Causes: The main causes may include a burned-out element, faulty wiring, a malfunctioning temperature sensor, or control board issues.
- Troubleshooting Steps: Inspect the element for damage, check connections, test the temperature sensor, and examine the control board for visible faults.
- Regular Maintenance: Keeping the stove clean and monitoring cooking habits can enhance performance and prolong the life of the heating element.
- When to Seek Help: If symptoms persist after basic troubleshooting or signs of serious damage appear, consider consulting a professional technician for repairs.
Overview of GE Stove Bottom Element Issues
The bottom element in a GE stove plays a crucial role in cooking. When it’s not working, meal preparation suffers. Understanding common issues can help identify the problem quickly.
Common Symptoms of Failure
- No Heat: The element doesn’t warm up at all.
- Uneven Heating: Food cooks unevenly, with some parts burnt and others raw.
- Burner Flickering: The element turns on and off unexpectedly.
Potential Causes
- Burned-Out Element: The most frequent cause is a damaged heating element. Inspect it for any visible signs of wear or breaks.
- Faulty Wiring: Damaged or loose wiring may disrupt the electrical current. Check connections behind the stove.
- Malfunctioning Temperature Sensor: If the sensor fails, it can misread temperatures, leading to inadequate heating.
- Control Board Issues: A faulty control board can lead to irregular heating patterns.
Troubleshooting Steps
- Inspect the Element: Look for any damage or discoloration. Replace it if needed.
- Check Connections: Ensure that all wires are securely connected.
- Test the Temperature Sensor: Use a multimeter to evaluate sensor functionality. Replace if faulty.
- Examine the Control Board: Check for burnt components or visible damage. Consider consulting a professional if issues persist.
- Regular Maintenance: Clean the stove regularly to prevent buildup and ensure efficient operation.
- Monitor Cooking Habits: Avoid using heavy cookware that may damage the element.
- Keep an Eye on Element Performance: If you notice changes in heating, address them immediately.
Understanding these aspects of your GE stove’s bottom element can lead to effective solutions and enhance your cooking experience.
Common Symptoms of GE Stove Bottom Element Not Working
When the bottom element of your GE stove fails, specific symptoms occur. Recognizing these signs helps in diagnosing the issue quickly.
Uneven Cooking Results
Uneven cooking results often indicate a malfunctioning bottom element. You might notice that foods cook inconsistently, even if you’re following regular cooking times. For example, the sides of a casserole may brown faster than the center. This inconsistency occurs because the bottom element isn’t distributing heat evenly. Ensure to check for hot spots or areas that remain cold while cooking.
Unresponsive Heating
Unresponsive heating is another clear sign of a problem. If the bottom element doesn’t heat up at all, you may find it difficult to boil water or bake items properly. For instance, a pot placed on the burner may remain cold, even after being on high heat for several minutes. In such cases, inspect the element for any visible damage or breaks. Additionally, ensure it’s securely connected and receiving power.
Possible Causes of the Problem
Understanding why the bottom element of your GE stove isn’t working can simplify the troubleshooting process. Here are some potential causes that you can investigate.
Electrical Issues
Check for electrical problems first. Ensure the stove is plugged in and receiving power. Look for tripped circuit breakers or blown fuses in your home’s electrical panel. A loose or damaged power cord can also cause heating issues. Inspect the connections for wear or corrosion. If everything looks fine, use a multimeter to test the outlet’s voltage.
Element Burnout
Element burnout remains a common issue. Inspect the bottom element for visible damage, like blisters or breaks. If the element appears burnt out, it likely needs replacement. You can test its continuity with a multimeter; if there’s no continuity, the element is defective and requires replacement.
Control Board Malfunctions
Control board malfunctions can disrupt the heating process. If the control board fails, the stove may not send the correct signals to the bottom element. Inspect the control board for burnt components or loose wires. If you notice any signs of damage, consider consulting a professional technician to evaluate and replace the control board if needed.
Troubleshooting Steps
Follow these steps to diagnose and resolve issues with the GE stove bottom element that isn’t working.
Checking Power Supply
Ensure your stove is plugged in securely. Examine the outlet for proper connection and functionality. Inspect the circuit breaker to verify it hasn’t tripped. If it has, reset it by flipping the breaker back on. Look for damage on the power cord, like cuts or frays. Any visible damage needs immediate replacement to prevent further issues.
Inspecting the Element
Examine the bottom element for signs of damage, such as blisters or burn marks. Remove the element from its socket for a closer inspection. Use a multimeter to test the element’s continuity—set it to the lowest resistance setting and place the probes on the element terminals. A reading of zero indicates a burnt-out element, requiring replacement.
Examining the Control Board
Look at the control board for any burnt components or loose wires. Disconnect the power before inspecting the board to stay safe. Pay extra attention to areas that show discoloration or melted parts. If you notice any issues, consult a professional technician for repair or replacement, as control board problems can lead to significant performance issues.
When to Seek Professional Help
You may encounter situations where troubleshooting just isn’t enough. Knowing when to call a professional can save you time and prevent further damage to your GE stove.
Recommended Products

The GE Appliances Control Faceplate is a genuine OEM (Original Equipment Manufacturer) part designed and engineered to exact specifications

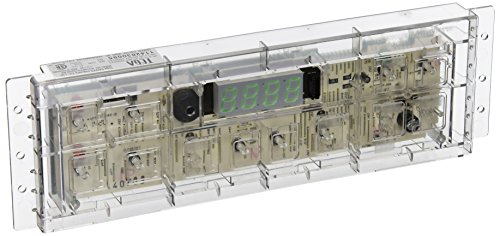
The WB27X45466 Control Board + Display is a genuine Original Equipment Manufacturer (Authentic OEM) part from General Electric that fits various models from the following brands of range/wall ovens: GE. Make sure to check below for your part number
The GE Appliances Control Board and Clock is a genuine OEM (Original Equipment Manufacturer) part designed and engineered to exact specifications
Persistent Issues
If you’ve performed basic troubleshooting steps, like checking the power supply and inspecting the heating element, and the bottom element still doesn’t work, it’s time to seek professional help. Unresolved problems might indicate deeper issues within the stove’s electrical system.
Signs of Damage
Look for signs of burns, fraying, or any unusual odor coming from your stove. These indications often signal a serious issue. If your stove exhibits these signs, avoid using it and consult a technician immediately.
Control Board Problems
If you’d noticed flickering lights or erratic behavior from the stove controls, the control board could be the culprit. A malfunctioning control board often requires professional examination and repair due to its complexity.
Inexperience with Repairs
If you’re not comfortable with electrical repairs or don’t have the right tools, avoid DIY fixes in favor of calling a professional. Safety should always come first, especially when dealing with electric components.
Warranty Considerations
If your stove is still under warranty, contacting a professional authorized service provider ensures you don’t void any warranty terms. Checking the warranty details can save you money on repairs.
Peace of Mind
Sometimes, it’s worth considering professional assistance to guarantee that your stove gets the care it needs. Professionals have experience, tools, and knowledge to identify and fix issues you might miss.
By recognizing these signs and knowing when to reach out, you can keep your GE stove running smoothly and safely.
Conclusion
Dealing with a non-working bottom element on your GE stove can be a hassle but don’t lose hope. By following the troubleshooting steps and keeping an eye on your stove’s performance you can often pinpoint the issue. Regular maintenance and awareness of any changes in how your stove operates can make a big difference.
If you find yourself stuck after trying the basics don’t hesitate to reach out for professional help. It’s always better to ensure your stove is safe and working properly. Remember that a little attention can go a long way in keeping your cooking experiences enjoyable and stress-free. Happy cooking!
Frequently Asked Questions
What are common signs of a malfunctioning bottom heating element in a GE stove?
A malfunctioning bottom heating element may show symptoms like no heat at all, uneven cooking results, flickering lights, or the element not responding to adjustments. If you notice any of these signs, it’s crucial to troubleshoot the issue promptly.
What might cause the bottom heating element to stop working?
The bottom heating element can fail due to several reasons, including a burned-out element, faulty wiring, defective temperature sensors, or problems with the control board. Each of these issues can lead to ineffective heating and cooking.
How can I troubleshoot my GE stove’s bottom heating element?
To troubleshoot, first, inspect the heating element for visible damage or signs of burning. Check all electrical connections to ensure they’re secure. Test the temperature sensor and, if needed, examine the control board. These steps can help identify the problem.
When should I call a professional for GE stove repair?
You should seek professional help if basic troubleshooting doesn’t resolve the issue or if you notice signs of electrical damage, such as burns or odd odors. If there are flickering lights or erratic stove behavior, these could indicate deeper problems that require expert attention.
Is regular maintenance important for my stove’s heating elements?
Yes, regular maintenance is crucial for ensuring your stove operates effectively. Monitoring cooking habits, inspecting heating elements, and addressing any performance changes can prevent future issues and enhance your cooking experience.
What safety precautions should I consider when troubleshooting my stove?
Always prioritize safety when troubleshooting your stove. If you’re uncomfortable with electrical repairs, avoid DIY fixes. Additionally, remember to unplug the stove before performing any inspections, and consider warranty implications before making repairs.

Hey, I’m Jake. I focus on cooling systems at Appliance Mastery, like fridges, freezers, and air conditioners.
I’ve worked in appliance repair for more than ten years and I’m certified through NASTeC. I’ve seen just about every fridge issue you can imagine.
My goal is to help you fix problems without stress. Whether it’s a freezer that won’t cool or an AC that keeps beeping, I’m here to walk you through it.