
Have you noticed water pooling in your freezer? It’s a frustrating problem that can lead to bigger issues if not addressed quickly. You’re not alone—many KitchenAid owners encounter this issue, and it can be caused by a variety of factors, from a clogged defrost drain to a faulty door seal.
Key Takeaways
- Identify Common Causes: Water leakage can result from clogged defrost drains, faulty door seals, damaged water supply lines, high humidity, or blocked airflow.
- Regular Maintenance: Regularly inspect and clear the defrost drain, check door seals for damage, and monitor water supply lines to prevent leaks.
- Humidity Management: Keep indoor humidity levels below 50% to minimize condensation and potential leaks in your KitchenAid freezer.
- Clear Airflow: Ensure vents are not blocked and air circulates freely within the freezer to prevent frost buildup and leaks.
- Prompt Troubleshooting: Act quickly by inspecting the freezer interior, ice maker, and drainage systems if you notice water pooling, ensuring issues are addressed immediately.
- Preventative Measures: Follow best practices like not overloading the freezer, maintaining proper temperature settings, and regularly defrosting to enhance efficiency and avoid leaks.
Overview of KitchenAid Freezer Issues
KitchenAid freezers can experience various problems that lead to water leaking. Understanding these issues helps you identify symptoms effectively and take appropriate action.
Common Causes of Water Leakage
- Clogged Defrost Drain
A clogged defrost drain prevents water from properly draining during the defrost cycle. Ice builds up, and when it melts, it pools in the freezer instead of flowing out. Regularly inspect and clear the drain to prevent this issue. - Faulty Door Seal
A defective door seal allows warm air to enter, causing condensation. This condensation can freeze and later melt, leading to leaks. Check for any gaps or signs of wear and replace the seal if necessary. - Faulty Water Supply Line
If your KitchenAid freezer has a water dispenser or ice maker, a damaged supply line may cause leaks. Inspect the line for cracks or loose connections. Tightening any fittings or replacing the line can resolve this issue. - High Humidity
High indoor humidity can increase moisture levels in your freezer. This excess moisture can lead to condensation inside the appliance. Using a dehumidifier or running the freezer at a slightly lower temperature helps manage humidity. - Blockage in Airflow
Blocked vents or poor air circulation can lead to uneven cooling. This condition may cause frost buildup that melts and creates water leaks. Ensure vents are clear and that air can circulate freely in your freezer.
- Inspect the Drain
Locate the defrost drain and check for clogs. Use a pipe cleaner or warm water to clear any debris. - Check the Door Seal
Close the freezer door on a piece of paper. If you can easily pull it out, replace the seal. - Examine Water Connections
Check the water supply line for leaks or damages. Tighten any loose fittings. - Monitor Humidity Levels
Use a hygrometer to track indoor humidity. Consider a dehumidifier if levels are consistently high. - Clear Airflow Vents
Ensure nothing obstructs the vents inside the freezer. Rearrange items if necessary for proper airflow.
By addressing these issues promptly, you can mitigate water leakage in your KitchenAid freezer and optimize its performance.
Common Causes of Water Leaking
Water leakage from your KitchenAid freezer can stem from several common issues. Identifying these problems early helps maintain the appliance’s efficiency and prevents further damage.
Blocked Defrost Drain
Blocked defrost drains often lead to water pooling at the bottom of the freezer. Inspect the defrost drain for any ice buildup or debris. Clear the blockage by carefully using warm water or a plumber’s snake. Regular maintenance ensures that the drain remains clear, preventing future leaks.
Damaged Door Seals
Damaged door seals allow warm air to enter the freezer, causing condensation and leaks. Inspect the door seals for cracks or tears. If any damage is present, replace the seals to maintain proper temperature and airflow. Ensuring a tight seal keeps your freezer working efficiently.
Clogged Ice Maker
A clogged ice maker can cause overflow and subsequent leaks. Check the ice maker for any debris or ice buildup. Clear the blockage by removing any ice and debris within the unit. Regularly cleaning the ice maker prevents clogs and reduces the risk of water leaks.
Troubleshooting Steps
If your KitchenAid freezer leaks water, follow these troubleshooting steps to identify and resolve the issue effectively.
Recommended Products
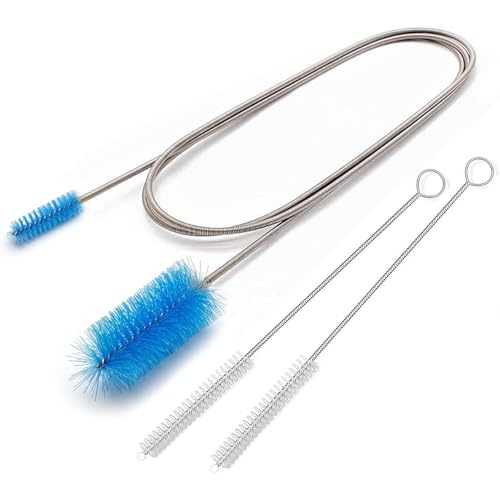
🚫UNCLOG NARROW TUBES INSTANTLY: Tired of water pooling in your fridge or grime clogging your aquarium filters? This 67-inch (170cm) extra-long flexible drain brush is the ultimate problem-solver. It easily snakes through deep, narrow, and curved tubing to effortlessly remove gunky buildup, dirt, and residue.

❤ The nylon bristles long pipe cleaner brush collect and remove the drain, food, grease buildup, and debris; durable enough for long-term use.

【 Practical Pipeline Cleaner】The refrigerator cleaning tool kit includes a syringe, hose, stainless steel cleaning brush, cleaning scraper, and anti clogging. Helps to clean the drain holes of the refrigerator, solve water leakage problems, and remove odors caused by blockages.
Inspecting the Freezer Interior
Start by inspecting the interior of the freezer for any signs of water pooling. Look for ice buildup around the vents or on the walls, as this can indicate a blocked defrost drain. Clear any debris or ice obstructing the drain to restore proper flow. Also, check for food items pressed against the walls, as they can obstruct airflow and lead to condensation. Remove any obstructions to ensure proper circulation.
Checking the Ice Maker
Examine the ice maker for any visible signs of leaks. Check the water supply line for kinks or damage, which can lead to leaks. Additionally, inspect the ice bin for overflows. If the ice maker isn’t producing ice correctly, it could cause water to leak into the freezer. Regularly clean and maintain the ice maker to prevent clogging and ensure it operates efficiently.
Evaluating Drainage Systems
Evaluate the drainage systems associated with your freezer. First, locate the defrost drain and ensure it’s clear of ice and debris. Use warm water to rinse out any blockages. Additionally, check the drainage pan at the bottom of the unit. If it’s overflowing, ensure it’s positioned correctly and not cracked. Monitor these systems regularly to prevent future leaks.
Preventative Measures
Taking steps to prevent water leakage can save you from dealing with costly repairs and restore your freezer’s efficiency. Implementing regular maintenance and following best practices ensures your KitchenAid operates smoothly.
Regular Maintenance Tips
- Inspect the Defrost Drain: Check the defrost drain every month for ice buildup or debris. Clear any blockages to maintain proper drainage.
- Examine Door Seals: Regularly inspect the door seals for cracks or tears. Replace damaged seals immediately to prevent warm air from entering.
- Monitor Water Supply Lines: Inspect your water supply lines for leaks or kinks. Ensure connections are tight and secure.
- Clean the Ice Maker: Clean your ice maker every few months to prevent clogs. Remove any ice buildup or obstructions inside.
- Assess the Drainage Pan: Periodically check the drainage pan for proper placement and cleanliness. Empty and clean it as needed to avoid overflow.
- Avoid Overloading the Freezer: Don’t cram food items against the walls, as this restricts airflow. Maintain space around the vents for optimal performance.
- Monitor Humidity Levels: Utilize a dehumidifier in high humidity areas. Keeping indoor humidity below 50% helps reduce condensation.
- Close Doors Promptly: Always ensure freezer doors close tightly. Avoid leaving doors open for long periods to prevent temperature fluctuations.
- Regulate Temperature Settings: Set your freezer temperature between 0°F and -10°F. Consistent temperatures promote efficient operation.
- Defrost Regularly: If your freezer isn’t frost-free, manually defrost it at least once a year. This practice helps prevent buildup that can lead to leaks.
By implementing these preventative measures, you can significantly reduce the chance of water leaking from your KitchenAid freezer.
Conclusion
Dealing with water leakage from your KitchenAid freezer can be frustrating but it’s manageable with the right approach. By staying proactive and regularly checking for potential issues like clogged drains or damaged seals you can keep your freezer running smoothly.
Remember that a little maintenance goes a long way in preventing bigger problems down the line. Taking the time to inspect your unit and address any concerns will not only enhance its performance but also extend its lifespan.
So don’t hesitate to roll up your sleeves and tackle those pesky leaks. Your KitchenAid deserves it and you’ll enjoy the peace of mind that comes with a well-maintained appliance.
Frequently Asked Questions
What causes water to pool in my KitchenAid freezer?
Water pooling in a KitchenAid freezer can be caused by a clogged defrost drain, a faulty door seal, or issues with the ice maker and water supply line. High indoor humidity and blockages in airflow might also contribute to this problem. Identifying and addressing these potential causes early can prevent further complications.
How can I prevent water leakage in my freezer?
To prevent water leakage, regularly inspect and clear the defrost drain, check door seals for damage, and monitor water supply lines for leaks. Cleaning the ice maker every few months and ensuring proper airflow by avoiding overcrowding can also help maintain proper function and prevent leaks.
How do I clear a clogged defrost drain?
To clear a clogged defrost drain, first, unplug the freezer and locate the drain. Use warm water to melt any ice buildup and remove debris with a small tool, like a pipe cleaner. Make sure to flush the drain with warm water after clearing it to ensure proper flow.
When should I replace the door seal on my freezer?
You should replace the door seal if you notice visible cracks, tears, or areas that are not sealing tightly. A faulty seal can lead to temperature fluctuations and moisture buildup inside the freezer, resulting in water pooling and ice formation.
How often should I inspect my freezer’s components for issues?
It’s advisable to inspect your freezer’s components, including the defrost drain and door seals, at least once a month. Regular checks can help catch problems early and ensure your appliance operates efficiently, minimizing the risk of water leakage.

Hey, I’m Jake. I focus on cooling systems at Appliance Mastery, like fridges, freezers, and air conditioners.
I’ve worked in appliance repair for more than ten years and I’m certified through NASTeC. I’ve seen just about every fridge issue you can imagine.
My goal is to help you fix problems without stress. Whether it’s a freezer that won’t cool or an AC that keeps beeping, I’m here to walk you through it.