
Have you noticed water pooling around your GE side-by-side freezer? You’re not alone. This frustrating issue can catch anyone off guard, leaving you wondering what went wrong.
Key Takeaways
- Common Causes of Water Leakage: Water pooling around your GE side-by-side freezer can result from clogged defrost drains, damaged door seals, and improper leveling.
- Maintenance is Key: Regularly inspecting door seals, clearing the defrost drain, and ensuring proper leveling can help prevent water leakage issues.
- Diagnostic Steps: To troubleshoot leaks, check for ice buildup, examine the drainage system, and evaluate the freezer’s temperature settings.
- Effective Solutions: Cleaning the defrost drain, repairing or replacing damaged water lines, and replacing faulty door seals are crucial steps to fix leaks.
- Preventative Measures: Establish a regular maintenance routine that includes inspecting seals, checking the water line, and monitoring freezer temperature to minimize future leaks.
Overview of GE Side By Side Freezers
GE side-by-side freezers offer convenience and reliable performance, making them a popular choice in many kitchens. These models typically feature two vertical compartments, allowing easy access to both frozen foods and fresh items. The design promotes efficient organization, with adjustable shelves and bins.
Common Features
- Spacious Compartments: Plenty of room for freezing large quantities of food, such as meats and vegetables.
- Temperature Control: Digital controls for precise temperature adjustments; this helps maintain optimal freshness and quality.
- Ice and Water Dispenser: Some models come with built-in dispensers for ready access to ice and chilled water.
Reasons for Water Leakage
Water pooling around your GE side-by-side freezer can stem from several causes:
- Clogged Defrost Drain: Food particles or ice can block the drain, leading to water buildup.
- Damaged Door Seals: Worn or torn seals may allow warm air inside, causing condensation.
- Improper Leveling: An unlevel freezer can impact drainage, resulting in leaks.
Maintenance Tips
To minimize issues, perform regular checks:
- Inspect Door Seals: Ensure seals are intact and clean to avoid moisture buildup.
- Clear Defrost Drain: Regularly check and clean the drain to prevent blockages.
- Level the Appliance: Ensure the freezer sits evenly to encourage proper drainage.
Troubleshooting
If you notice leaks, follow these steps:
- Check for Ice Buildup: Look inside for any ice accumulation and defrost if necessary.
- Examine the Drainage System: Ensure the defrost drain is clear; use hot water to flush if blocked.
- Evaluate Temperature Settings: Keep freezer temperatures around 0°F for optimal performance.
By paying attention to these details, you can maintain the efficiency of your GE side-by-side freezer and prevent water leakage issues.
Common Causes of Water Leakage
Water leakage in GE side-by-side freezers can stem from several common issues. Identifying these causes allows you to take prompt action to fix the problem.
Clogged Defrost Drain
Clogged defrost drains often lead to water pooling inside the freezer. Ice and debris can block the drain, causing melted water to overflow. Check the drain hole, usually located at the back of the freezer compartment, and ensure it’s clear. If you notice blockage, use warm water or a small brush to clear it out.
Damaged Water Line
A damaged water line can also cause leaks. Inspect the water supply line, usually located at the back of the freezer. Look for cracks, leaks, or disconnections. If the water line is damaged, replace it promptly to avoid further leakage. It’s crucial to ensure each connection is tight and secure to prevent future problems.
Broken Door Seals
Broken or worn door seals allow warm air to enter, leading to excess condensation and water leakage. Examine the seals around the freezer doors for any tears or gaps. Clean the seals to remove debris, then check their integrity. Consider replacing seals that appear damaged to maintain proper temperature and prevent leaks.
Diagnosing the Problem
Diagnosing the cause of water leakage in your GE side-by-side freezer requires careful inspection and systematic troubleshooting. Here’s how to identify the issue effectively.
Identifying Water Leak Locations
Check these common areas for water leaks:
- Defrost Drain: Look for pooling water at the bottom of the freezer. The defrost drain might be clogged, causing water to accumulate.
- Water Supply Line: Inspect the water supply line connected to the ice maker. Look for cracks or leaks that could contribute to water flow outside the appliance.
- Door Seals: Examine the door seals for any damage or debris. Broken seals allow warm air to enter, resulting in condensation and leaks.
- Floor Beneath the Freezer: Check the floor for any water accumulation. This can help you trace the source of the leak back to the appliance.
Troubleshooting Steps
Follow these steps to troubleshoot and fix leaks:
- Inspect the Defrost Drain: Unclog any blockage using warm water or a vacuum to clear any debris. This can resolve pooling issues.
- Check the Water Supply Line: Look for damage along the line. Replace any cracked sections to stop leaks.Turn off the water supply while inspecting.
- Examine Door Seals: Clean and check the door seals for damage. Replace the seals if you find any tears or gaps. A good seal maintains the freezer’s efficiency.
- Evaluate Temperature Settings: Ensure the freezer temperature is set between 0°F and 5°F. Too warm settings can promote condensation and leaks.
- Level the Appliance: Use a level tool to check if your freezer is even. Uneven surfaces can cause water to pool and leak out. Adjust the leveling legs if needed.
By identifying leak locations and following these troubleshooting steps, you can effectively diagnose and resolve water leakage issues in your GE side-by-side freezer.
Solutions to Fix the Leak
You can address water leakage from your GE side-by-side freezer with several practical solutions. Each method focuses on tackling the common causes of leaks effectively.
Recommended Products

❤ The nylon bristles long pipe cleaner brush collect and remove the drain, food, grease buildup, and debris; durable enough for long-term use.
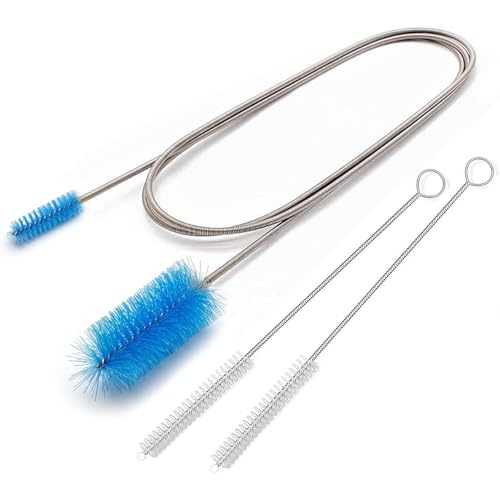
🚫UNCLOG NARROW TUBES INSTANTLY: Tired of water pooling in your fridge or grime clogging your aquarium filters? This 67-inch (170cm) extra-long flexible drain brush is the ultimate problem-solver. It easily snakes through deep, narrow, and curved tubing to effortlessly remove gunky buildup, dirt, and residue.
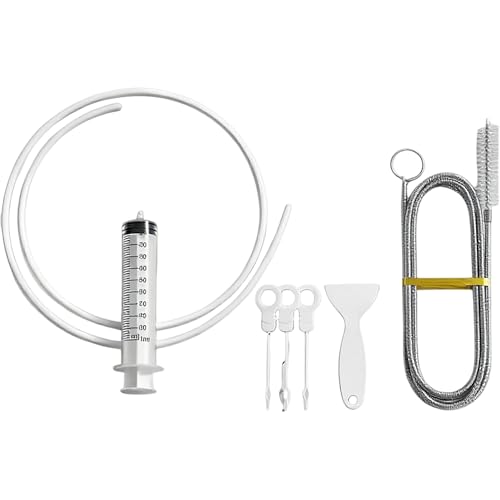
【7-Piece Complete Cleaning Kit】All-in-one solution for fridge drain clogging, including 60IN long flexible brush, flexible hose, syringe, plungers and shovel. One purchase covers all your refrigerator drain cleaning needs, no extra tools required, saving time and money.
Cleaning the Defrost Drain
Clearing the defrost drain is vital for preventing water buildup inside your freezer.
- Locate the Drain: Find the defrost drain at the bottom of the freezer compartment. It’s typically a small hole or channel.
- Remove Clogs: Use a mixture of warm water and vinegar to flush out debris. A flexible brush or pipe cleaner can help dislodge stubborn clogs.
- Check for Ice: Look for ice around the drain area. If present, let the freezer thaw before cleaning to restore proper drainage.
- Monitor Regularly: Regularly check the drain for build-up to prevent future obstructions.
Repairing or Replacing Water Lines
A damaged water line can cause significant leaking.
- Inspect the Water Line: Look closely at the water supply line for visible cracks, leaks, or wear.
- Tighten Connections: Securely tighten any loose fittings or connections.
- Replace if Necessary: If damage is evident, replace the entire water line. You can find replacement lines at home improvement stores. Measuring the length needed beforehand ensures a proper fit.
- Test the New Line: After installing a new line, turn the water back on and check for leaks at the connections to ensure a secure seal.
Replacing Door Seals
Intact door seals prevent warm air from entering and causing condensation, which leads to leaks.
- Inspect Seals: Check the entire length of the door seals for cracks, tears, or gaps. A simple visual inspection often reveals the problem.
- Clean Seals: Clean the seals with warm, soapy water and a soft cloth to remove dirt and debris. This helps improve the seal’s effectiveness.
- Replace Faulty Seals: If the seals are damaged, purchase new seals compatible with your model. Follow the manufacturer’s instructions for installation, ensuring a snug fit.
- Test Seal Integrity: Close the door and check for any light seeping through. If light shows, the seal isn’t tight, indicating the need for adjustment or replacement.
These steps should help you effectively resolve any leaking issues with your GE side-by-side freezer, ensuring its efficiency and improving its performance.
Preventative Measures
Preventing water leakage from your GE side-by-side freezer is easier than you might think. Regular maintenance and monitoring can help ensure your appliance runs smoothly.
Regular Maintenance Tips
- Inspect Door Seals: Check door seals monthly for tears or wear. Clean them with warm soapy water to remove dirt, which can prevent proper sealing. Replace any damaged seals promptly to maintain efficiency.
- Clear the Defrost Drain: Every few months, clear the defrost drain. Locate it at the bottom of the freezer and use a mixture of warm water and vinegar to remove clogs. Regular checks can prevent water buildup and leaks.
- Check the Water Line: Inspect the water supply line quarterly for cracks or leaks. Look for any signs of wear. If you notice issues, replace the line immediately to stop leaks from starting.
- Ensure Proper Leveling: Verify that your freezer is level. Use a level tool, adjusting feet as necessary. A balanced freezer ensures proper drainage and minimizes the risk of leaks.
- Set the Freezer Temperature: Keep your freezer temperature at 0°F (-18°C). This setting helps maintain proper refrigeration and prevents excessive condensation that can lead to leaks.
- Check Temperature Regularly: Use a thermometer to check freezer temperature every few weeks. Adjust settings as needed based on food preservation needs and monitor for any fluctuations.
- React Quickly to Changes: If you notice the temperature rising, investigate promptly. A malfunctioning thermostat or blocked vents might require immediate attention to avoid excess condensation and potential leaks.
By following these preventative measures, you can maintain your GE side-by-side freezer effectively and minimize the risk of water leakage.
Conclusion
Dealing with a water leak from your GE side-by-side freezer can be frustrating but it’s manageable with the right approach. By understanding the common causes and following the troubleshooting steps outlined, you can identify the issue and take action. Regular maintenance is key to preventing future leaks and keeping your appliance running smoothly.
Remember to check those door seals and clear the defrost drain periodically. Keeping an eye on your water supply line and ensuring your freezer is level can make a big difference too. With a little attention, you can enjoy the convenience of your freezer without the worry of water pooling around it.
Frequently Asked Questions
What causes water to pool around my GE side-by-side freezer?
Water pooling around your GE side-by-side freezer can be due to clogged defrost drains, damaged door seals, or improper leveling. These issues can lead to excess condensation and leaks. Regular inspection and maintenance can help prevent these problems.
How can I maintain my GE side-by-side freezer to prevent leaks?
To maintain your GE side-by-side freezer, inspect door seals monthly, clear the defrost drain every few months, check the water line quarterly, ensure proper leveling, and keep the freezer temperature at 0°F (-18°C).
How do I clear a clogged defrost drain?
To clear a clogged defrost drain, locate the drain hole, remove any visible debris, and flush it with a mixture of warm water and vinegar. Regularly monitoring the drain helps prevent future clogs.
When should I replace my freezer’s door seals?
You should replace your freezer’s door seals if they are cracked, worn, or not sealing properly. Inspect them periodically for damage, as faulty seals can let in warm air and cause condensation.
How can I identify a damaged water supply line?
Inspect the water supply line for visible cracks or leaks. Feel for dampness around the connection points and check for signs of water pooling. Replace any damaged sections promptly to prevent further leaks.

Hey, I’m Jake. I focus on cooling systems at Appliance Mastery, like fridges, freezers, and air conditioners.
I’ve worked in appliance repair for more than ten years and I’m certified through NASTeC. I’ve seen just about every fridge issue you can imagine.
My goal is to help you fix problems without stress. Whether it’s a freezer that won’t cool or an AC that keeps beeping, I’m here to walk you through it.