
Have you noticed water pooling around your Whirlpool water heater? You’re not alone. A leak from the top of your unit can be frustrating and worrying, especially when you rely on hot water for daily tasks. It’s a common issue that many homeowners face, and understanding the cause can save you time and money.
In this article, you’ll learn about the potential reasons behind that pesky leak and how to address it effectively. Whether it’s a simple fix or a sign of something more serious, you’ll gain the knowledge you need to tackle the problem head-on. Let’s get your water heater back in shape so you can enjoy peace of mind.
Key Takeaways
- Common Causes of Leaks: Understand that leaks from the top of your Whirlpool water heater can arise from loose connections, a faulty temperature and pressure relief valve, or a damaged drain valve.
- Signs of a Leak: Be vigilant for water accumulation around the base, visible corrosion or rust on the tank, and unusual noises that could indicate internal issues.
- Quick Fixes: Tightening loose connections is often a simple solution; however, if that fails, replacing faulty components like the TPR or drain valve may be necessary.
- Know When to Call a Professional: If basic troubleshooting doesn’t resolve the leak, seek help from licensed plumbers who can diagnose and address complex issues effectively.
- Importance of Preventive Maintenance: Regularly checking connections, maintaining the TPR valve, and flushing the tank can prevent future leaks and enhance water heater performance.
- Adhere to Proper Installation: Following manufacturer guidelines and using quality materials during installation can significantly reduce the risk of leaks in your Whirlpool water heater.
Understanding Whirlpool Water Heaters
Whirlpool water heaters are designed for reliability and efficiency. Understanding their features and types helps you identify issues like leaks more effectively.
Recommended Products
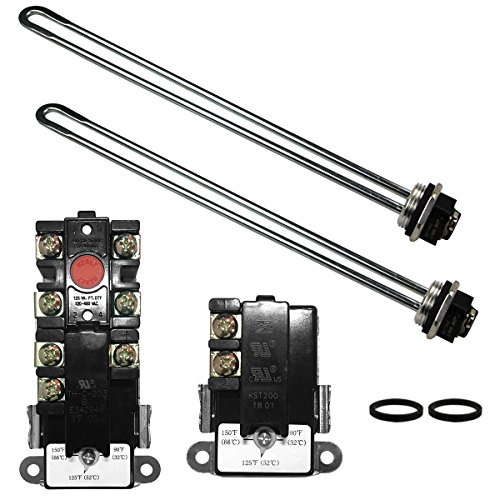
【ONE YEAR WARRANTY】Z Turn-up Kit Includes (2) 4500W 240V COPPER Water Heater Element, Insert Length: 13-9/16". 3500W@208V. Fit Most Brands of Water Heater >= 30 Gallons.
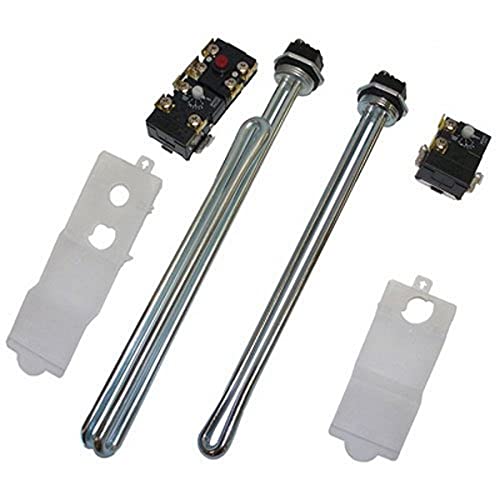

【ONE YEAR WARRANTY】Include (2) 4500W 240V COPPER Water Heater Element, Insert Length: 13-9/16". 3500W@208V
Common Features
- Energy Efficiency: Whirlpool water heaters often include insulation and energy-saving modes.
- Digital Displays: Many models feature user-friendly digital interfaces for easy temperature adjustments.
- Safety Features: Automatic shut-off and temperature control enhance safety during use.
- Durable Design: Sturdy materials help prevent leaks and extend the lifespan of the unit.
- Tank Water Heaters: These store heated water for immediate use. They usually range from 30 to 80 gallons, making them suitable for various household sizes.
- Tankless Water Heaters: These provide hot water on demand. They eliminate the need for a storage tank, reducing the risk of leaks.
- Heat Pump Water Heaters: These extract heat from the air or ground, making them highly efficient. They work well in moderate climates.
- Hybrid Water Heaters: Combining features of tank and tankless systems, these adjust energy use based on demand. They offer flexibility in hot water availability.
Understanding these features and types prepares you to identify and resolve any issues, including leaks from the top of your Whirlpool water heater.
Causes of Leaking from the Top
Understanding the causes of leaks from the top of your Whirlpool water heater aids in quick diagnosis and resolution. Here are the primary reasons for such leaks.
Recommended Products

Water Heater Maintenance: Allows the water heater to be drained for servicing or flushing of sediment

Note : This is a gas control valve and should be installed by a professional and not by homeowner as that potentially voids any warranty by not including professional installation.

2025 New Arrival. This model HMP012 has Straight Spout with 2.5 inch long shank. Other options available.
Loose Connections
Loose connections often contribute to leaks. Check the inlet and outlet pipes for secure fittings. Tighten any loose connections with an adjustable wrench. If leaks continue, consider applying plumber’s tape to ensure a proper seal.
Faulty Temperature and Pressure Relief Valve
A faulty temperature and pressure relief (TPR) valve can cause leaks. If the valve is malfunctioning, it may not properly release excess pressure, leading to water escaping from the top. Inspect the TPR valve for signs of corrosion or wear. Replace the valve if you observe any damage, as a functioning TPR valve is crucial for safety and performance.
Damaged Drain Valve
A damaged drain valve may also lead to leaks. Inspect the valve for cracks or corrosion. If you notice leaks around the valve, it might be time for a replacement. Use a bucket to catch any water when replacing the drain valve to minimize mess. Make sure to tighten the new valve securely to prevent future leaks.
Identifying the Signs of a Leak
Detecting a leak early can prevent extensive damage to your home. Here are some key signs to look out for.
Water Accumulation
You might notice puddles or damp spots around the base of your water heater. Regularly check the area for any unusual water accumulation. If water collects consistently, inspect for leaks at the inlet and outlet pipes. Keep a towel handy to catch small drips while you investigate.
Corrosion and Rust
Inspect the tank for signs of corrosion or rust. Brown or red stains indicate rust, which often means the tank is compromised. Pay extra attention to fittings, where moisture might gather. If corrosion is visible, consider replacing parts or the entire unit, depending on the extent.
Unusual Noises
Listen for unusual sounds coming from your water heater. Banging, popping, or hissing noises often signal internal issues. Sediment buildup causes popping sounds, while water escaping from connections can create hissing. Address these noises promptly, as they may indicate leaks needing immediate attention.
Solutions for a Leaking Water Heater
Addressing a leak from the top of your Whirlpool water heater requires quick action. With the right approach, you can prevent further damage and restore functionality.
Recommended Products

Compatibility: Ecowater Comfort 200, Comfort 300; Ecowater 4510; Tapworksi NSC 9 ED, NSC 11 ED; Viessmann Aquaset 500; Trinnity MINI, BOX; Aeg 18L, 26L; Bosch BOSH Aqua 2000S 10L; Whirlpool WHES18, WHES3T; North Star NSC 9 UD; Kenmore 350 Water Softener; Ecopure 42,000 Grain Water Softener; GE Smart 40,000 Grain Water Softener GXSHC40N; Morton SELECT (MODEL M20); Cosmowater Standard 15 HOME 22 Carbon Exclusive Pure Hybrid; Rheem RS32, etc. Please see details for more specific models.
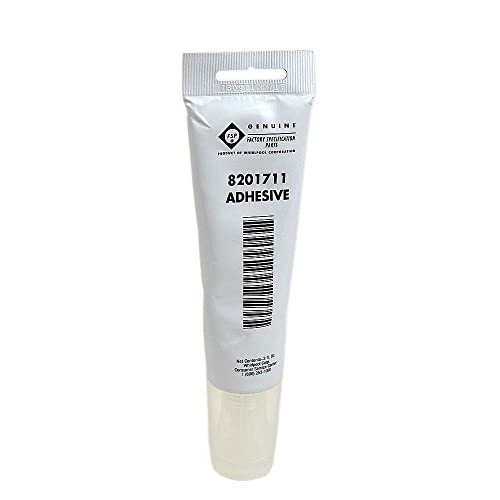
This part is compatible with models including; GU980SCGT2,RC17SED-P1326313M,GU980SCGT3,66517777992,66517777990,AGR5715QDB,I2000-P1324903M,66516805891,KUDA22ST3,66516805890,KUDA22ST2,KUDA22ST1,KUDA22ST0,66516689000,GU980SCGS1,AGR5715QDW,GU980SCGS2,DU911PCDB0,GU980SCGS3,665773882,DU940PWKT0,LAT9235AAE,LA105,WU704,LA104,LAT8700AAL,LA112,66517422992,66517422991,LA8440,SE1000,LA590,LAT8700AAW,66517422990,DC24J6,AGR5715QDQ,LAT9235AAM,66516645891,AGR5715QDS,JDS9860BDB,LAT7304ABM,LAT7304ABL,66515708892

Everything you need in one kit
Tightening Connections
Check all visible connections at the top of the water heater. These include the inlet and outlet pipes, as well as any fittings. Use an adjustable wrench to tighten connections. Ensure you don’t overtighten, which can cause damage.
- Inspect connections regularly.
- Feel for moisture at joints.
- Tighten fittings until snug.
Replacing Components
If tightening connections doesn’t stop the leak, consider replacing faulty components. Common culprits include:
- Temperature and Pressure Relief (TPR) Valve: Look for corrosion or signs of wear. Whether it’s malfunctioning, replacing it can stop leaks.
- Drain Valve: A damaged drain valve often leads to leaks. If you notice cracks or leakage, swap it out.
Follow these steps:
- Turn off the water supply and power.
- Drain the heater via the drain valve.
- Replace the faulty component with a new one, ensuring secure fittings.
Professional Repair Services
If leaks persist after tightening or replacing components, seek professional help. Certified technicians possess the tools and expertise to diagnose complex issues effectively.
- Search for licensed plumbers in your area.
- Request estimates and inquire about warranties.
- Schedule an appointment at your earliest convenience to avoid water damage.
By taking these steps, you can address leaks quickly and maintain the efficiency of your Whirlpool water heater.
Preventive Measures
Taking preventive measures can significantly reduce the likelihood of leaks in your Whirlpool water heater. By implementing regular maintenance and following proper installation techniques, you can ensure your unit operates efficiently.
Regular Maintenance
Conduct regular maintenance checks on your water heater. Schedule inspections every six months to look for signs of wear or damage.
- Check Connections: Inspect all visible connections for tightness. Ensure inlet and outlet pipes aren’t loose.
- Examine the TPR Valve: Regularly test the temperature and pressure relief (TPR) valve. This valve helps prevent excess pressure buildup.
- Flush the Tank: Annually flush the tank to remove sediment. Sediment buildup can cause corrosion and affect performance.
- Inspect for Leaks: Look for water accumulation or signs of rust. Addressing issues early can prevent serious damage.
Proper Installation Techniques
Proper installation plays a crucial role in preventing leaks.
- Follow Manufacturer Guidelines: Always adhere to the instructions provided by Whirlpool. Each model may have specific installation requirements.
- Use Quality Materials: Opt for high-quality pipes and fittings. Low-grade materials can lead to leaks over time.
- Ensure Level Installation: Ensure the water heater is level. Uneven installation can strain connections and lead to leaks.
- Employ Professional Assistance: If unsure about installation, consider hiring a professional. Expert installation minimizes potential issues.
By focusing on regular maintenance and proper installation techniques, you can effectively reduce the risk of leaks in your Whirlpool water heater.
Conclusion
Dealing with a leak from the top of your Whirlpool water heater can be stressful but knowing how to tackle it makes all the difference. By staying proactive and keeping an eye out for signs of trouble you can prevent minor issues from turning into major headaches.
Regular maintenance and timely inspections will help ensure your water heater remains in top shape. If you ever find yourself unsure about a repair don’t hesitate to reach out to a professional. With the right approach you can keep your hot water flowing smoothly and enjoy peace of mind in your home.
Frequently Asked Questions
Why is my Whirlpool water heater leaking from the top?
Water pooling around the top of a Whirlpool water heater can be caused by loose connections, faulty temperature and pressure relief (TPR) valves, or damaged drain valves. Inspect these areas carefully to identify the source of the leak.
How can I fix a leak in my Whirlpool water heater?
Start by checking and tightening all visible connections at the top of the unit. If that does not fix the leak, you may need to replace the TPR valve or drain valve. Always ensure the power and water supply are turned off before performing repairs.
What maintenance should I perform on my water heater?
Regular maintenance includes inspecting for leaks, checking connections, testing the TPR valve, flushing the tank annually, and conducting biannual inspections. This helps maintain efficiency and catch issues before they escalate.
How can I prevent leaks in my Whirlpool water heater?
To prevent leaks, ensure proper installation, use quality materials, and follow manufacturer guidelines. Regular maintenance and inspections every six months can also help identify and resolve issues early.
When should I call a professional for my water heater?
If you notice persistent leaks after tightening connections or modifying parts, or if you’re unsure how to safely replace components like the TPR or drain valve, it’s best to consult a professional for diagnosis and repair.

Hey, I’m Jake. I focus on cooling systems at Appliance Mastery, like fridges, freezers, and air conditioners.
I’ve worked in appliance repair for more than ten years and I’m certified through NASTeC. I’ve seen just about every fridge issue you can imagine.
My goal is to help you fix problems without stress. Whether it’s a freezer that won’t cool or an AC that keeps beeping, I’m here to walk you through it.