
Have you ever noticed water pooling around your RV’s water heater? A leaking bypass valve can be a real headache, especially when you’re trying to enjoy your travels. This common issue can lead to bigger problems if not addressed quickly, leaving you with more than just a wet floor.
Key Takeaways
- Understanding the Bypass Valve: The RV water heater bypass valve is essential for diverting water flow during winterization and maintenance, preventing freezing and conserving water.
- Common Leak Causes: Leaks typically result from seal and gasket failure or corrosion in metal components due to moisture exposure.
- Symptoms of Leakage: Look for visible water accumulation and damp surroundings as primary indicators of a leaking bypass valve.
- DIY Troubleshooting: Initial checks include inspecting for wet areas, corrosion, and damaged seals. Tighten connections and apply Teflon tape for minor leaks.
- Know When to Seek Help: Persistent leaks, significant corrosion, or complex issues warrant professional assistance to prevent further damage.
Understanding RV Water Heater Bypass Valve
Understanding the RV water heater bypass valve helps identify issues like leaks. This valve plays a vital role in your RV’s water system, especially when winterizing or troubleshooting problems.
What Is an RV Water Heater Bypass Valve?
An RV water heater bypass valve is a mechanism that diverts water flow either to or around the water heater. During routine maintenance, such as winterization, this valve allows you to drain water from the heater without emptying the entire freshwater tank. By diverting the flow, it prevents water from entering the heater, saving antifreeze from your winterizing process.
Importance of Bypass Valves in RVs
Bypass valves are crucial for several reasons:
- Winterization: Bypass valves let you winterize your RV efficiently by preventing water from freezing inside the heater.
- Water Conservation: These valves help conserve water during maintenance, allowing efficient use of your resources.
- Maintenance: Accessing the water heater for repairs or replacements becomes simpler with a bypass valve in place.
Proper understanding of this component helps you address issues before they escalate into significant problems, like leaking or damage to your RV’s plumbing system.
Common Causes of Leakage
Understanding the common causes of a leaking bypass valve helps you diagnose and fix issues quickly. Here are the primary factors that contribute to leakage.
Seals and Gasket Failure
Seals and gaskets play a crucial role in preventing leaks in your RV’s water heater system. Rubber and plastic components can degrade over time due to prolonged exposure to water, heat, and varying temperatures. Signs of failure include visible cracks or deterioration around the seals. Regularly inspect these components for wear and consider replacing them every few years or if you notice any leaks. Using high-quality replacement seals ensures a better fit and longer lifespan.
Corrosion and Rust
Corrosion and rust are common culprits behind leaks in metal components of your RV water heater. Moisture and minerals in the water can lead to oxidation, especially in areas where protective coatings have worn off. Look for anything that appears discolored, flaking, or pitted. Address any corrosion immediately by cleaning and treating the affected areas with rust inhibitors. If corrosion worsens, replacing parts may be necessary to prevent further leaks.
Symptoms of a Leaking Bypass Valve
A leaking bypass valve often presents noticeable symptoms that indicate trouble. Identifying these signs early helps prevent more severe damage to your RV.
Visible Water Accumulation
Visible water accumulation around your water heater is a primary symptom of a leaking bypass valve. When water builds up on the floor or within the cabinet, it often signals a leak. Check for pooling near the valve itself or along the pipes leading to and from the water heater. If you see water caked in dirt or staining that wasn’t there before, a leak likely exists.
Damp or Wet Surroundings
Damp or wet surroundings around the water heater provide another clear indication of a leak. You might notice damp spots on walls, ceilings, or floors adjacent to the water heater. Prolonged exposure to moisture can lead to mold growth or damage to internal components. If you detect any odd smells or see discoloration, it’s time to investigate the bypass valve for leaks.
Troubleshooting a Leaking Bypass Valve
You can resolve issues with a leaking bypass valve by following a clear troubleshooting process. This approach helps identify and fix the problem effectively, ensuring your RV stays water-tight.
Recommended Products

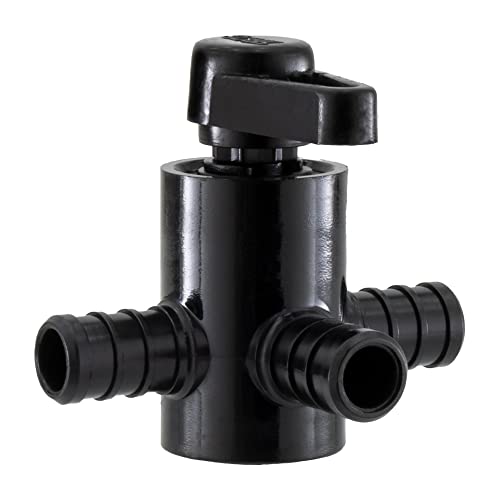
Upgraded Leak-Proof Design:This newly upgraded 94228 diverter valve features a reinforced structure for a tighter fit, effectively preventing leaks. Zero-leakage standards for reliable performance

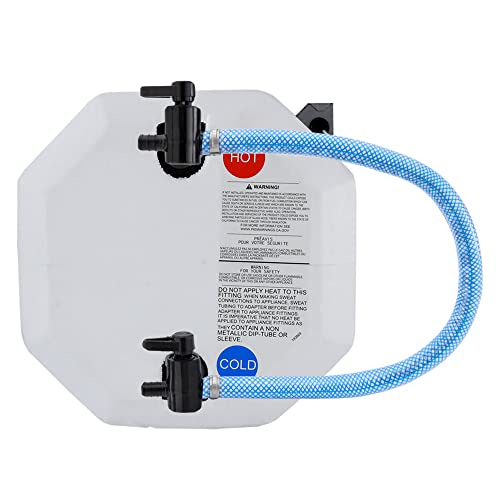
Save Antifreeze: Camco’s Supreme Permanent RV Hot Water Heater Bypass Kit efficiently bypasses your camping water heater, saving 6-10 gallons of RV antifreeze each winterizing cycle. This cuts costs & simplifies RV winterization.

Initial Checks and Observations
Start with basic visual inspections around the bypass valve. Check for the following:
- Wet Areas: Look for signs of water accumulation directly around the valve.
- Corrosion or Rust: Inspect metal parts for visible rust or corrosion that can indicate deterioration.
- Damaged Seals or Gaskets: Examine seals and gaskets for cracks or wear, as these are common sources of leakage.
Also, ensure that the bypass valve is in the correct position. Depending on the season, a faulty setting may lead to unintended leaks.
Identifying the Source of the Leak
Pinpointing the exact source of the leak involves a step-by-step process:
- Shut Off Water Supply: Stop the water flow to prevent further leaking during your investigation.
- Dry the Area: Use towels to dry any pooling water, making it easier to identify new leaks.
- Inspect Connections: Check all connections around the bypass valve for tightness. Loose fittings can lead to leaks.
- Use a Leak Detector: If you’re still unsure, a leak detector can help determine moisture in hidden areas.
After completing these steps, you should have a clearer understanding of whether the problem lies with a seal, connection, or the valve itself. Addressing the identified source promptly prevents more significant issues down the road.
Repair and Maintenance Solutions
Addressing a leaking bypass valve quickly prevents further damage and maintains your RV’s efficiency. Here are some practical solutions for repairs and maintenance.
Recommended Products
Comprised of a length of PEX tubing and crimp rings as well as a fitting for either side, the USA made hot water bypass system is easy to use and install.
Three-way valve for your RV water heater
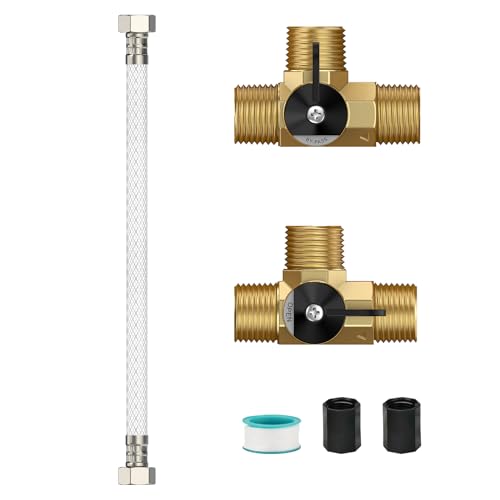
Saving Antifreeze: RVGUARD By-Pass kit can help you save antifreeze by bypassing the water heater. The same protection, the less antifreeze.
DIY Repairs for Minor Leaks
Fixing minor leaks can be straightforward. Start by gathering tools like a wrench, screwdriver, and Teflon tape.
- Turn Off the Water Supply: Shut off the water supply to prevent additional leaks.
- Dry the Area: Use towels or a wet/dry vacuum to soak up any accumulated water around the bypass valve.
- Inspect Seals and Gaskets: Look for visible cracks or signs of wear. If you see damage, you’ll need to replace those components.
- Reapply Teflon Tape: For loose connections, wrap Teflon tape around the threads of the fittings. This helps create a watertight seal when reassembling.
- Tighten Connections: Use the wrench to carefully tighten the connections without over-tightening, as this can cause damage.
- Test for Leaks: Once you’ve completed these steps, restore the water supply and monitor the area for any new leaks.
If the leak continues despite DIY efforts, further inspection might be necessary.
When to Seek Professional Help
Sometimes, leaks require professional intervention. Recognize these signs to know when it’s time to call in an expert.
- Persistent Leaking: If water continues to pool despite DIY repairs, this indicates a more significant underlying issue.
- Corrosion or Rust: If corrosion or rust appears on metal components surrounding the bypass valve, professionals can assess the extent of damage and recommend repairs.
- Complex Issues: If you cannot locate the source of the leak after thorough checks, or if the problem involves the water heater itself, it’s best to contact a technician.
- Safety Concerns: If you notice electrical issues or your RV warranties could be affected by attempting repairs, call a professional to avoid further complications.
These steps ensure your RV’s water heating system remains functional and leak-free.
Conclusion
Dealing with a leaking bypass valve can be frustrating but catching it early can save you from bigger headaches down the road. Regular inspections and maintenance are key to keeping your RV’s water heater in top shape.
If you notice any signs of leaks or damage don’t hesitate to take action. Whether it’s a simple DIY fix or a call to a professional addressing the issue promptly will help you enjoy your travels without the worry of water damage.
Remember your RV is your home on wheels so keeping it leak-free ensures your adventures remain fun and worry-free. Happy travels!
Frequently Asked Questions
What causes water to pool around my RV’s water heater?
Water pooling around your RV’s water heater is often due to a leaking bypass valve. This can be caused by seals and gaskets failing over time or corrosion and rust in metal parts. Regular maintenance and inspection can help catch these leaks early.
How does the bypass valve work in an RV water heater?
The RV water heater bypass valve controls the flow of water to and from the water heater. During winterization or maintenance, it diverts water away from the heater to prevent damage and conserve water, making it an important component for RV owners.
What are the symptoms of a leaking bypass valve?
Key symptoms of a leaking bypass valve include water accumulation around the heater, damp areas, odd smells, or discoloration. If you notice these signs, it’s crucial to inspect the valve promptly to prevent further damage.
How can I troubleshoot a leaking bypass valve in my RV?
Start troubleshooting by turning off the water supply and drying the area. Look for wet spots, check for corrosion or rust, and inspect seals and gaskets. Ensure the bypass valve is correctly positioned and tight to identify the leak source.
When should I seek professional help for my RV’s leaking bypass valve?
You should contact a professional if the leak persists after your DIY repairs, if you see significant corrosion or rust, or if the issue is complex and difficult to diagnose. Safety concerns also warrant professional attention to ensure proper repairs.

Hey, I’m Jake. I focus on cooling systems at Appliance Mastery, like fridges, freezers, and air conditioners.
I’ve worked in appliance repair for more than ten years and I’m certified through NASTeC. I’ve seen just about every fridge issue you can imagine.
My goal is to help you fix problems without stress. Whether it’s a freezer that won’t cool or an AC that keeps beeping, I’m here to walk you through it.