
Thinking about taking the plunge and buying your own AC unit? Picture this: it’s a scorching summer day, and your current unit decides to call it quits. What do you do? The thought of buying and installing your own AC unit might seem daunting, but it could be the key to keeping your cool and saving some bucks. Curious about how you can make this happen?
You’re not alone in wondering if you can handle this task. The idea of being in control of your indoor comfort is enticing, but is it really doable? In this article, we’ll break it down for you – from selecting the right unit to the nitty-gritty of installation. Stay tuned to discover how you can make your home a chill oasis all on your own.
Selecting the Right AC Unit
When choosing an AC unit, consider the size of the space you want to cool.
Ensure the unit’s cooling capacity matches your room size.
BTU (British Thermal Units) is a measure of cooling power. Here’s a quick guide:
| Room Size (sq ft) | BTUs Needed |
|---|---|
| 100-300 | 5,000-7,000 |
| 250-400 | 8,000-10,000 |
| 350-550 | 12,000-16,000 |
For efficiency, look for units with higher Energy Efficiency Ratio (EER) ratings.
Consider additional features like programmable thermostats and low noise levels for enhanced comfort.
Remember, choosing the right AC unit ensures optimal performance and energy savings.
Calculating the Correct Size
When calculating the correct size of an AC unit for your space, consider the square footage of the room you intend to cool. Matching the BTU (British Thermal Units) rating of the AC unit to the room size is crucial for efficient cooling.
- Small rooms (150-350 sq. ft.): Opt for an AC unit with around 5,000-8,000 BTUs.
- Medium rooms (350-550 sq. ft.): Consider an 8,000-12,000 BTU model.
- Large rooms (550-1,050 sq. ft.): Look for units with 12,000-18,000 BTUs.
- For open layouts or high ceilings, you may need to adjust the BTU requirements accordingly.
Oversized units can lead to frequent cycling, resulting in inefficient operation, while undersized units struggle to cool the space effectively.
Understanding BTUs and room size will help you choose an AC unit that balances efficiency and effectiveness in cooling your home.
Ensuring Compatibility with your Home
When considering buying and installing your AC unit, it’s crucial to ensure compatibility with your home. Here are some key points to keep in mind:
- Size Matters: AC units come in various sizes, so it’s important to select one that fits the square footage of the room you intend to cool.
- Calculate the BTU: Determining the appropriate British Thermal Units (BTU) rating for your space is essential for optimal cooling efficiency.
- Avoid Under-sizing: A unit with a lower BTU than needed will struggle to cool the room adequately.
- Beware of Over-sizing: An oversized unit can lead to rapid temperature changes and poor humidity control.
- Consider Energy Efficiency: Look for units with a high Energy Efficiency Ratio (EER) to save on electricity costs.
- Installation Requirements: Ensure you have the necessary tools and expertise for a proper installation.
- Seek Professional Help: If you’re unsure about the compatibility or installation process, don’t hesitate to consult a professional for guidance.
By taking these factors into account, you can make an informed decision when buying and installing an AC unit in your home.
Recommended Products

Customizable Cooling: Achieve optimal comfort with custom temperature settings, 6-way directional airflow, and three different fan speeds
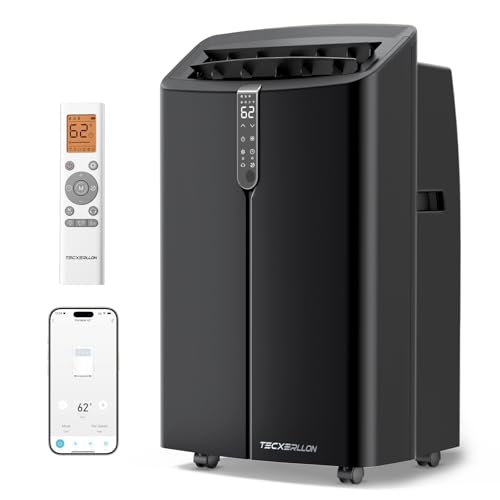
【16,000 BTU Portable AC for Large Rooms Up to 850 Sq. Ft.】Built for large living rooms, bedrooms, apartments, open-plan spaces, and home offices, this 16,000 BTU portable air conditioner delivers fast, steady cooling for spaces from 550 to 850 sq. ft. The high-efficiency compressor helps cool the room quickly, while the adjustable 61°F–90°F temperature range lets you set the comfort level that fits your space.

Customizable Cooling: Achieve optimal comfort with custom temperature settings, 6-way directional airflow, and three different fan speeds
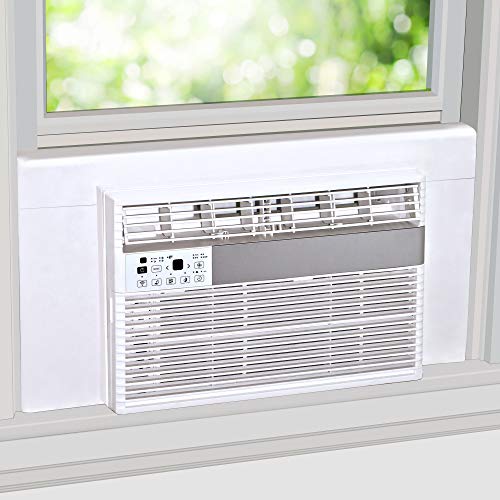
The Installation Process
So, you’ve decided to take on the challenge and install your own AC unit. Let’s walk through the installation process step by step:
Prepare for Installation
- Gather all the necessary tools and equipment.
- Read the manufacturer’s instructions thoroughly.
Location Check
- Select a spot near an electrical outlet and away from direct sunlight.
- Make sure there’s enough airflow around the unit.
Mounting the Unit
- Install the mounting bracket securely on the wall.
- Lift and secure the AC unit onto the bracket.
Electrical Connection
- Carefully connect the AC unit to the power source.
- Double-check all electrical connections for safety.
Sealing and Insulating
- Seal any gaps around the unit to prevent air leaks.
- Insulate the tubing to maximize efficiency.
Testing the Unit
- Power on the AC unit and check for proper function.
- Ensure both cooling and fan modes work correctly.
- Adjust the thermostat settings to your preference.
- Regularly clean and maintain the unit for optimal performance.
Remember, while installing your own AC unit can be rewarding, if you’re unsure at any point, don’t hesitate to seek professional help. Safety and efficiency should always be top priorities when taking on such a project.
Recommended Products
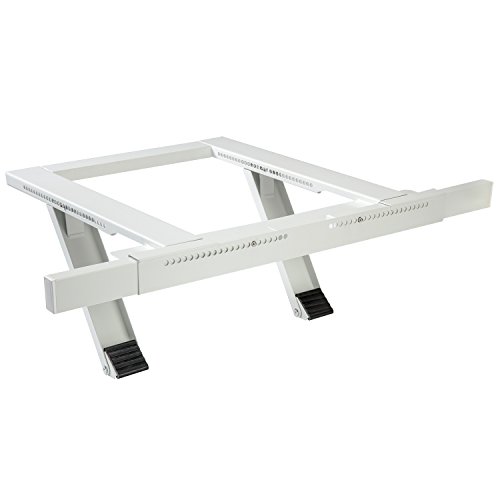
Bracket For AC Window Unit – Easily Expands from 24” to 38” to Fit in Most Single or Double Hung Windows; Adapts to Exterior Wall Thickness of 4” to 11”
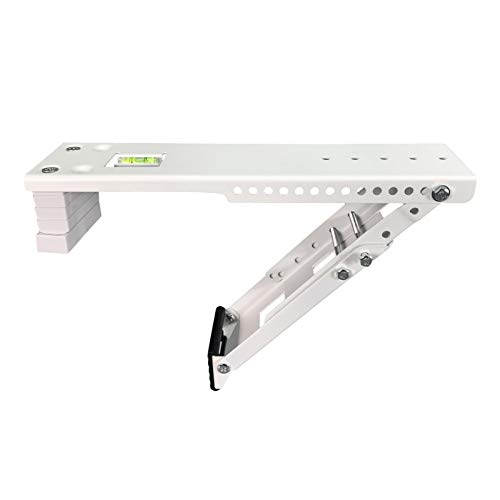
Patent No. D989611 - adapts to single or double hung windows. Does not work with slider, crank-out or casement windows. (check description below for window requirements and Product Guides). For installation support, download the User Instructions or contact us first.
MATERIAL - 1’’ thick insulating foam covered in white flexible vinyl
Maintenance Tips
- Clean or Replace Filters Regularly: This helps maintain the efficiency of your AC unit.
- Check and Clear the Drain line: Ensure the drain line is clear to prevent any blockages that may cause leaks.
- Inspect the Thermostat: Make sure your thermostat is working correctly to avoid overworking your unit.
- Keep the Outdoor Unit Clean: Remove debris and vegetation around the outdoor unit for proper airflow.
- Schedule Professional Maintenance Annually: A professional can tune up your AC unit for optimal performance.
| Fact | Data |
|---|---|
| Recommended Frequency | Annually |
| Time Taken | 1-2 hours |
Conclusion
You’ve learned that buying and installing your own AC unit is possible with the right knowledge and tools. Remember to choose the correct unit size and follow the installation steps carefully. Safety and efficiency are key, so don’t hesitate to seek professional assistance if needed. Regular maintenance, such as cleaning filters and checking the thermostat, will keep your AC running smoothly. With proper care, your DIY AC installation can provide cool comfort for years to come.
Frequently Asked Questions
What factors should I consider when selecting an AC unit?
When selecting an AC unit, consider factors like square footage and BTU rating to ensure proper cooling efficiency and effectiveness.
Is it advisable to install the AC unit myself?
While it’s possible to install the AC unit yourself, it’s crucial to follow a detailed step-by-step guide for installation to ensure safety and efficiency.
What are the key steps involved in installing an AC unit?
Key installation steps include preparing for the process, selecting the location, mounting the unit securely, making electrical connections, sealing and insulating for efficiency, testing for proper function, and regular maintenance.
What maintenance tips can help improve AC performance?
To improve AC performance, maintain the unit by cleaning or replacing filters regularly, clearing the drain line, inspecting the thermostat, keeping the outdoor unit clean, and scheduling professional maintenance annually.

Hi, I’m Charlie, and I cover all things laundry here at Appliance Mastery.
I’ve spent over eight years working on washing machines, dryers, and dishwashers. I also have a degree in mechanical engineering, which helps me understand how these appliances really work.
I try to make every guide clear and practical. If you’re stuck with a noisy dryer or a leaking washer, I’ll help you figure out what’s wrong and how to fix it.