
Have you noticed water pooling around your water heater? A leak near the pressure relief valve can be frustrating and concerning. This common issue not only disrupts your daily routine but can also lead to more significant problems if left unaddressed.
Key Takeaways
- Common Leak Causes: The most frequent reasons for leaks around the pressure relief valve include a faulty valve, high pressure in the water heater, and corrosion of the tank.
- Signs of Trouble: Key indicators that the pressure relief valve may be failing include water pooling around the heater and frequent discharges of water from the valve.
- Visual Inspection Steps: Conduct a thorough visual inspection by checking for dampness, examining the valve and connections, and assessing the tank for rust or corrosion.
- Diagnosing Pressure Issues: Use a pressure gauge and manually test the valve to determine if excessive pressure is causing leaks, as readings above 80 PSI may indicate problems.
- Effective Solutions: Repairing or replacing the pressure relief valve, adjusting temperature settings, and installing a pressure-reducing valve can effectively address leaking issues.
- Preventive Maintenance: Implement regular maintenance checks on your water heater to ensure the pressure relief valve functions properly and prevent future leaks.
Common Causes Of Water Heater Leaking Around Pressure Relief Valve
A water heater leak near the pressure relief valve often arises from specific issues. Understanding these causes helps in effective troubleshooting.
Recommended Products

Rv Water Heater Pressure Relief Valve Socket Wrench: For rv pressure relief valve remover, including campers, motorhomes, boats, and indoor settings hot water heater socket, effectively remove temperature pressure relief valves, etc.

1 Tankless Heater Solution: Ideal for Releasing Pressure in your Tankless or Closed-Loop Hot Water Systems

Pressure relief valves are for protection against excessive pressure
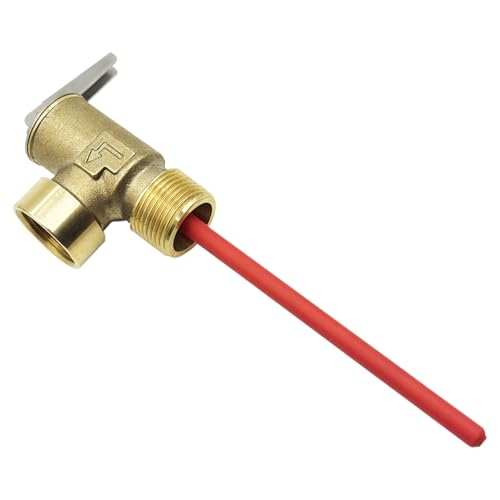
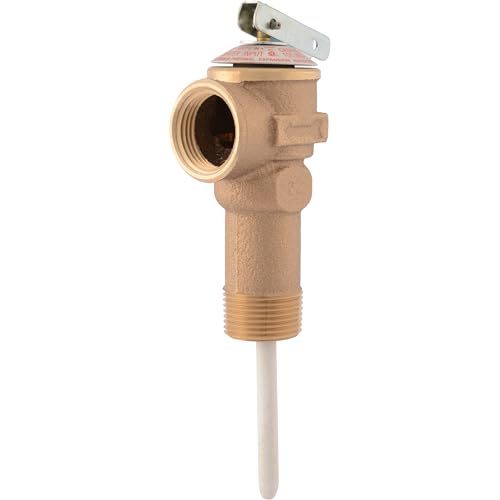
Faulty Pressure Relief Valve
Faulty pressure relief valves can cause leaks. A valve may malfunction due to wear or debris. Check if the valve is properly seated. If you notice water dripping or pooling, that might indicate a need for replacement. Consult a plumber for proper inspection and replacement.
High Pressure In Water Heater
High pressure in the water heater leads to excess stress on the system. This pressure increase often results from overproduction of heat or an overly high setting on the thermostat. Regularly monitor the temperature and set it below 120°F for optimal performance. Installing a pressure gauge helps you keep track of the system’s pressure.
Corroded Tank
A corroded tank contributes to leaks around the pressure relief valve. Rust and corrosion weaken the tank’s structure. Inspect the tank regularly for any signs of wear, especially if it’s older than 10 years. Replacement might become necessary if corrosion is evident. Regular maintenance, such as flushing the tank, can prolong its lifespan.
Signs Of A Problematic Pressure Relief Valve
Recognizing signs of a problematic pressure relief valve helps you address issues promptly and maintain your water heater’s efficiency.
Water Pooling Around The Heater
You notice water pooling around the heater, indicating a potential pressure relief valve issue. A leak at this location often stems from a faulty valve or excessive pressure buildup in the tank. Check the area frequently for moisture. If the overflow pipe attached to the valve drips, that’s a strong sign the valve may require replacement or assistance.
Frequent Discharging Of Water
You experience frequent discharges of water from the pressure relief valve. This discharging can occur during periods of high usage or when the water temperature exceeds safety limits. Monitor the valve to see if it releases water regularly. If you observe this happening more often than normal, it may indicate a need for adjustment. Consider checking the temperature and pressure settings for proper regulation.
Steps To Diagnose The Issue
Diagnosing a leak around your water heater’s pressure relief valve involves a few straightforward steps. You can identify the source of the leak by conducting a visual inspection and performing pressure testing.
Recommended Products

Precision Dual-Scale with Peak Memory: This pressure meter measures 0-200 PSI/0-14 Bar with ±2-1-2% accuracy (ASME B40.1 Grade A). Red max pointer tracks and retains peak pressure spikes, easily reset for monitoring faucets, spigots, or hydraulic systems.
✅[Ultimate Safety & Peace of Mind]: This 3/4-inch NPT water heater relief valve is your essential safeguard. It automatically releases excess pressure, preventing tank explosions and ensuring complete peace of mind for your household.

This pressure test gauge and valve body assembly is intended for pressure measuring in the gas line or tank.
Visual Inspection
- Check for Dampness: Look around the pressure relief valve for signs of water accumulation. Dampness indicates a leak.
- Inspect the Valve: Examine the pressure relief valve closely. Look for cracks, corrosion, or improper fittings.
- Look at Connections: Inspect all connections leading to and from the valve. Loose or damaged connections can create leaks.
- Check the Tank: Examine the water heater tank itself for any signs of rust or corrosion. These issues can lead to leaks as well.
- Turn Off the Heater: Switch off the power supply to the water heater to ensure safety.
- Attach a Pressure Gauge: Connect a pressure gauge to the drain valve. This gauge helps measure the pressure within the tank.
- Open the Drain Valve: Slowly open the drain valve. Observe the pressure reading. If pressure exceeds 80 PSI, your valve might leak due to excessive pressure.
- Perform a Manual Test: Quickly press the test lever on the relief valve. Water should discharge and stop right away. Continuous discharge indicates a faulty valve.
By following these steps, you can effectively diagnose any potential issues with your water heater’s pressure relief valve.
Solutions For Leaking Issues
Addressing a leak around the pressure relief valve requires prompt action to prevent further damage. Here are a couple of effective solutions.
Recommended Products
CASH ACME RELIEF VALVE: Cash Acme NCLX Combination Temperature and Pressure Relief Valves are designed for the protection of water heaters and storage tanks; incorporate an inert thermal element coating that provides effective isolation from mineral deposits (liming) and galvanic corrosion

Provides Protection: Helps protect your RV or home water heater from excess temperature and water pressure

For best results, use only Rheem replacement parts for repairing your Rheem Water Heater
Repairing Or Replacing The Pressure Relief Valve
- Identify the Leak: Start by confirming the source of the leak. If water flows directly from the pressure relief valve, it likely needs repair or replacement.
- Turn Off the Power and Water Supply: Ensure safety by shutting off the power to the water heater and turning off the water supply.
- Release Pressure: Open a hot water tap to relieve pressure in the system. This step reduces potential hazards when handling the valve.
- Inspect the Valve: Check for visible corrosion or damage on the valve. If it’s faulty, a replacement is necessary.
- Remove the Old Valve: Use a wrench to unscrew the old valve from the tank. Make sure to keep a bucket handy to catch any remaining water.
- Install the New Valve: Wrap Teflon tape around the threads of the new valve and screw it into place. Ensure it’s secure but avoid overtightening, which may cause damage.
- Reconnect and Test: Turn on the water supply and power. Monitor the valve for leaks. If it’s functioning properly, you shouldn’t see any water escaping.
- Check the Pressure Setting: Locate the thermostat on the water heater. The ideal temperature range is 120°F to 140°F. Setting it too high can cause excessive pressure.
- Adjust the Temperature: If needed, lower the setting to reduce pressure buildup. A lower temperature leads to safer operation.
- Install a Pressure Gauge: Attach a pressure gauge to the drain valve. Monitor the pressure; it should not exceed 80 PSI.
- Install a Pressure-Reducing Valve: If you consistently experience high pressure, consider installing a pressure-reducing valve. This adjustment measures and manages the pressure before it enters the water heater.
- Regular Maintenance Checks: Schedule periodic inspections to monitor the pressure relief valve and overall system function. Prevention reduces the likelihood of leaks in the future.
Conclusion
Dealing with a leak around your water heater’s pressure relief valve can be a hassle but addressing it quickly can save you from bigger problems down the line. By keeping an eye on the signs and performing regular maintenance you can ensure your water heater runs smoothly. Remember to check the pressure settings and inspect for any corrosion or damage. If you find that the valve needs replacing don’t hesitate to take action. Your water heater will thank you for it and you’ll enjoy peace of mind knowing everything’s working as it should.
Frequently Asked Questions
What causes water pooling around a water heater?
Water pooling around a water heater typically indicates a leak, often from the pressure relief valve. Common causes include a faulty pressure relief valve, excessive pressure in the tank, or corrosion of the tank. Regular inspection and maintenance can help identify these issues early.
How can I tell if my pressure relief valve is faulty?
Signs of a faulty pressure relief valve include frequent water discharge, rust or corrosion around the valve, and constant leaks or pooling water. If the valve releases water too often or during regular usage, it may need inspection or replacement.
What should I do if my water heater is leaking?
If your water heater is leaking, first turn off the power and water supply. Conduct a visual inspection to find the source of the leak. If it’s from the pressure relief valve, consider replacing it or checking for excessive pressure.
How can I prevent leaks around my water heater?
To prevent leaks, regularly inspect and maintain your water heater. Monitor the pressure levels, adjust the thermostat to avoid excessive pressure, and flush the tank periodically. Ensuring proper functioning of the pressure relief valve is also crucial.
Is replacing a pressure relief valve a DIY task?
Replacing a pressure relief valve can be a DIY task for those with basic plumbing skills. However, if you’re unsure about the process, it’s best to hire a professional to ensure proper installation and safety.
How often should I inspect my water heater?
It’s recommended to inspect your water heater at least once a year. Regular inspections help catch potential issues, such as leaks or corrosion, early before they lead to significant problems.

Hey, I’m Jake. I focus on cooling systems at Appliance Mastery, like fridges, freezers, and air conditioners.
I’ve worked in appliance repair for more than ten years and I’m certified through NASTeC. I’ve seen just about every fridge issue you can imagine.
My goal is to help you fix problems without stress. Whether it’s a freezer that won’t cool or an AC that keeps beeping, I’m here to walk you through it.