
Have you ever noticed water pooling around your Keurig while it heats up? You’re not alone. This frustrating issue can catch anyone off guard, especially when you’re craving that perfect cup of coffee.
Key Takeaways
- Common Causes of Leaks: Leaks during heating are often due to improper sealing of the water reservoir or clogged reservoirs from mineral buildup.
- Troubleshooting Steps: Regularly check for blockages in the water reservoir and lines, clean the brew needle, and ensure the reservoir is seated properly to prevent leaks.
- Regular Maintenance: Descale your Keurig every 3 to 6 months to prevent clogs and check for cracks in the water reservoir regularly to catch issues early.
- Proper Usage Tips: Always fill the reservoir to the recommended line, use filtered water, and inspect rubber seals for wear to maintain optimal performance.
- Immediate Action: If leakage occurs, addressing the issue promptly through troubleshooting and maintenance can restore your machine’s functionality and ensure a perfect brew every time.
Understanding Keurig Coffee Makers
Keurig coffee makers are popular for their convenience and simplicity. Understanding their features and operation can help you troubleshoot issues like leaking water during the heating process.
Common Features
- Single-Serve Brewing: Each machine uses pods, known as K-Cups, for individual servings, ensuring fresh coffee each time.
- Water Reservoir: Most models have a removable tank, allowing you to fill it easily. Some have a built-in filtration system for better taste.
- Brew Size Options: They typically offer multiple cup sizes, letting you choose how much coffee you’d like.
- Programmable Settings: Some models include timers or customizable brew strength, enhancing your coffee experience.
- Auto Shut-Off Function: This feature conserves energy by turning off the machine after a period of inactivity.
How They Work
Keurig machines heat water stored in the reservoir. Here’s how the process unfolds:
- Filling the Reservoir: You fill the water tank, which connects to the internal heating system.
- Heating the Water: When you select your brew size, the machine heats the water to the optimal temperature, usually between 192°F and 204°F.
- Puncturing the Pod: The machine punctures the K-Cup and forces hot water through it.
- Brewing the Coffee: Hot water extracts flavors while passing through the coffee grounds, resulting in your brewed cup.
If you notice water pooling around the machine while it heats, check the water reservoir for cracks and ensure it’s seated correctly. Regular maintenance, like descaling, prevents clogs and reduces leaks.
Causes of Keurig Leaking Water While Heating
Keurig machines can leak water during the heating process for several reasons. Identifying the underlying problem is crucial to restoring normal function. Below are common causes of this issue.
Improper Sealing
Improper sealing occurs when the water reservoir does not fit securely onto the machine. If the reservoir isn’t aligned correctly, water can escape while heating. Check for any gaps between the reservoir and the base. Ensure that you press down firmly until you hear a click, indicating it’s securely attached. If there are any visible cracks in the reservoir, replacing it may be necessary to prevent leaks.
Clogged Water Reservoir
A clogged water reservoir can also cause leaks. Scale buildup from hard water can obstruct water flow, leading to pressure changes that result in leaks. Regularly descaling your machine can prevent these issues. For maintenance, mix a descaling solution as directed and run it through the system. Rinse the reservoir thoroughly afterward with clean water. If the clog persists, consider using a soft brush to clean any hard-to-reach areas within the reservoir.
Troubleshooting Steps
If your Keurig leaks water while heating, follow these troubleshooting steps to resolve the issue quickly and effectively.
Recommended Products

Replacement Upper Needle Seal, for Most K-eurig Coffee Models 4 Pack Upper Needle Seal Silicone Rubber Gasket
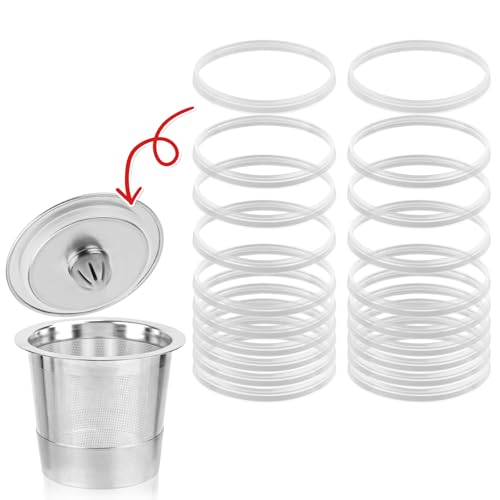
Package Content: You will receive 20 pieces of silicone gaskets for Keurig stainless steel, enough to meet your use and replacement needs.

Check for Blockages
- Examine the Water Reservoir: Remove the reservoir and check for any debris or mineral buildup. Clean it thoroughly with a soft sponge and warm, soapy water.
- Inspect the Water Lines: Look for clogs in the water lines. Detach the water lines if possible and clear any blockages. Running water through them can help remove stubborn buildups.
- Clean the Needle: The brew needle can also get clogged. Use a paperclip to gently clear any coffee grounds or debris from the needle’s opening to ensure proper water flow.
- Check the Reservoir Seal: Ensure the water reservoir is seated correctly on the machine. A misalignment can lead to leaks during the heating process. Remove and reattach it to make sure it fits snugly.
- Examine Seals and Gaskets: Inspect rubber seals and gaskets for wear and tear. If you notice any cracks or deformities, replace them to prevent leaks.
- Test for Air Leaks: Place a few drops of water around the seals and observe. If water seeps out, the seal might be compromised and require replacement.
Following these troubleshooting steps can help identify and fix the leaking issue quickly, allowing you to enjoy your coffee without interruption.
Preventive Measures
Taking preventive measures can significantly reduce the risk of your Keurig leaking water while heating. Implementing regular maintenance and proper usage tips keeps your machine in excellent working condition.
Regular Maintenance
Perform regular descaling every 3 to 6 months to prevent mineral buildup and clogs. Use a descaling solution from Keurig or a mixture of equal parts white vinegar and water. Run a descaling cycle according to the manufacturer’s instructions.
Check for cracks or damage in the water reservoir regularly. A visual inspection before each use helps catch issues early. Clean the brew needle weekly to prevent blockages. Remove the needle with a paperclip or needle cleaner, then rinse under water.
Proper Usage Tips
Ensure the water reservoir is properly seated. Listen for a click when snapping it into place. Fill the reservoir to the recommended fill line, avoiding overfilling.
Use fresh, filtered water to minimize mineral deposits. Hard water contributes to scale buildup, increasing the likelihood of leaks. Always place a cup or mug under the brew head before brewing to catch any unexpected drips.
Inspect the rubber seals and gaskets periodically for wear or cracks. Replace any damaged parts immediately. Performing these simple actions keeps your Keurig functioning smoothly and helps prevent leaks.
Conclusion
Dealing with a leaking Keurig can be frustrating but don’t let it ruin your coffee experience. By taking a few simple steps like checking for cracks and ensuring proper sealing you can keep your machine in top shape. Regular maintenance is key to preventing leaks and ensuring your coffee maker runs smoothly.
Remember to descale your machine every few months and keep an eye on those rubber seals. With a little attention you’ll be able to enjoy your favorite brews without any interruptions. So go ahead and savor that next cup of coffee knowing you’ve got your Keurig under control.
Frequently Asked Questions
What causes water pooling around my Keurig machine?
Water pooling usually results from an improperly sealed water reservoir. Cracks in the reservoir or clogs due to scale buildup can also contribute to this problem.
How can I prevent water leaks from my Keurig?
To prevent water leaks, regularly perform maintenance such as descaling every 3 to 6 months, check for cracks in the water reservoir, and ensure that all seals and gaskets are in good condition.
How often should I descale my Keurig?
It’s recommended to descale your Keurig every 3 to 6 months. This helps prevent mineral buildup, which can cause clogs and leaks.
What maintenance tips can help my Keurig function smoothly?
Regularly clean the brew needle, check for cracks in the water reservoir, ensure the reservoir is properly seated, and use fresh filtered water to keep your Keurig running efficiently.
Can I fix water pooling issues myself?
Yes, you can troubleshoot pooling issues by ensuring the water reservoir is securely attached, checking for blockages, and inspecting seals and gaskets for wear. Follow the steps outlined in the article for detailed guidance.

Hey, I’m Jake. I focus on cooling systems at Appliance Mastery, like fridges, freezers, and air conditioners.
I’ve worked in appliance repair for more than ten years and I’m certified through NASTeC. I’ve seen just about every fridge issue you can imagine.
My goal is to help you fix problems without stress. Whether it’s a freezer that won’t cool or an AC that keeps beeping, I’m here to walk you through it.