
Have you noticed water pooling around your water heater? A leaking pipe on top can be a frustrating problem that often leads to bigger issues if not addressed quickly. You might be wondering what causes this leak and how you can fix it without breaking the bank.
Key Takeaways
- Identify Leaks Early: Recognizing warning signs such as water puddles, dampness, and rust stains around your water heater can help prevent extensive damage.
- Common Causes: Leaks may result from corroded pipes, loose fittings, high water pressure, temperature changes, or faulty valves.
- Immediate Action: Shut off the water supply immediately, remove standing water, and inspect the area for any hidden damage to mitigate risks.
- Repair Options: Simple DIY fixes like tightening fittings, replacing washers, or using epoxy putty can address minor leaks, but consult a professional for more severe issues.
- Preventive Maintenance: Regular inspections, flushing the tank yearly, and ensuring proper temperature and pressure settings can minimize the likelihood of future leaks.
- Advanced Solutions: Explore modern water heater models with safety features, consider upgrading pipe materials, and install leak detection systems for added protection against leaks.
Understanding The Problem
A leak from a pipe on top of your water heater can lead to frustrating consequences. Identifying the cause and symptoms early can prevent more significant damage.
Common Causes Of Leaks
- Corroded Pipes: Age and rust can weaken pipes, leading to leaks.
- Loose Fittings: Connections may become loose over time, causing water to escape.
- Temperature Changes: Rapid temperature shifts can affect pipe integrity, leading to cracks.
- High Water Pressure: Excessive pressure can strain pipes and connections.
- Faulty Valves: Worn or damaged valves can create leaks in the system.
- Water Puddles: Noticeable water buildup around your heater indicates a leak.
- Damp Walls or Ceilings: Moisture may appear on surfaces near the heater.
- Decreased Water Pressure: Low pressure can signal an underlying leakage issue.
- Increased Utility Bills: Unexpected spikes in your bill may indicate water loss.
- Rust Stains: Discoloration around pipes or fittings can be a sign of corrosion.
Assessing The Damage
Detecting the extent of leakage is crucial. The sooner you assess the damage, the better you can mitigate further issues.
Visual Inspection
Start with a thorough visual inspection of the area around the water heater. Look for any visible signs of water or pooling. Check the pipes for corrosion and inspect fittings for tightness. Look at the insulation on pipes, as damp insulation often indicates leaks. Inspect the floor beneath the heater for water stains or warping. Keep an eye on the walls nearby for discoloration or peeling paint. These visual cues help identify the source and severity of the leak.
Signs Of Water Damage
Be aware of certain signs that indicate water damage. Monitor water buildup around the heater; even a small amount can signal a leak. Check for damp walls or ceilings; these may indicate issues with nearby pipes. Notice any drops in water pressure, as leaks often cause fluctuations. Watch out for increased utility bills; unexpected spikes might point to hidden leaks. Lastly, inspect for rust stains on pipes or fixtures; rust can be a strong indication of corrosion. Recognizing these signs early can prevent more serious damage.
Immediate Steps To Take
When noticing a leak from the pipe on top of your water heater, prompt action is essential to minimize damage. Follow these immediate steps to manage the situation.
Recommended Products

UNDER $20 TO PROTECT AGAINST ONE OF THE COSTLIEST HOME LEAKS: Water heater failures are among the most common causes of residential water damage. Early detection gives you time to replace the heater before water reaches flooring or adjacent walls. Flood Buzz Blue owners report catching failures early enough to avoid major repair bills - small alarm, large save.
NO SETUP REQUIRED - PLACE AND PROTECT: The Flood Buzz Small has a factory-installed, pre-tested battery sealed inside - no battery installation, no tools, no app. Open the box, set each unit on the floor near any water connection, and your home is protected from the first drip. Done in seconds.

With 3000W power, the water heater can raise the water by 45° F(0.3GPM) /27° F(0.5GPM) in seconds. You can adjust the water flow to meet your outlet temperature requirement. The Larger water flow, the lower outlet temperature; The smaller water flow, the higher outlet temperature. Not Suitable for Shower(Shower normally requires at least 1.8 gpm). You can set Fahrenheit or Celsius degrees by holding power button for 6 seconds.
Shutting Off The Water Supply
- Locate the main water supply valve. This valve often sits near your water heater or where the water line enters your home.
- Turn the valve clockwise. Doing this stops water from flowing into the heater and prevents further leaking.
- Verify the supply is off. Turn on a faucet in your home to ensure no water is running. This step confirms that the supply valve has successfully shut off.
- Gather cleaning supplies. Use towels, mops, or a wet-dry vacuum to soak up as much water as possible.
- Remove standing water. Move quickly to gather any pooled water, especially around the heater and nearby areas.
- Inspect the area. Check for damp insulation, carpets, or walls while cleaning. These signs indicate possible hidden damage that might need attention.
- Set up fans and dehumidifiers. Place fans in the vicinity to enhance air circulation and speed up drying. Dehumidifiers can help eliminate moisture from the air.
Taking these immediate actions can help you manage the leak efficiently and reduce the risk of further water damage.
Repair Options
Fixing a leaking pipe on top of a water heater offers several approaches. You can choose to tackle the problem yourself or seek professional help, depending on the severity of the leak.
Recommended Products

EFFECTIVE FOR EMERGENCY LEAK REPAIR: Silicone self fusing tape works perfectly as a quick, temporary fix for leaking hoses, pipes, faucets, and sinks, as well as other plumbing repairs. It forms a reliable seal until permanent professional help is available.
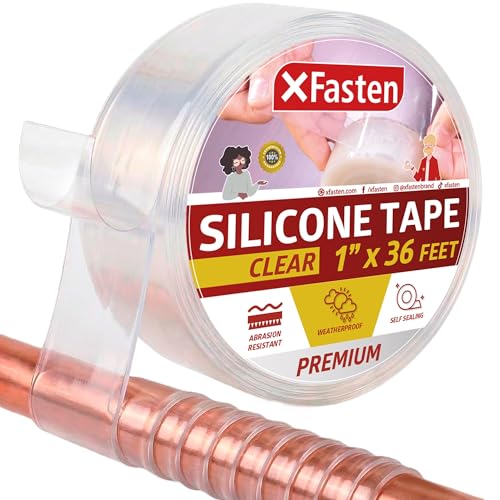
Self-fusing Silicone Tape that does not melt up to 260°C (500°F) making it ideal for emergency repairs for automotive, plumbing, marine, hose, electrical, indoor and outdoor applications.

You will receive two rolls of black self fusing silicone tape, 1inch wide(2.5cm), 20mil thick(0.5mm), each roll is 10feet(3m) long. Insulation Feature: Crafted from silicon rubber, our self-fusing silicone tape primarily consists of Si. Even post-combustion, it generates SiO2, retaining its insulating properties.
DIY Fixes
Assess the leak’s cause first. Common fixes include:
- Tighten Loose Fittings: Use a wrench to check and tighten any loose connections. Hand-tightening is often inadequate.
- Replace Washers: If the leak is from a fitting, replace worn washers. Obtain the right size for an effective seal.
- Seal Cracks: For minor cracks, plumbing tape can provide a temporary seal. Wrap it tightly around the affected area.
- Use Epoxy Putty: Mold epoxy putty around the leak for a more durable fix. Follow the manufacturer’s instructions for curing time.
- Adjust Temperature: If high temperature causes pipes to expand and leak, lowering the water heater temperature can help reduce pressure.
Perform these fixes with caution. Always turn off the water supply before starting any repairs. Monitor the area after repairs to ensure the leak has stopped.
When To Call A Professional
Not every leak is a quick fix. Call a plumbing expert if you notice:
- Significant Water Damage: If the leak causes damage to walls or ceilings, professional assessment is crucial.
- Persistent Leaks: If DIY fixes don’t hold up, a professional can diagnose underlying issues.
- High Water Pressure: An expert can check and regulate pressure levels to prevent future leaks.
- Corroded Pipes: Corrosion may indicate aging pipes that need replacement instead of a simple repair.
- Complex Systems: If your water heater is part of a larger plumbing system, professional help ensures that repairs don’t disrupt other areas.
Deciding between a DIY fix and professional service depends on your skill level and the issue’s severity. Prioritize safety and proper repairs to avoid complications down the road.
Preventive Measures
Preventing leaks from pipes on top of your water heater requires regular attention and proactive measures. Implementing these strategies can significantly reduce the risk of future issues.
Recommended Products
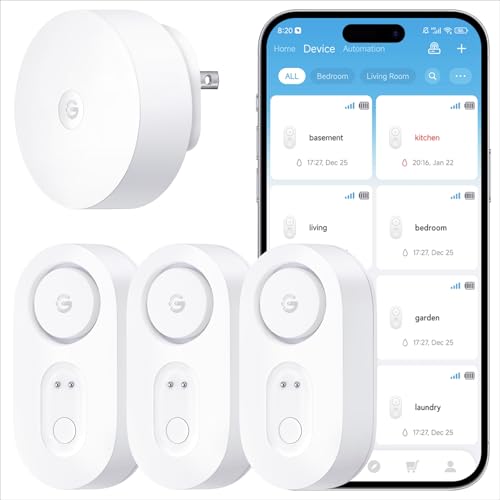
Breakthrough 1804 ft Connectivity: Engineered with advanced Sub-1G long-range wireless tech, our leak detector maintains robust signals over unprecedented distances—reaching up to 1804 feet even through 5 dense walls. Secure every critical space in expansive properties, from deep basements to detached garages and distant outbuildings.

Breakthrough 1804 ft Connectivity: Engineered with advanced Sub-1G long-range wireless tech, our leak detector maintains robust signals over unprecedented distances—reaching up to 1804 feet even through 5 dense walls. Secure every critical space in expansive properties, from deep basements to detached garages and distant outbuildings.

SMS, APP & Email Real-time Alerts: Connect the gateway to Wi-Fi, and it will instantly send SMS, APP, and email notifications and alerts to your phone when a water leak occurs, even if you're not at home, helping you locate the leak faster.
Regular Maintenance Tips
- Inspect Regularly: Check the area around your water heater every few months. Look for signs of moisture, corrosion, or any water buildup.
- Tighten Fittings: Ensure all connections and fittings are tight. Use a wrench to check and secure any loose parts.
- Check Temperature and Pressure: Keep the temperature below 120°F and maintain the pressure below 80 psi. This reduces stress on the plumbing.
- Flush the Tank: Flush your water heater annually to remove sediment buildup. This keeps the heater running efficiently and extends its lifespan.
- Examine Expansion Tank: If your system has an expansion tank, check it for proper functioning. Ensure it’s not fully pressurized, which affects the system’s performance.
- Consider Modern Options: Newer water heater models often have advanced safety features that reduce the risk of leaks. Look for energy-efficient models that offer better insulation.
- Install a Leak Detection System: Use smart leak detectors near your water heater. These devices alert you to leaks, enabling prompt action.
- Evaluate Pipe Materials: Upgrading old, corroded pipes to more durable materials, such as PEX or copper, can minimize the risk of leaks.
- Focus on Installation Quality: Ensure that installation is done correctly by qualified professionals. Poor installation often leads to leaks down the line.
- Think About Automatic Shut-off Valves: Install automatic shut-off valves that can cut off the water supply in case of a leak, minimizing potential damage.
By incorporating these preventive measures, you can significantly reduce the chances of encountering leaks on top of your water heater.
Conclusion
Addressing a leaking pipe on your water heater is crucial for maintaining your home’s safety and efficiency. By staying vigilant and recognizing the signs of a leak early on you can prevent costly damage and repairs.
Regular maintenance and inspections can go a long way in keeping your water heater in top shape. Don’t hesitate to tackle minor repairs yourself but know when it’s time to call in a professional.
With the right approach you can ensure your water heater runs smoothly and efficiently for years to come.
Frequently Asked Questions
What causes water pooling around my water heater?
Water pooling can often be due to leaking pipes, which may result from issues like corroded pipes, loose fittings, temperature changes, high water pressure, or faulty valves. It’s essential to identify the cause quickly to prevent further damage.
How can I detect a leak around my water heater?
Look for signs such as noticeable water buildup, damp walls or ceilings, rust stains, and unexpected spikes in your utility bills. Decreased water pressure can also indicate a leak. Conduct regular inspections for early detection.
What should I do if I find a leak?
If you detect a leak, shut off the main water supply immediately to prevent further damage. Use fans and dehumidifiers to help dry the area, and consider calling a professional if you’re unsure how to proceed.
Can I fix a leak around my water heater myself?
Yes, some minor leaks can be fixed using DIY methods, such as tightening loose fittings or applying epoxy putty. However, for significant leaks, it’s best to consult a professional to ensure safety and proper repairs.
How can I prevent future leaks around my water heater?
Regular maintenance is key to preventing leaks. Inspect the area consistently, tighten fittings, check water temperature and pressure, flush the tank annually, and consider installing leak detection systems or upgrading old pipes for added safety.

Hey, I’m Jake. I focus on cooling systems at Appliance Mastery, like fridges, freezers, and air conditioners.
I’ve worked in appliance repair for more than ten years and I’m certified through NASTeC. I’ve seen just about every fridge issue you can imagine.
My goal is to help you fix problems without stress. Whether it’s a freezer that won’t cool or an AC that keeps beeping, I’m here to walk you through it.