
Have you noticed water pooling around your hot water heater? A leak from the top element can be a frustrating and worrisome problem. It’s something many homeowners face, and it can lead to bigger issues if not addressed quickly.
In this article, you’ll find practical tips to identify the cause of the leak and steps to fix it. Whether it’s a loose connection or a faulty component, understanding the problem can save you time and money. Let’s tackle this issue together so you can get back to enjoying reliable hot water without the worry of leaks.
Key Takeaways
- Common Leak Causes: Leaks from the top of a hot water heater often arise from a faulty temperature and pressure relief (T&P) valve or loose connections and fittings.
- Identifying Signs of Leakage: Look for water accumulation around the heater and decreased water temperature as indicators that the system may be leaking.
- Diagnosing the Issue: Inspect the T&P valve and all connections for moisture or signs of rust to identify the source of the leak effectively.
- Fixing Loose Connections: Tighten any loose fittings and connections carefully to prevent damage and reduce leak occurrences.
- Replacing the T&P Valve: If the T&P valve is malfunctioning, replacing it can resolve leaks and restore the heater’s efficiency.
- Regular Maintenance: Routine inspections and maintenance of the water heater can help prevent leaks and ensure optimal performance.
Causes of Hot Water Heater Leaking From Top Element
A hot water heater leaking from the top element can stem from several issues. Identifying the root cause helps you address the problem efficiently.
Recommended Products

Provides Protection: Helps protect your RV or home water heater from excess temperature and water pressure
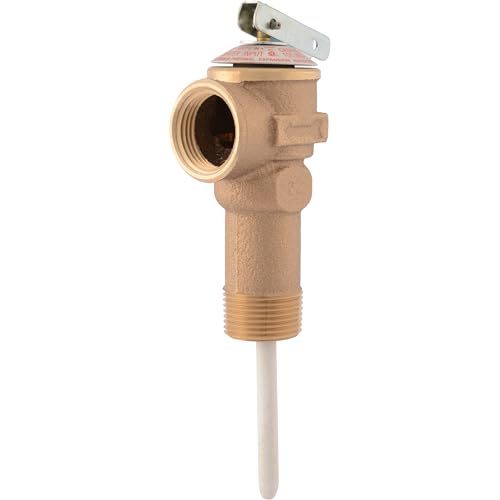
CASH ACME RELIEF VALVE: Cash Acme NCLX Combination Temperature and Pressure Relief Valves are designed for the protection of water heaters and storage tanks; incorporate an inert thermal element coating that provides effective isolation from mineral deposits (liming) and galvanic corrosion
Faulty Temperature and Pressure Relief Valve
A faulty temperature and pressure relief valve, or T&P valve, often leads to leaks. This valve helps regulate the pressure inside the tank. If it fails, it can cause water to escape from the valve.
To check if the T&P valve is the culprit, look for these signs:
- Water pooling around the valve.
- Constant dripping sounds.
- Rust or corrosion on the valve.
If you suspect the valve’s malfunctioning, you can replace it. Turn off the power to the heater, drain some water from the tank, and carefully unscrew the old valve. Install the new valve, securing it tightly to prevent further leaks.
Loose Connections and Fittings
Loose connections and fittings can also cause leaks. Over time, vibrations and temperature changes can loosen these components. Look for any visible signs of water at joints or fittings.
You can address this by tightening any loose connections with a wrench. Ensure you’re not over-tightening, which can cause damage. If you find any damaged fittings, replace them to restore watertight seals.
Maintaining these components regularly can help prevent leaks and ensure your water heater operates efficiently.
Signs of a Leak
Identifying signs of a leak early can save you from costly repairs. Pay attention to the following indicators that suggest your hot water heater may be leaking from the top element.
Water Accumulation Around the Heater
Noticeable puddles or water pooling around the base of your hot water heater typically signal a leak. Check for continuous wetness that doesn’t dry up within a short period. This accumulation often indicates a malfunctioning component, such as the T&P valve or loose fittings. Inspect the area regularly and clean it to ensure that any water present is from the heater, not condensation or other sources.
Decreased Water Temperature
Experiencing lukewarm water instead of hot could mean your heater is struggling to maintain optimal temperatures. If you notice a drop in water temperature, it may stem from a leak where hot water escapes before reaching your fixtures. This cooling effect happens as the leaked water mixes with the surrounding cold air. If you suspect this issue, check the top of the heater carefully for any dampness or dripping, which could confirm a leak.
How to Diagnose the Issue
Diagnosing a leak from the top element of your hot water heater requires careful inspection. Start by checking these critical areas to ensure proper functionality.
Recommended Products

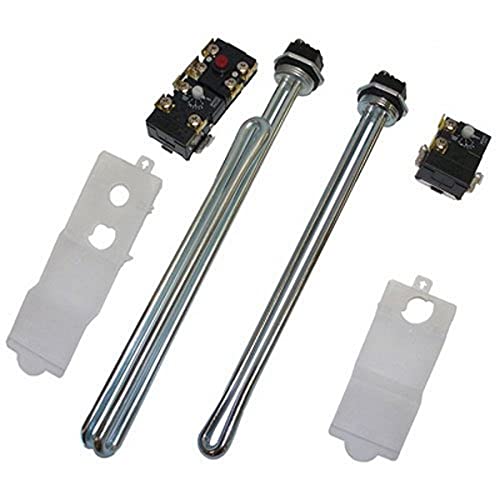
Size: Small.For best results, use only Rheem replacement parts for repairing your Rheem Water Heater Maximum Temperature Setting (Deg. F): 210, Maximum Pressure Setting...
Checking the Relief Valve
Check the temperature and pressure relief (T&P) valve for signs of leakage. This valve releases excess pressure from the tank. If it’s faulty, you may notice water pooling around it. Look for these indicators:
- Water accumulation on the floor.
- A dripping sound near the valve.
- Rust or corrosion around the valve.
If you see any of these signs, it might be time to replace the T&P valve. Follow these steps:
- Turn off the power supply to the heater.
- Shut off the cold water supply valve.
- Attach a hose to the T&P valve and drain the excess water.
- Remove the old valve and replace it with a new one, ensuring a tight fit.
Inspecting Connections and Pipes
Inspect all connections and pipes at the top of the heater. Loose fittings can lead to leaks. Pay attention to these areas:
- Check connection points for signs of moisture.
- Tighten any loose fittings with an adjustable wrench.
- Examine pipes for cracks or damage.
Use these steps to conduct your inspection:
- Turn off the power and water supply to stay safe.
- Dry the area with a towel to spot new moisture easily.
- Tighten connections until they feel secure but avoid overtightening, which can cause damage.
By systematically checking these components, you can identify the source of the leak and take appropriate action.
Solutions to Fix the Leak
Addressing a leak from the top element of your hot water heater requires methodical steps to ensure an effective repair. Follow these actionable solutions for a reliable fix.
Recommended Products
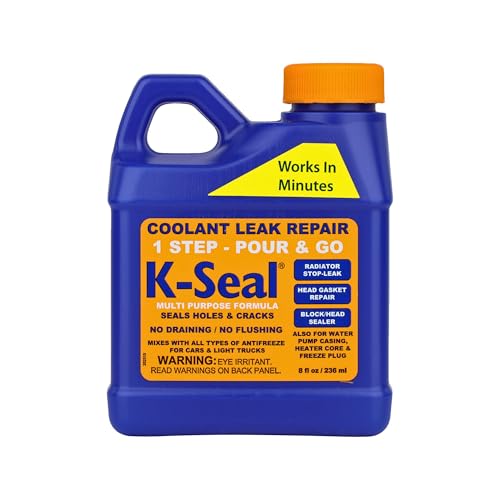
FIX IT FAST: Our multi-purpose solution works in minutes to quickly seal leaks in the radiator, head gasket, freeze plugs, block, heater matrix & water pump. Fixes most leaks in water-cooled engines
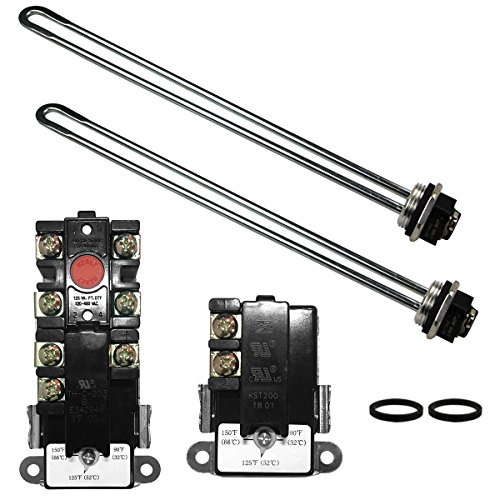
【ONE YEAR WARRANTY】Z Turn-up Kit Includes (2) 4500W 240V COPPER Water Heater Element, Insert Length: 13-9/16". 3500W@208V. Fit Most Brands of Water Heater >= 30 Gallons.
Tightening Connections
Start by checking all visible connections and fittings at the top of your hot water heater. You might find loose connections due to vibrations or temperature changes over time.
- Inspect the Connections: Look for moisture around any visible joints or fittings.
- Use a Wrench: Carefully tighten any loose fittings with an adjustable wrench. Avoid overtightening; this can cause damage.
- Check the Pipes: Examine the connecting pipes for signs of wear, rust, or cracks. If you notice anything out of the ordinary, replacement may be necessary.
Tightening connections can significantly reduce leaks and extend your water heater’s lifespan.
Replacing the Relief Valve
If you suspect the temperature and pressure relief (T&P) valve is at fault, replacing it is the next step. A malfunctioning T&P valve can lead to significant leaks.
- Turn Off Power and Water Supply: Switch off the heater and shut off the water supply to prevent flooding.
- Drain the Tank: Attach a hose to the drain valve at the bottom of the heater and drain a few gallons of water.
- Remove the Old Valve: Unscrew the old T&P valve using a wrench and inspect the threads. Clean them if necessary.
- Install the New Valve: Apply plumber’s tape on the threads of the new valve, then screw it into place. Ensure it’s tight but not over-torqued.
- Reconnect Water Supply: Open the water supply and check for leaks around the new valve.
Replacing the T&P valve can often resolve leaks effectively, restoring your hot water heater to proper function.
Conclusion
Addressing a leak from the top element of your hot water heater doesn’t have to be overwhelming. By staying vigilant and acting quickly you can prevent more serious issues down the line. Whether it’s a loose connection or a faulty T&P valve taking the time to inspect and fix the problem will save you both time and money.
Remember to always prioritize safety when working on your heater. If you ever feel unsure about the repairs don’t hesitate to call a professional. With a little effort you can keep your hot water heater running smoothly and enjoy reliable hot water for years to come.
Frequently Asked Questions
What causes water pooling around a hot water heater?
Water pooling around a hot water heater is often caused by leaks from the top element, typically due to a faulty temperature and pressure relief (T&P) valve or loose connections. Early detection of leaks can prevent further damage and costly repairs.
How can I identify a leak in my hot water heater?
Signs of a leak include water accumulation around the heater, dripping sounds, rust, and decreased water temperature. Checking for visible dampness or puddles around the base can help you identify the issue quickly.
What should I do if I suspect a faulty T&P valve?
If you suspect a faulty T&P valve, turn off the power and water supply, then drain the tank. Inspect the valve for leakage and replace it if necessary. Using plumber’s tape can help ensure a proper seal during reinstallation.
Can loose connections cause leaks in hot water heaters?
Yes, loose connections can lead to leaks due to vibrations and temperature changes. It’s important to inspect all fittings at the top of the heater and tighten any loose connections carefully to prevent leaks.
How can I fix a leak in my hot water heater?
To fix a leak, start by tightening all visible connections using a wrench, taking care not to overtighten. Check pipes for wear or damage, and replace any faulty components, such as the T&P valve, as needed.
When should I call a professional for hot water heater repairs?
If you’re unable to identify or fix the leak after following basic troubleshooting steps, or if the problem persists, it’s wise to call a professional. They can ensure safe and effective repairs to restore your hot water heater’s functionality.

Hey, I’m Jake. I focus on cooling systems at Appliance Mastery, like fridges, freezers, and air conditioners.
I’ve worked in appliance repair for more than ten years and I’m certified through NASTeC. I’ve seen just about every fridge issue you can imagine.
My goal is to help you fix problems without stress. Whether it’s a freezer that won’t cool or an AC that keeps beeping, I’m here to walk you through it.