
The E4 error on a Whirlpool dishwasher typically indicates a problem with the drain system. You can resolve this issue by checking the drain hose, filter, and sump area for blockages or damage.
Understand E4 Error Code Meaning
The E4 error code on a Whirlpool dishwasher can be a frustrating issue, often indicating a problem with water drainage. Understanding the specific meaning behind this code is crucial for diagnosing the underlying issue and taking the appropriate steps to resolve it. By familiarizing yourself with the E4 error, you can effectively troubleshoot and potentially fix the problem yourself.
The E4 error code on Whirlpool dishwashers signals an overflow condition. This can occur due to a malfunction in the drainage system or an issue with the water level sensor. Understanding the underlying causes is essential for effective troubleshooting.
Recommended Products
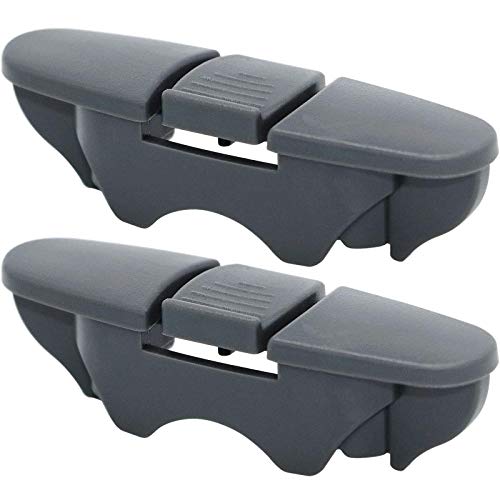
【𝑷𝑹𝑶𝑫𝑼𝑪𝑻 𝑺𝑷𝑬𝑪𝑰𝑭𝑰𝑪𝑨𝑻𝑰𝑶𝑵𝑺】- W10508950 dishwasher rack stop clip is located on both ends of the slide rail to...
Whirlpool Dishwasher E4 Error Diagnosis
Experiencing an E4 error on your Whirlpool dishwasher can be frustrating, but understanding its causes is the first step toward a solution. This section will guide you through the diagnostic process, helping you identify the underlying issues that trigger this error and empowering you to tackle the repairs yourself.
| Symptom | Primary Suspect | Difficulty (1-5) |
|---|---|---|
| E4 Error Code | Clogged Drain Hose | 3 |
| Water Overflow | Faulty Water Level Sensor | 4 |
| Poor Drainage | Dirty Filter | 2 |
Identify Root Causes of E4 Error
The E4 error in Whirlpool dishwashers can be frustrating, but understanding its root causes is the first step toward an effective DIY solution. By examining common issues that trigger this error, you can pinpoint the problem and take the necessary steps to restore your dishwasher’s functionality without the need for professional help.
Several factors can lead to the E4 error code. Identifying the root cause will help you focus your repair efforts effectively.
Clogged Drain Hose: A blockage in the drain hose can prevent proper drainage, causing the dishwasher to think it is overflowing.
Faulty Water Level Sensor: If the sensor malfunctions, it may incorrectly signal that water levels are too high.
Dirty Filter: A clogged filter can restrict water flow, leading to drainage issues.
Recommended Products

WHIRLPOOL GENUINE OEM Parts & Accessories are designed specifically for your appliance, meet tested engineering standards, and are crafted to ensure the quality of your appliance.
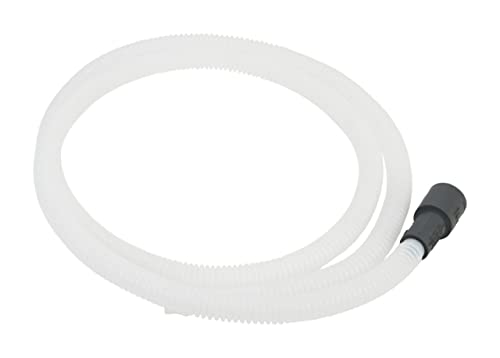
GENUINE OEM: Whirlpool Genuine OEM Accessories are designed specifically for your appliance, meet tested engineering standards, and are crafted to ensure the quality of your appliance, unlike non-OEM parts
Step-by-Step Fix for E4 Error
Encountering an E4 error on your Whirlpool dishwasher can be frustrating, but with the right approach, you can resolve it yourself. This guide provides a detailed, step-by-step process to diagnose and fix the issue, empowering you to save time and money while restoring your appliance to full functionality. Follow these instructions to tackle the problem effectively.
You can fix the E4 error with a few straightforward steps. Follow this guide to diagnose and resolve the issue.
Unplug the Dishwasher: Always disconnect the power before starting any repairs.
Inspect the Drain Hose:
Remove the drain hose from the back of the dishwasher.
Check for kinks or blockages.
Clear any debris you find.
Examine the Filter:
Locate the filter at the bottom of the dishwasher.
Remove it and clean it thoroughly under running water.
Replace the filter securely.
Check the Sump Area:
Remove the lower spray arm to access the sump.
Clear any debris or buildup in this area.
Test the Water Level Sensor:
Locate the sensor and inspect the wiring for damage.
If the sensor is faulty, replace it according to the manufacturer’s instructions.
Reconnect and Test:
Reattach the drain hose and filter.
Plug the dishwasher back in and run a test cycle.
Essential Tools for Whirlpool E4 Repair
When tackling the E4 error on your Whirlpool dishwasher, having the right tools can make all the difference in your repair process. This section outlines the essential tools you’ll need to efficiently diagnose and resolve the issue, empowering you to fix your appliance without the need for professional help. Equip yourself with these items to streamline your repair efforts.
Having the right tools and supplies will make the repair process smoother. Gather the following items before starting:
Screwdriver set
Towels for spills
Bucket for water collection
Replacement parts if necessary
Whirlpool Dishwasher E4 Error Troubleshooting Mistakes
When dealing with the E4 error on your Whirlpool dishwasher, it’s easy to overlook common troubleshooting mistakes. Understanding these pitfalls can save you time and frustration, allowing you to address the issue effectively. This section will highlight frequent errors that can occur during the diagnostic process and guide you toward a successful resolution.
When troubleshooting the E4 error, be aware of common pitfalls that can complicate repairs.
Ignoring the Filter: Many users overlook the filter, which can lead to recurring issues.
Not Checking the Hose: A damaged or kinked hose is often the primary cause of drainage problems.
Skipping the Sensor Check: Failing to inspect the water level sensor can lead to unnecessary replacements.
Maintenance Tips for Whirlpool Dishwashers
Proper maintenance is essential for keeping your Whirlpool dishwasher running smoothly and efficiently. Regular care not only extends the appliance’s lifespan but also helps prevent common issues, such as the E4 error. Implementing these maintenance tips can save you time and money, allowing you to enjoy hassle-free dishwashing.
Regular maintenance can help prevent the E4 error and extend the life of your dishwasher. Consider these tips:
Clean the Filter Monthly: Regular cleaning will prevent clogs and improve performance.
Inspect the Drain Hose: Periodically check for kinks or signs of wear.
Run Hot Water Before Starting: This can help dissolve grease and food particles more effectively.
Whirlpool Dishwasher E4 Error Professional Help
When faced with the E4 error on your Whirlpool dishwasher, it can be tempting to call for professional help. However, understanding the potential causes and solutions can empower you to tackle the issue yourself. This section will guide you through when it might be necessary to seek expert assistance and how to decide if a DIY fix is feasible.
If you have followed these steps and the E4 error persists, it may be time to consult a professional. Issues such as a malfunctioning control board or persistent drainage problems may require expert attention.
If you are unsure about any step or lack the necessary tools, professional help can save time and ensure a proper fix.

Hey, I’m Jake. I focus on cooling systems at Appliance Mastery, like fridges, freezers, and air conditioners.
I’ve worked in appliance repair for more than ten years and I’m certified through NASTeC. I’ve seen just about every fridge issue you can imagine.
My goal is to help you fix problems without stress. Whether it’s a freezer that won’t cool or an AC that keeps beeping, I’m here to walk you through it.