
Whirlpool gas range fault codes indicate specific issues that can arise during operation. Understanding these codes allows for effective troubleshooting and repair, saving time and money on unnecessary service calls.
Common Whirlpool Gas Range Fault Codes
Understanding the common fault codes for Whirlpool gas ranges is essential for effective troubleshooting and repair. These codes provide valuable insights into specific issues, allowing you to diagnose problems quickly and efficiently. By familiarizing yourself with these codes, you can tackle repairs like a professional and restore your appliance to optimal performance.
Whirlpool gas ranges display fault codes to help diagnose problems. Each code corresponds to a specific issue, allowing users to identify the root cause quickly. Familiarizing yourself with these codes is essential for efficient repairs.
| Fault Code | Description | Possible Cause |
|---|---|---|
| F0 | Control board failure | Faulty control board |
| F1 | Oven temperature sensor error | Defective temperature sensor |
| F3 | Open oven temperature sensor | Broken wiring or sensor failure |
| F5 | Door lock malfunction | Faulty door lock mechanism |
Whirlpool Gas Range Fault Code Causes
Understanding the causes behind fault codes on a Whirlpool gas range is essential for effective troubleshooting and repair. Each code signifies a specific issue, allowing you to pinpoint the problem quickly. This section delves into the common fault codes and their underlying causes, empowering you to address them with confidence.
Understanding the root cause of a fault code is critical for effective repair. Each code indicates a different issue that can stem from various components. Here are some common causes associated with the fault codes listed above.
F0: A control board failure may occur due to power surges or component wear. Inspect the control board for visible damage or loose connections.
F1: An oven temperature sensor error typically results from a faulty sensor or wiring issues. Test the sensor with a multimeter to confirm its functionality.
F3: An open oven temperature sensor can be caused by broken wiring or a defective sensor. Check the wiring harness for continuity and replace the sensor if necessary.
F5: A door lock malfunction often involves the door lock mechanism itself. Inspect the mechanism for debris or mechanical failure.
Whirlpool Gas Range Fault Code Troubleshooting Steps
When dealing with a Whirlpool gas range, understanding fault codes is essential for effective troubleshooting. These codes can indicate various issues, from ignition problems to temperature discrepancies. By following the outlined troubleshooting steps, you can diagnose and resolve these faults efficiently, ensuring your appliance operates smoothly.
Addressing fault codes requires a systematic approach. Follow these steps to diagnose and repair common issues.
Identify the Fault Code: Check the display for any fault codes and note them.
Refer to the Manual: Consult the Whirlpool user manual for specific troubleshooting steps related to the fault code.
Inspect Components: Examine the relevant components associated with the fault code. Look for signs of wear, damage, or loose connections.
Test Electrical Connections: Use a multimeter to test electrical connections and sensors for continuity.
Replace Defective Parts: If any components are found to be faulty, order and install replacements.
Reset the Range: After repairs, reset the gas range by unplugging it for a few minutes or turning off the circuit breaker.
Troubleshooting Tips for Whirlpool Gas Ranges
When dealing with issues in Whirlpool gas ranges, understanding common fault codes can significantly streamline the troubleshooting process. This section provides practical tips for diagnosing problems effectively, ensuring you can address malfunctions with confidence and precision. By following these guidelines, you can enhance your repair skills and maintain your appliance’s optimal performance.
Effective troubleshooting can prevent minor issues from escalating into major repairs. Here are some tips to keep in mind.
Regular Maintenance: Schedule routine maintenance to keep your gas range in optimal condition. Clean burners and check for gas leaks.
Use Quality Parts: When replacing components, always purchase high-quality OEM parts to ensure compatibility and reliability.
Document Repairs: Keep a record of any repairs made, including parts replaced and dates. This can help in future troubleshooting.
Recommended Products

𝗣𝗘𝗥𝗙𝗘𝗖𝗧 𝗙𝗜𝗧 - ① Compatible with Whirlpool Gas Stove Ranges WFG540H0AH0, WFG710H0AS0, WFG710H0AS1, WFG540H0AB0, WFG540H0AB1, WFG540H0AB2, WFG720H0AS0, WFG720H0AS1, WFG540H0AS0, WFG540H0AE0, WFG540H0AE1, WFG540H0AE2, WFG540H0AH1, WFG540H0AH2, WFG540H0AS2, WFG540H0AW0. ②Replaces part # 4248219, AP5958476, PS10067059, EAP10067059, W10430807, W10676228(If you encounter models that are not listed or uncertain, please contact us first for inquiries)
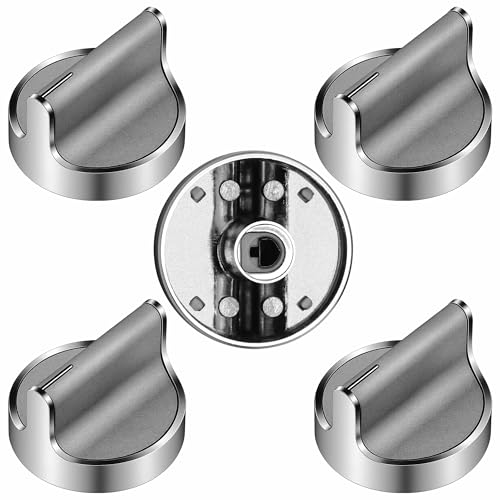
⚠️ Verify Size & D-Shaft Orientation Before Ordering- Our W10594481 whirlpool gas oven knobs replacements measure 2” diameter x 1-3/4” deep, with a 0.18” diameter D-shape shaft that extends 1/2” from the back. Install with the flat side of the D-shaft at the 3 o’clock position, so the valve indicator points straight to 12 o’clock for proper flame control. Knobs marked “OFF/Ignition” belong to W10766544 and are NOT compatible—double-check your shaft direction & knob markings to avoid mispurchase.

Compatibility:The 8523793 range surface burner igniter replacement for Whirlpool gas range series models, Compatible with Whirlpool oven igniter, Amana gas oven igniter, Jenn Air , Kenmore gas stove igniter, Magic Chef, Maytag and other brand.Part number 8523793 AP6012852 replacement 8273061, 939943, 74007473, 7432M126-60, AH650811, ER8523793, ER74009336, PS650811, EA650811, AP3175721, AP6012851, PS11746068, and WP8523793 (Please Note:To avoid purchasing errors, please confirm the model number of the required gas range stove ignitor electrode before ordering)
Whirlpool Gas Range Repair Safety Guidelines
When tackling repairs on a Whirlpool gas range, safety should always be the top priority. Understanding the specific safety guidelines can help prevent accidents and ensure a successful repair process. This section outlines essential precautions and best practices to follow while working on your appliance.
Safety should always be a priority when working on gas appliances. Follow these precautions to ensure a safe repair environment.
Disconnect Power: Always unplug the gas range or turn off the circuit breaker before starting any repairs.
Ventilate the Area: Ensure proper ventilation in the workspace to avoid gas buildup.
Check for Gas Leaks: After any repairs, test for gas leaks using soapy water on connections. Bubbles indicate a leak.
Final Thoughts on Whirlpool Gas Range Fault Codes
Understanding the fault codes of your Whirlpool gas range is essential for effective troubleshooting and repair. By familiarizing yourself with these codes, you can quickly identify issues and take appropriate action, ensuring your appliance operates smoothly. This section summarizes key insights and practical tips for addressing common problems associated with these fault codes.
Understanding and addressing fault codes on your Whirlpool gas range can enhance its longevity and performance. By following systematic troubleshooting steps and maintaining safety, you can effectively resolve issues. Always prioritize quality parts and regular maintenance for optimal results.

Hey, I’m Jake. I focus on cooling systems at Appliance Mastery, like fridges, freezers, and air conditioners.
I’ve worked in appliance repair for more than ten years and I’m certified through NASTeC. I’ve seen just about every fridge issue you can imagine.
My goal is to help you fix problems without stress. Whether it’s a freezer that won’t cool or an AC that keeps beeping, I’m here to walk you through it.