
Replacing the handle on a Whirlpool dryer is a straightforward process that enhances both functionality and aesthetics. This guide provides a step-by-step approach to ensure you can complete the task efficiently and effectively.
Whirlpool Dryer Handle Replacement Tools
When tackling the replacement of a Whirlpool dryer handle, having the right tools is essential for a smooth process. This section outlines the specific tools you’ll need to ensure an efficient and successful handle replacement, helping you avoid common pitfalls and achieve a professional finish. Equip yourself properly to make the task straightforward and manageable.
Before starting the replacement process, ensure you have all necessary tools and supplies on hand. This preparation will save time and reduce frustration during the repair. The following items are typically needed:
Replacement handle specific to your Whirlpool dryer model
Screwdriver set (Phillips and flathead)
Pliers for gripping and twisting
Work gloves to protect your hands
Safety goggles to shield your eyes
| Tool/Supply | Purpose |
|---|---|
| Replacement handle | To replace the old, broken handle |
| Screwdriver set | To remove screws securing the handle |
| Pliers | To assist with tight spaces |
| Work gloves | To protect hands during repairs |
| Safety goggles | To protect eyes from debris |
Recommended Products

W10861225 W10714516 Dryer Door Handle: W10861225 Dryer Door Handle is used to open and close the dryer door. Unbreakable W10861225 dryer handle replacement is made of strong ABS with smooth surface, non-toxic and resistant, not easy to break.You’ll need to replace this w10861225 amana dryer handle if the locking tab has broken off or door won’t close, causing the handle to continuously fall out. W10861225 W10714516 whirlpool dryer door handle is unbreakable, Solve your problems effectively
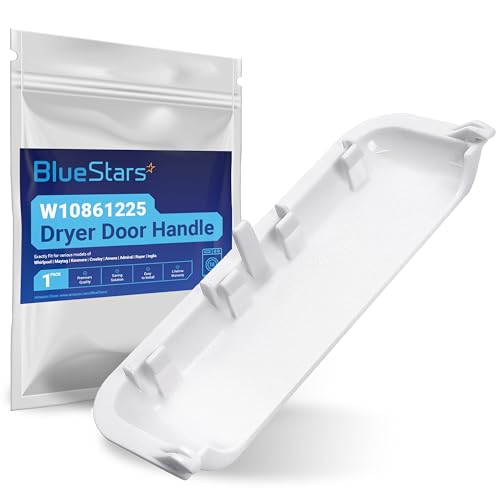
MODEL NUMBER: W10861225 Dryer Door Handle (5-3/4" x 2").
Replacement Door Handle for Whirlpool, Amana, Crosley, Maytag, Kenmore, Roper and many more brands.
Preparing Your Whirlpool Dryer for Handle Replacement
Before replacing the handle on your Whirlpool dryer, it’s essential to prepare the appliance properly to ensure a smooth process. This involves gathering the necessary tools, disconnecting power, and assessing the current handle for any specific issues. Taking these steps will help you avoid complications and make the replacement straightforward.
Prior to beginning the replacement, take a few moments to prepare your dryer. This ensures safety and allows for easier access to the handle area. Follow these steps:
Unplug the dryer from the electrical outlet to prevent any electrical hazards.
Clear the area around the dryer to provide ample workspace.
Inspect the old handle to determine how it is secured. Look for screws or clips that may need removal.
Always ensure the dryer is unplugged before starting any repairs.
Whirlpool Dryer Old Handle Removal Steps
Removing the old handle from your Whirlpool dryer is a straightforward process that requires careful attention to detail. This section outlines the necessary steps to ensure a smooth removal, allowing you to prepare for the installation of your new handle. Follow these instructions closely to avoid any potential damage to your appliance.
Once the dryer is prepared, you can proceed to remove the old handle. This step requires careful attention to avoid damaging surrounding components. Follow these instructions:
Locate the screws or clips that secure the handle.
Use the screwdriver to remove the screws. If clips are present, gently pry them off with the flathead screwdriver.
Carefully pull the handle away from the dryer door. If it’s stuck, use pliers to gently wiggle it free.
Recommended Products

[Compatible Models] Dryer Door Handle compatible Models] Compatible with Ama-na NED4655EW1, May-tag MEDC215EW1/ MEDX655DW1/ MEDC465HW0, Whirl-pool WED5000DW2/ WED4815EW1/ WED49STBW1/ WED7300DW1/ WED7000DW1 etc.
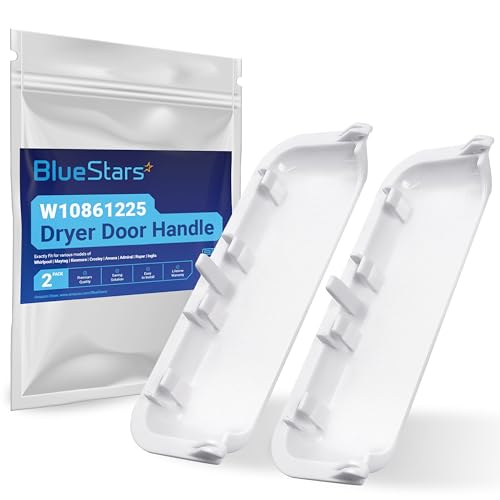
MODEL NUMBER: W10861225 Dryer Door Handle (5-3/4" x 2") - PACK OF 2.

【2 PACK W10861225 DRYER DOOR HANDLE】-- Includes 2 x W10861225 whirlpool dryer door handle. The W10861225 Amana dryer door handle replacement size: 5-3/4" x 2". The W10861225 whirlpool dryer handle replacement is perfectly and snapped right into place. W10861225 Dryer door handle Used to open and close the dryer door. If you pull on the handle too hard, the plastic will break. If the latch falls off, causing the handle to keep falling off, then the W10861225 whirlpool dryer handle needs to be replaced
Whirlpool Dryer Handle Installation Steps
Installing a replacement handle on your Whirlpool dryer can seem daunting, but with the right guidance, the process becomes manageable. This section provides clear, step-by-step instructions to help you successfully replace the handle, ensuring your dryer remains functional and easy to use. Follow these detailed steps to restore your appliance efficiently.
With the old handle removed, installing the new one is the next step. This process is straightforward but requires precision to ensure proper alignment. Follow these steps:
Align the new handle with the screw holes or clips on the dryer door.
Insert screws into the holes and tighten them securely using the screwdriver. Ensure the handle is firmly attached.
Test the handle by pulling it gently to confirm it is securely installed.
Whirlpool Dryer Handle Installation Challenges
Installing a replacement handle on a Whirlpool dryer can present several challenges that may not be immediately apparent. From ensuring the correct fit to managing the screws and components, each step requires careful attention to detail. Understanding these potential hurdles will help streamline the installation process and ensure a successful repair.
Sometimes, even after a successful installation, issues may arise. Understanding these common problems can help you address them quickly. Here are a few potential issues:
Handle feels loose: Check if screws are tightened properly.
Handle does not align: Verify that the replacement handle is compatible with your specific Whirlpool dryer model.
Difficulty opening door: Ensure that the handle is installed correctly and not obstructing the door mechanism.
Whirlpool Dryer Handle Maintenance Practices
Maintaining the handle of your Whirlpool dryer is essential for both functionality and safety. Regular inspections and proper care can prevent wear and ensure smooth operation. This section outlines effective practices to keep your dryer handle in optimal condition, enhancing its longevity and performance.
To ensure the longevity of your new handle, consider implementing a few maintenance practices. Regular care can prevent future issues and extend the life of your dryer components. Here are some tips:
Regularly inspect the handle for signs of wear or damage.
Clean the handle with a mild detergent to remove dirt and grime.
Avoid excessive force when opening or closing the dryer door.
Always use compatible parts to prevent damage to your appliance.
Whirlpool Dryer Handle Installation Testing
Installing a replacement handle on your Whirlpool dryer is a straightforward process, but ensuring it functions correctly is crucial for optimal performance. This section outlines the essential steps for testing the newly installed handle, helping you confirm that everything is secure and operational before putting your dryer back into regular use.
After installation, it is crucial to test the dryer to confirm everything is functioning as expected. Follow these steps:
Plug the dryer back in and ensure it powers on.
Open and close the door using the new handle to test its functionality.
Run a short cycle to ensure the dryer operates without issues.
By following these steps, you can successfully replace the handle on your Whirlpool dryer and maintain its functionality.

Hey, I’m Jake. I focus on cooling systems at Appliance Mastery, like fridges, freezers, and air conditioners.
I’ve worked in appliance repair for more than ten years and I’m certified through NASTeC. I’ve seen just about every fridge issue you can imagine.
My goal is to help you fix problems without stress. Whether it’s a freezer that won’t cool or an AC that keeps beeping, I’m here to walk you through it.