
Ever wondered why your dryer doesn’t seem to dry as efficiently as it used to? Picture this: you keep tossing in damp laundry, only to find it still wet after a full cycle. Frustrating, right? Well, what if we told you that testing your dryer’s moisture sensor could be the key to solving this drying dilemma?
Understanding the Moisture Sensor on Dryer
To ensure your dryer functions efficiently, it’s essential to understand the moisture sensor. Here’s a closer look at how it works and why it’s crucial in the drying process:
- The moisture sensor detects the moisture level in the laundry.
- When your clothes reach the desired dryness level, the sensor signals the dryer to stop.
- This feature is designed to prevent over-drying and save energy.
Why Test the Moisture Sensor?
- A faulty sensor can lead to inefficient drying cycles.
- Testing the sensor ensures it accurately detects moisture levels.
- Regular testing helps maintain the dryer’s performance.
How to Test the Moisture Sensor with a Multimeter
- Unplug the dryer before starting any maintenance work.
- Locate the moisture sensor – typically near the dryer vent.
- Set your multimeter to measure resistance.
- Test the moisture sensor by placing the multimeter probes on its terminals.
- A functional sensor should show a certain resistance reading.
- Improves drying efficiency and reduces energy consumption.
- Extends the lifespan of your dryer.
- Ensures your clothes are dried properly.
Remember, understanding and testing the moisture sensor can go a long way in optimizing your dryer’s performance.
Gathering the Necessary Tools
To test the moisture sensor on your dryer with a multimeter, you’ll need a few essential tools for the job. Here’s what you’ll require:
- Multimeter: This device measures electrical resistance and is vital for checking the moisture sensor’s functionality.
- Screwdriver: Use a screwdriver to remove panels and access the sensor inside your dryer.
- User Manual: Refer to the user manual for your specific dryer model to locate the moisture sensor.
Remember, having these tools on hand will make the testing process smoother and more effective.
Testing the Moisture Sensor with a Multimeter
Testing the moisture sensor with a multimeter ensures your dryer functions optimally:
- Step 1: Set your multimeter to measure resistance on the ohm scale.
- Step 2: Disconnect your dryer from the power supply.
- Step 3: Locate the moisture sensor in your dryer. It’s often near the lint screen or blower wheel.
- Step 4: Remove the wires connected to the moisture sensor.
- Step 5: Place the multimeter’s probes on the moisture sensor terminals.
Proper testing of the sensor with a multimeter validates its functionality and helps prevent issues with drying cycles.
Interpreting the Results
Once you’ve tested the moisture sensor on your dryer with a multimeter, it’s crucial to interpret the results accurately. Here’s what to consider:
- Normal reading: If the multimeter displays a resistance value within the expected range, typically 10-50 kilohms, your moisture sensor is likely functioning correctly.
- Low reading: A lower resistance value may indicate a wet sensor, wiring issues, or a faulty component. Cleaning the sensor or checking the wiring can help determine the cause.
- High reading: Conversely, a higher resistance value could signal a dry sensor or wiring problem, necessitating further inspection or repair.
Remember, accurate interpretation is key to identifying issues with your moisture sensor and ensuring efficient dryer performance.
Troubleshooting and Next Steps
When testing your dryer’s moisture sensor with a multimeter, different readings can lead to various issues. Here are some troubleshooting tips and what to do next:
- Low Reading (Below 10 kilohms):
- Indicates a wet sensor or wiring problems.
- Check for moisture on the sensor and ensure proper wiring connections.
- Normal Reading (10-50 kilohms):
- Signifies correct sensor functionality.
- Proceed with regular dryer use but monitor for changes in performance.
- High Reading (Above 50 kilohms):
- Suggests a dry sensor or wiring issues.
- Inspect the sensor for contaminants and examine the wiring for any faults.
If you encounter persistent issues after testing, consider contacting a professional repair service for further diagnostics and solutions. Regular maintenance and timely repairs can ensure optimal performance of your dryer.
Recommended Products

DC61-02627A Moisture Plate Sensor Fits for Samsung Kenmore Dryer.
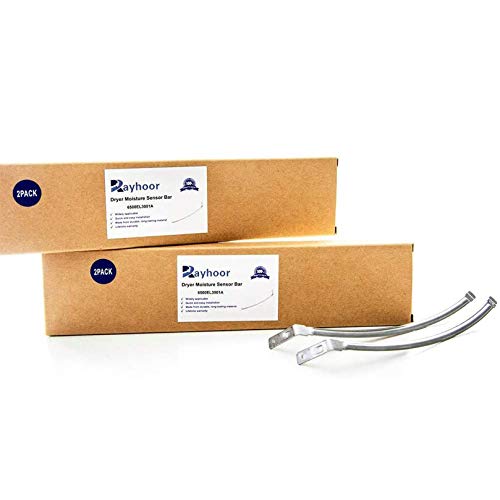
【Perfect Replacement】 Our 2 Pack 6500EL3001A Dryer Moisture Sensor Bar replaces part numbers: 6500el3001a, pd00001914, 1268224, ap4445128, eap3529161, eap3529161.

# Moisture Sensor Plate Bar Number DC61-02627A, replace for Kem-more Sam-sung part 2069516, AP4578789, PS4206812, EAP4206812, PD00023015. IMPORTANT NOTE: Please check your dryer model number carefully before ordering, Confirm this moisture sensor plate bar fits or not. IMPORTANT, IMPORTANT, IMPORTANT.
Conclusion
You now have a clear understanding of how to test your dryer’s moisture sensor using a multimeter. By interpreting the readings accurately, you can identify potential issues with the sensor or wiring. Remember, a low, normal, or high reading indicates different scenarios that require specific troubleshooting steps. Checking for moisture, ensuring proper connections, and inspecting the sensor are key to maintaining your dryer’s efficiency. If problems persist, don’t hesitate to seek professional help. Regular maintenance is crucial for keeping your dryer in top condition. Happy testing!
Frequently Asked Questions
What should I do if my multimeter displays readings below 10 kilohms when testing my dryer’s moisture sensor?
If your multimeter reads below 10 kilohms, it indicates a wet sensor or wiring issues. Check for moisture in the sensor and wiring connections, dry them thoroughly, and retest the sensor.
What does a multimeter reading of 10-50 kilohms mean for my dryer’s moisture sensor?
A reading between 10-50 kilohms is considered normal and indicates proper sensor functionality. This range signifies that the sensor is working correctly.
What does it indicate if my multimeter shows a reading above 50 kilohms when testing the dryer’s moisture sensor?
If the multimeter displays a reading above 50 kilohms, it suggests a dry sensor or wiring problems. Inspect the sensor for contaminants and ensure proper wiring connections.
When should I consider seeking professional repair services for my dryer’s moisture sensor issues?
If troubleshooting steps do not resolve the issue or if the problems persist, it is advisable to seek professional repair services. They can diagnose and fix complex issues to ensure optimal dryer performance.
Why is regular maintenance essential for my dryer’s optimal performance?
Regular maintenance helps in detecting and addressing issues early before they escalate. It ensures that the dryer operates efficiently, prolongs its lifespan, and prevents costly repairs in the future.

Hi, I’m Charlie, and I cover all things laundry here at Appliance Mastery.
I’ve spent over eight years working on washing machines, dryers, and dishwashers. I also have a degree in mechanical engineering, which helps me understand how these appliances really work.
I try to make every guide clear and practical. If you’re stuck with a noisy dryer or a leaking washer, I’ll help you figure out what’s wrong and how to fix it.