
Ever wondered if you can give your washer and dryer a fresh new look with a splash of paint? Picture this: your laundry room could be transformed from dull to delightful with a simple DIY project. In this article, you’ll discover the secrets to revamping your appliances and adding a personal touch to your home decor.
Imagine the satisfaction of customizing your washer and dryer to match your style and color scheme. With a few easy steps, you can breathe new life into these essential appliances and elevate the aesthetic of your laundry space. Get ready to unleash your creativity and make your laundry room a place you’ll love to spend time in.
Benefits of Painting Your Washer and Dryer
When it comes to painting your washer and dryer, there are several benefits to consider. Here are some key advantages of embarking on this DIY project:
- Customization: Transforming the color of your appliances allows you to personalize them to match your unique style and preferences.
- Cost-Effective: Painting your washer and dryer is a budget-friendly way to update the look of your laundry room without the expense of purchasing new appliances.
- Enhanced Aesthetics: By giving your appliances a fresh coat of paint, you can revamp the appearance of your laundry space and create a cohesive design.
- Creativity: This project offers an opportunity to unleash your creativity and experiment with different colors and finishes to achieve the desired look.
- Renewed Appeal: Refreshing the look of your washer and dryer can renew your enjoyment of using these essential appliances and make laundry time feel less like a chore.
In the next section, we’ll delve into the step-by-step process of painting your washer and dryer to help you achieve professional results.
Choosing the Right Type of Paint
When painting your washer and dryer, it’s crucial to use the right type of paint to ensure a long-lasting and durable finish. Here are some key points to consider:
- Appliance Epoxy Paint: Specifically designed for appliances, this type of paint is durable and resistant to stains and heat.
- Latex Paint: While more budget-friendly, it may not be as durable or scratch-resistant as epoxy paint.
- Spray Paint: Provides a smooth and even finish, ideal for appliances with intricate details.
Remember to thoroughly clean and lightly sand your washer and dryer before applying any paint to ensure better adhesion.
Recommended Products

Ideal for refinishing exterior metal surfaces including refrigerators, dishwashers, laundry machines and more
Ideal for refinishing exterior metal surfaces including refrigerators, dishwashers, laundry machines and more

Ideal for refinishing exterior metal surfaces including refrigerators, dishwashers, laundry machines and more
Preparing Your Appliances for Painting
When preparing your washer and dryer for painting, it’s crucial to thoroughly clean them first to remove any dirt, grease, or residue. Use a mild detergent and water to wash the surfaces and ensure they are completely dry before moving on to the next step.
Next, sand the appliances with fine-grit sandpaper to create a rough surface that the paint can adhere to. This step is essential for achieving a long-lasting finish on your washer and dryer. Be sure to sand in the direction of the grain to avoid damaging the appliance’s surface.
After sanding, remove any dust or particles by wiping the appliances down with a tack cloth. This will help ensure a smooth application of paint and prevent any imperfections in the finish.
To protect the surrounding area from paint overspray, consider taping off any parts of the washer and dryer that you don’t want to paint. This will help you achieve clean, precise lines and avoid any accidental paint splatter on other surfaces.
Lastly, choose a well-ventilated area for painting your appliances to ensure proper air circulation and wear a mask to protect yourself from paint fumes. These precautions will help create a safe environment for your painting project.
Recommended Products

Clean paint brushes and rollers without making your sink a mess. Let the Washbox get dirty while your sink stays clean! NOW INCLUDES A PLUG FOR SOAKING BRUSHES AND ROLLERS!

Stainless Steel Leak-Proof Brush Washer with clip-on lid with a watertight rubber seal
Stainless Steel Leak-Proof Brush Washer with clip-on lid with a watertight rubber seal
Step-by-Step Guide to Painting Your Washer and Dryer
Here’s a straightforward guide to painting your washer and dryer:
- Preparation:
- Clean the appliances thoroughly with a mild detergent.
- Sand them with fine-grit sandpaper. Sanding along the grain is crucial.
- Use a tack cloth to eliminate dust for a smoother paint application.
- Painting Process:
- Tape off any areas you don’t want to paint.
- Choose a well-ventilated location for painting.
- Wear a mask for protection against paint fumes.
- Paint Application:
- Start with a high-quality primer specifically formulated for metal surfaces.
- Apply thin, even coats of paint, allowing each coat to dry completely.
- Use a paint sprayer or high-density foam roller for a professional finish.
- Drying and Curing:
- Let the appliances dry for the recommended time between coats.
- Allow the final coat to cure for at least 24 hours before using the washer and dryer.
Remember, patience and attention to detail are key to achieving a beautiful and long-lasting painted finish on your appliances.
Recommended Products

Weather and corrosion resistant primer bonds tightly to exterior/interior surfaces like wood, metal, concrete, masonry and more to provide excellent adhesion for top coat

Ideal for refinishing exterior metal surfaces including refrigerators, dishwashers, laundry machines and more
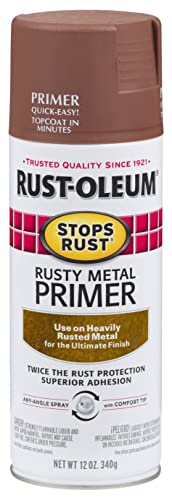
Use to prime exterior or interior heavily rusted metal surfaces only
Tips for Maintaining the Painted Finish
To ensure your painted washer and dryer look great for years to come, here are some helpful tips:
- Regular Cleaning: Wipe down the appliances with a soft cloth and mild detergent to keep them looking fresh.
- Avoid Abrasive Cleaners: Steer clear of harsh chemicals or scrubbing pads that could damage the painted surface.
- Gentle Handling: Be careful when moving or using the appliances to prevent scratches or chipping.
- Touch-Up as Needed: Keep some extra paint for touch-ups in case of minor nicks or scratches.
- Proper Ventilation: Maintain good airflow around the appliances to prevent moisture buildup that could affect the paint.
- Wait for Curing: Give the final coat ample time to cure fully before putting the appliances back into regular use.
| Statistics | Data |
|---|---|
| Paint Cure Time | 24 hours |
| Cleaning Frequency | Regularly |
| Touch-Up Paint | Available |
Conclusion
You’ve now learned the essential steps and tips for successfully painting your washer and dryer. By following the guide provided, you can achieve a fresh and durable finish that will revamp the look of your appliances. Remember to prioritize proper cleaning, sanding, and painting techniques to ensure a long-lasting result. Maintaining the painted finish is key, so be sure to handle your appliances with care and use mild detergents for cleaning. With the right approach, your painted washer and dryer can maintain their new look for a long time. Happy painting!
Frequently Asked Questions
Q: What are the key steps for painting my washer and dryer?
A: The key steps include cleaning, sanding, priming, and painting with thin, even coats for a durable finish.
Q: What type of primer should I use for painting my washer and dryer?
A: It is recommended to use a high-quality primer suitable for metal surfaces.
Q: How should I maintain the painted finish on my washer and dryer?
A: Maintain the finish by regularly cleaning with mild detergent, avoiding abrasive cleaners, and handling gently to prevent damage.
Q: How long does the paint on my washer and dryer need to cure?
A: Allow the final coat of paint to cure fully for at least 24 hours.
Q: What should I do if the painted finish on my washer and dryer gets damaged?
A: Keep extra paint for touch-ups to ensure the finish stays looking fresh.

Hi, I’m Charlie, and I cover all things laundry here at Appliance Mastery.
I’ve spent over eight years working on washing machines, dryers, and dishwashers. I also have a degree in mechanical engineering, which helps me understand how these appliances really work.
I try to make every guide clear and practical. If you’re stuck with a noisy dryer or a leaking washer, I’ll help you figure out what’s wrong and how to fix it.