
Have you ever tried to cook a meal only to find your GE stove element isn’t working? It’s frustrating when you’re ready to whip up your favorite dish, and suddenly, your stove lets you down. You’re not alone—many people face this issue at some point.
Key Takeaways
- Common Issues: GE stove elements often face challenges like burners not heating, uneven cooking, and connection problems. Understanding these issues can simplify troubleshooting.
- Troubleshooting Steps: Check your power supply, inspect the heating element for damage, and test the burner switch to identify the problem quickly.
- Signs to Call for Help: Persistent heating issues, unusual noises, visible damage, and frequent circuit breaker tripping may indicate the need for professional repairs.
- Repair vs. Replacement: Evaluate repair costs (typically $100 to $300) against replacement part prices ($30 to $150) and consider your stove’s age when making a decision.
- Preventative Maintenance: Regular cleaning and periodic inspections help maintain GE stove elements, enhancing their lifespan and cooking performance.
Common Issues With GE Stove Elements
Many users encounter issues with GE stove elements. Understanding these common problems can help you troubleshoot effectively.
Recommended Products

Comes with burners 2pcs x WB30M1 6in and 2pcs WB30M2 8in, Stove Burner Covers 2pcs x Drip Pans 6in and 2pcs x Drip Pans 8in

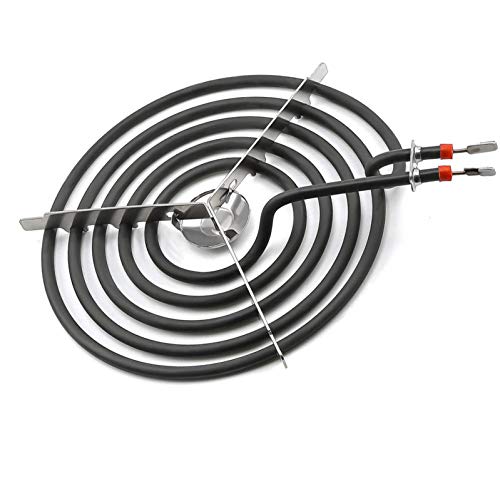
【𝗪𝗕𝟯𝟬𝗧𝟭𝟬𝟬𝟳𝟰 𝗦𝗨𝗥𝗙𝗔𝗖𝗘 𝗕𝗨𝗥𝗡𝗘𝗥 𝗘𝗟𝗘𝗠𝗘𝗡𝗧】:The 8" WB30T10074 Surface Burner Element is for stoves.The WB30T10074 burner element has 5 turns of coil, 1 "Y" bracket and is RATED at 2600 watts, 240 volts.The surface element delivers heat to the cooking zone at the top of the range for a quick and even heating area. Product includes 1 x 8-inch plug-in burner.

【Compatibility】This stove burner replacement set fits for most ranges. Reminder: It does not fit for GE and Hotpoint. If you select the wrong burner set, it will not fit your stove. If you are not sure whether the product is compatible with your stove, please feel free to contact us, we will help you confirm it. Replace part number: 484782, 9761347, 12001231, S46Y15, 5304431014, 484783, SU204, 04000034, 0045546, 0051088, 0054794, 0067069, 0071930, 3374, AP3075808, PS340571, EAP340571.
Burners Not Heating
Burners not heating typically indicates a malfunction. Inspect the following areas:
- Power Supply: Check if the stove is plugged in and if the circuit breaker is functioning. A blown fuse or tripped circuit can prevent the burner from operating.
- Element Condition: Examine the heating element for visible damage, such as cracks or breaks. A damaged element needs replacement.
- Connection Issues: Ensure the element is secure in its socket. Loose connections can disrupt functionality.
- Control Settings: Verify that the burner settings are correctly adjusted. Sometimes, the knob could be stuck or not fully engaged.
Uneven Cooking
Uneven cooking presents another challenge with GE stove elements. Consider these factors:
- Element Positioning: If the element isn’t aligned correctly, it might not distribute heat evenly. Ensure proper placement.
- Pan Size and Type: Use cookware appropriate for the burner size. Oversized or mismatched pans can result in hot spots or cold areas.
- Element Differences: Understand that some elements provide varying heat levels. More powerful burners cook faster but require monitoring.
Identifying these issues can streamline your cooking process and enhance your stove’s efficiency.
Troubleshooting Steps
Follow these steps to identify and resolve issues with your GE stove element.
Recommended Products

✅【𝗘𝗥𝗦𝟯𝟬𝗠𝟭&𝗘𝗥𝗦𝟯𝟬𝗠𝟮 𝗦𝘁𝗼𝘃𝗲 𝗘𝗹𝗲𝗰𝘁𝗿𝗶𝗰 𝗕𝘂𝗿𝗻𝗲𝗿】:①ERS30M1 5 Turn 6 inch:1350 watts, 208/240 volts. ②ERS30M2 6 turn 8 inch: 208V-240V, 1765W-2350W. ge Electric Range Burner Element,ge Stove Electric Burner Replacement transfer heat to the cooking area at the top of the range, generating much needed heat for your stove to achieve fast and even heating of the area.☞The WB30M1(ERS30M1) surface element is 5 Turn 6 inch with a silver center medallion. ☞The WB30M2(ERS30M2) surface element is 6 turn 8 inch with silver center medallions. Both surface elements are rated at 240V.

[Product specification]: ERS30M1 5 Turn 6 inch:1350 watts, 208/240 volts. replaces: 2912, 340523, AH243867, CH30M1, EA243867, PS243867, WB30M0001, WB30X5071, WB30X5109, WB30X5119, WB30X5121, WB30X5129, YCH30M1, B003BNZ4ZE, B003N6T03G. ERS30M2 6 turn 8 inch: 208V-240V, 1765W-2350W. replaces: WB30M2, CH30M2, AP2634728, 2797, 340524, AH243868, EA243868, PS243868, WB30K5027, WB30M0002, WB30X5072, WB30X5120, WB30X5122, WB30X5130., B003BNZ4Z4

[Premium Quality WB30M2 WB30M1 Electric Stove Burners Replacement Kit]: WB30M1 WB30M2 stove burner replacement are made of high temperature resistant 304 stainless steel, new nickel-chrome internal heating wire, which heats up evenly and quickly during use, providing heat for the cooking zone at the top of the stove, with a maximum temperature resistance of 1292°.This ERS30M1&ERS30M2 stove electric burner are internally filled with insulating magnesium oxide powder, which still maintains good insulating properties at high temperatures.Upgraded nickel chrome makes the WB30M1 WB30M2 coil burner replacement parts have been tested many times by the manufacturer for reliability and longer use
Checking Power Supply
Ensure the stove is plugged into a functional outlet. Test the outlet using another appliance. If the outlet works, verify the circuit breaker hasn’t tripped. A tripped breaker can cut power to the stove. Reset the breaker if necessary, and try turning on the stove again.
Inspecting the Element
Examine the stove element for visible signs of damage. Look for cracks, burns, or warping on the surface of the element. If the element appears damaged, replacement is necessary. To remove the element, disconnect it following your stove’s user manual. Install a new element to test if that resolves the issue.
Testing the Burner Switch
Check the burner switch by turning it on and listening for a click. If you don’t hear a click, the switch may be faulty. Use a multimeter to test the continuity of the switch. If no continuity is present, replacing the switch can restore functionality. Follow your manual for detailed replacement instructions.
When to Seek Professional Help
Knowing when to contact a professional for help with your GE stove element can save time and prevent further issues. If you’ve tried troubleshooting and the problem persists, consider these indicators.
Signs of Major Malfunctions
- Persistent Heating Issues: If burners remain cold despite your attempts to troubleshoot, it signals a possible internal failure.
- Burner Noises: Unusual clicking, buzzing, or popping sounds may indicate electrical issues or problems with the element itself.
- Visible Damage: Inspect the stove element for cracks or breaks. Significant damage often requires replacement beyond DIY repairs.
- Frequent Tripping: If the circuit breaker trips regularly when using the stove, it points to a possible electrical short that requires expert evaluation.
- Repair Costs: Typical repair costs for a malfunctioning element can range from $100 to $300, depending on parts and labor.
- Replacement Parts: New elements may range from $30 to $150. Weigh this against repair costs and consider your stove’s age.
- Warranty Status: Review the warranty for your stove. If it’s still valid, professional repairs might be covered, minimizing your out-of-pocket expenses.
- Long-Term Value: Assess whether investing in repairs enhances your stove’s value or if replacing the entire unit is more economical in the long run.
Preventative Maintenance Tips
Keeping your GE stove elements in good condition enhances cooking performance and lifespan. Follow these tips for optimal maintenance.
Recommended Products

👉 Compatible with Model : Compatible with GE & Hotpoint electric stove. Drip pans fit with burner elements perfectly to save the hassle of choosing the size.
[Product Specifications]:The 8-inch (approximately 20.3 cm) burner element has 5 turns. Turns are the number of times the coil is wound in a circle. Rated at 2600 watts, 240 volts. Meets or exceeds original equipment specifications. (XL=Please refer to pictures, measurements and part numbers to determine if this part fits your model unit)

This surface element (part number WB30X31057) is for ranges. Surface element WB30X31057 supplies the heat to a cooking area on top of the range.
Regular Cleaning
Clean your stove elements regularly to prevent buildup. Use a damp cloth and mild detergent for surfaces. Avoid harsh chemicals or abrasive sponges that could scratch. For stubborn stains, apply a paste of baking soda and water, let it sit for 15 minutes, then gently scrub. Regularly remove any food debris from the burners, as this can obstruct heat and cause uneven cooking.
Periodic Inspections
Inspect your stove elements periodically to catch issues early. Look for visible signs of wear, such as cracks or burns. Test each element by turning it on and observing heat distribution. If an element fails to heat or shows inconsistent performance, it might require replacement. Check connections to ensure they’re secure and free of corrosion. Performing these checks every few months can extend the life of your stove and prevent unexpected failures.
Conclusion
Dealing with a GE stove element that won’t work can be a real hassle. By following the troubleshooting steps and maintenance tips shared, you can often resolve the issue or at least pinpoint what might be wrong.
Remember to stay proactive with regular checks and cleanings to keep your stove in great shape. If you find yourself facing persistent problems or major malfunctions, don’t hesitate to reach out to a professional.
With a little care and attention, you can enjoy cooking again without the stress of a malfunctioning stove element. Happy cooking!
Frequently Asked Questions
What are common issues with GE stove elements?
Many users face issues like burners not heating and uneven cooking. These problems can stem from power supply issues, damaged elements, or incorrect control settings. Proper maintenance and inspection can help address these issues effectively.
How can I troubleshoot a GE stove element that won’t heat?
Start by checking the power supply and ensuring the stove is plugged into a working outlet. Inspect the element for damage and secure connections, and verify that the control settings are correct. If these steps don’t help, consider testing the burner switch.
Why is my GE stove cooking unevenly?
Uneven cooking can be caused by improper element positioning, using the wrong pan size or type, or misunderstanding the element’s heat levels. Make sure to use the right cookware and position it correctly for optimal performance.
When should I seek professional help for my GE stove?
Contact a technician if you notice persistent heating issues, unusual burner noises, visible damage, or frequent circuit breaker tripping. These signs can indicate major malfunctions that require expert attention.
What are the repair costs for GE stove elements?
Repair costs can range from $100 to $300, depending on the issue. Replacement parts typically cost between $30 and $150. It’s important to assess your stove’s age and warranty status when deciding whether to repair or replace.
How can I maintain my GE stove elements?
Regular maintenance includes cleaning with a damp cloth and mild detergent, avoiding harsh chemicals, and removing food debris. Periodically inspect the stove for wear and secure connections, and check heat distribution every few months to catch potential problems early.

Hey, I’m Jake. I focus on cooling systems at Appliance Mastery, like fridges, freezers, and air conditioners.
I’ve worked in appliance repair for more than ten years and I’m certified through NASTeC. I’ve seen just about every fridge issue you can imagine.
My goal is to help you fix problems without stress. Whether it’s a freezer that won’t cool or an AC that keeps beeping, I’m here to walk you through it.