
Replacing the thermal fuse on a Whirlpool dryer is a straightforward task that can restore functionality to your appliance. This repair typically resolves issues like the dryer not heating or running, allowing you to get back to laundry without professional help.
Whirlpool Dryer Thermal Fuse Failure Symptoms
Understanding the symptoms of a faulty thermal fuse is crucial for effective troubleshooting. Common indicators include the dryer not starting, no heat during cycles, or the appliance shutting off unexpectedly. Recognizing these signs early can prevent further damage and save on repair costs.
| Symptom | Primary Suspect | Difficulty (1-5) |
|---|---|---|
| Dryer does not start | Thermal fuse | 3 |
| No heat during cycles | Thermal fuse | 4 |
| Dryer shuts off mid-cycle | Thermal fuse | 3 |
Essential Tools for Whirlpool Dryer Repair
To effectively replace the thermal fuse on a Whirlpool dryer, having the right tools is crucial for a successful repair. This section outlines the essential tools you’ll need to ensure the process is straightforward and efficient, making it easier for beginners to tackle this common appliance issue with confidence.
Before starting the replacement process, gather all necessary tools and supplies. Having everything ready will streamline the repair and reduce the risk of errors. Essential items include:
Screwdriver set (Phillips and flathead)
Multimeter for testing
Replacement thermal fuse
Safety gloves and goggles
Recommended Products

UNIVERSAL REPLACEMENT PART COMPATIBILITY: This 3-pack of 3392519 dryer thermal fuses fits dryers that use WP3392519, 694511, ET401, 80005, 3388651, WP3392519VP, PS11741460, AP6008325, G4AP0500, 39800, 21900 6L4101. Thermal fuse compatible with Whirlpool thermal fuse dryer models and select Kenmore, KitchenAid, Roper, Estate, Inglis, Crosley, Maytag, Amana, and Admiral, Magic Chef dryer parts. Designed to meet standards across heating systems needing a thermal fuse for overheat control.
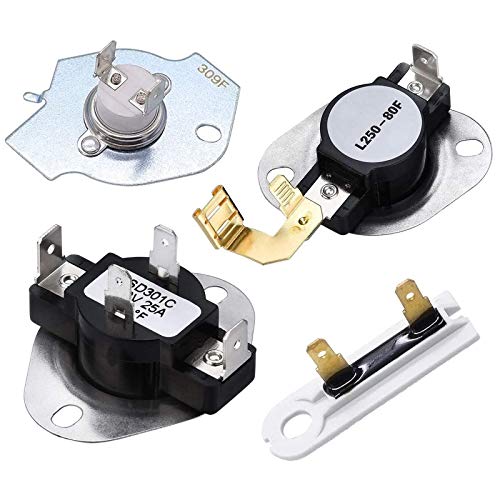
✔✔【ITEM SPECIALITY】:▶ 3387134 WP3387134 dryer cycling thermostat monitors and regulates the temperature inside the dryer. ▶The high-limit thermostat 3977767 WP3977767 shuts off the heating element. ▶The thermal fuse 3392519 WP3392519 (medx655dw1 thermal fuse) shuts off the burner or the motor in an electric dryer. ▶3977393 is a Thermal Fuse Rated at 309 degrees F, it is a one time fuse, if it blows, it will not allow the heat to come back on

GENUINE OEM: Whirlpool Genuine OEM Parts are designed specifically for your appliance, meet Whirlpool engineering standards, and are crafted to ensure the quality of your appliance
Whirlpool Dryer Safety Preparation Steps
Safety is paramount when working on electrical appliances. Start by unplugging the dryer from the power source. This step prevents electrical shock and ensures a safe working environment. Next, move the dryer away from the wall to access the back panel easily.
Accessing the Thermal Fuse in Whirlpool Dryer
To reach the thermal fuse, you will need to remove the back panel of the dryer. Use a screwdriver to take out the screws securing the panel. Carefully lift the panel off and set it aside. This will expose the internal components, including the thermal fuse.
Whirlpool Dryer Thermal Fuse Location and Testing
The thermal fuse is typically located near the heating element or blower housing. It is a small, rectangular component with two wires attached. Use a multimeter to test the fuse for continuity. If the multimeter shows no continuity, the fuse is blown and needs replacement.
Whirlpool Dryer Thermal Fuse Replacement Steps
Replacing the thermal fuse in a Whirlpool dryer is a straightforward task that can significantly improve its performance. This guide outlines the essential steps to safely and effectively replace the thermal fuse, ensuring your dryer operates efficiently and reduces the risk of overheating. Follow these instructions carefully to achieve professional results, even as a beginner.
Once you have confirmed that the thermal fuse is faulty, proceed with the replacement. Follow these steps:
Disconnect the wires from the old thermal fuse. Take note of their positions for reinstallation.
Remove the old fuse from its mounting bracket.
Install the new thermal fuse by securing it in the same position as the old one.
Reconnect the wires to the new fuse, ensuring a snug fit.
Recommended Products

100% LIFETIME PROTECTION: Enjoy reliable performance with our lifetime protection, ensuring that your product will always be covered for any defects or issues that may arise.

MODEL NUMBER: The 3392519 Kenmore Dryer Thermal Fuse (Thermal Cutoff, Temperature Fuse) is a small but essential safety component measuring 2 by ½ inches. Designed to shut off power to the motor circuit when overheating occurs, this white plastic fuse helps resolve common dryer issues, including: No heat or insufficient heat | Failure to start | Drum not spinning | Extended drying time | Unexpected shutdown

【Package Included】3 Pack 3392519 Dryer Thermal Fuse Replacement Kit. Made of heat-sensitive material, with a 196°F single blow (non-resettable) limiter, it can strictly prevent the clothes dryer from overheating and better protect your safety.Dryer non resettable thermal fuse, which is located on the blower housing next to the blower fan
Whirlpool Dryer Reassembly Steps After Fuse Replacement
After replacing the thermal fuse, it’s time to reassemble the dryer. Replace the back panel and secure it with screws. Ensure all components are correctly positioned before tightening. Once the panel is back in place, push the dryer back against the wall.
Testing Whirlpool Dryer Functionality After Repair
After replacing the thermal fuse in your Whirlpool dryer, it’s essential to ensure that everything is functioning correctly. This section will guide you through the necessary steps to test your dryer’s performance, helping you confirm that the repair was successful and that your appliance is operating safely and efficiently.
Before considering the job complete, plug the dryer back into the power source. Run a test cycle to check if the dryer heats properly and functions as expected. If the dryer operates normally, the repair is successful.
Recommended Products
![BlueStars [LIFETIME WARRANTY] 3387134 Cycling Thermostat 3392519 Dryer Thermal Fuse 3977393 Thermal Cut-off Switch 3977767 High-limit Thermostat Kit - Compatible with Whirlpool Kenmore Maytag Dryers](https://m.media-amazon.com/images/I/51r0G-NM64L._SL500_.jpg)
HIGH COMPATIBILITY: It is made exactly fit for most top name brands (Whirlpool, Kenmore, Maytag, Roper, Crosley, Inglis, Estate, Amana, KitchenAid, Admiral, Magic Chef) and perfectly fits and replaces original parts so you can easily install it YOURSELF within few minutes. Fits models: [Kenmore] 110.6012990, 110.6012990, 110.76862692, 110.76901690, 110.77834792, 110.796228, 110.97263100, 110.97263800, 110.98762790, 11060012000, 11060012001, 11060012002, 11060022010, 1106012510, etc.

MAKE YOUR DRYER RUN AGAIN: 3392519 Kenmore Dryer Thermal Fuse (Thermal Cutoff, Temperature Fuse) is a 2 by ½ inch, white, plastic safety mechanism that stops the flow of electricity to the motor circuit when a dryer overheats. It fixes the following symptoms: No heat or not enough heat | Will Not Start | Will not Tumble | Takes too long to dry | Shuts off too soon

1 Pack Included: Each order comes with one thermal fuse for a complete replacement.
Whirlpool Dryer Thermal Fuse Replacement Errors
When replacing the thermal fuse in a Whirlpool dryer, beginners may encounter several common errors that can complicate the process. Understanding these pitfalls is essential for achieving a successful repair and ensuring the dryer functions efficiently. This section highlights typical mistakes and offers guidance to help navigate the replacement smoothly.
During the replacement process, be cautious of common errors that can lead to further issues. Avoid the following:
Not disconnecting the power supply
Misplacing screws or components
Failing to test the new fuse before reassembly
Maintenance Tips for Whirlpool Dryers
Proper maintenance is essential for ensuring the longevity and efficiency of your Whirlpool dryer. Regular checks and simple upkeep can prevent common issues, enhance performance, and save on repair costs. This section provides practical tips tailored for beginners to help you keep your appliance in top condition.
Regular maintenance can prolong the life of your dryer and prevent future issues. Consider these maintenance tips:
Clean the lint filter after every use to ensure proper airflow.
Inspect the venting system for blockages regularly.
Schedule professional servicing at least once a year to catch potential problems early.
Whirlpool Dryer Post-Fuse Replacement Issues
After replacing the thermal fuse in your Whirlpool dryer, you may encounter several issues that can affect its performance. Understanding these potential problems is crucial for ensuring your dryer operates efficiently and safely. This section will explore common post-replacement challenges and provide guidance on how to address them effectively.
If your dryer still does not function properly after replacing the thermal fuse, further troubleshooting may be necessary. Check the following components:
Thermostat for proper operation
Heating element for continuity
Wiring connections for any signs of wear or damage
If issues persist, consulting a professional technician may be the best course of action.

Hey, I’m Jake. I focus on cooling systems at Appliance Mastery, like fridges, freezers, and air conditioners.
I’ve worked in appliance repair for more than ten years and I’m certified through NASTeC. I’ve seen just about every fridge issue you can imagine.
My goal is to help you fix problems without stress. Whether it’s a freezer that won’t cool or an AC that keeps beeping, I’m here to walk you through it.