
Have you noticed water pooling around your Rheem water heater? A leaking pressure relief valve can be a frustrating issue, but you’re not alone. Many homeowners face this problem, often wondering what steps to take next.
Understanding why the valve leaks and how to address it can save you time, money, and headaches. This article will guide you through the common causes of a leaking pressure valve and offer practical solutions to help you fix the issue. With the right information, you can restore your water heater’s efficiency and keep your home safe.
Key Takeaways
- Understanding Leakage Causes: Common causes of a leaking pressure relief valve include high water pressure, overheating, sediment buildup, and wear and tear.
- Identifying Symptoms: Signs of a leaking valve include water accumulation, continuous dripping, fluctuating water pressure, and visible rust or corrosion.
- Effective Diagnosis: Utilize tools like wrenches, pressure gauges, and flashlights to inspect and diagnose the specific cause of the leak.
- DIY Repair Steps: Turn off power and water supply, drain the tank, inspect the valve, and replace it if necessary to fix the leak.
- Professional Help: Seek professional assistance if leaks persist, issues are complex, or if you lack experience in performing repairs.
- Preventive Maintenance: Conduct regular checks, monitor water pressure, set appropriate temperatures, flush the tank, and replace parts with quality components to prevent future leaks.
Overview of Rheem Water Heaters
Rheem water heaters are popular choices for homeowners due to their efficiency and reliability. These units come in various types, including tank and tankless models. Each offers unique benefits tailored to different needs.
Types of Rheem Water Heaters:
- Tank Water Heaters: These store hot water in a tank. They provide a continuous supply of hot water but may run out during heavy use.
- Tankless Water Heaters: These heat water on demand, offering an endless hot water supply. They are energy-efficient and save space.
Key Features:
- Energy Efficiency: Rheem models often include advanced technology to minimize energy consumption. Look for Energy Star ratings for optimal efficiency.
- Durability: Built with high-quality materials, Rheem water heaters are designed to last. Many models include warranties ranging from 6 to 12 years.
- Smart Technology Integration: Some Rheem models feature Wi-Fi connectivity, allowing remote monitoring and control. This feature helps you keep track of your water heater’s status easily.
Common Problems:
If you notice issues like a leaking pressure valve, it’s crucial to address them promptly. Regular maintenance can prevent significant problems. Conduct routine checks on the valve, inspect for corrosion, and replace any worn-out parts.
By understanding the features and common issues of Rheem water heaters, you can make informed decisions about maintenance and repairs.
Common Issues with Water Heaters
Leaking pressure valves are just one of many common issues you might encounter with water heaters. Familiarizing yourself with these problems helps maintain efficiency and extends the life of your unit.
Signs of a Pressure Valve Leak
You may notice several signs indicating a leaking pressure relief valve:
- Water Accumulation: A puddle forms near the water heater. This occurs due to excess water escaping from the valve.
- Constant Dripping: You hear a steady drip sound. This indicates a persistent leak requiring attention.
- Water Pressure Fluctuations: You experience fluctuating water pressure. This can happen if the valve malfunction affects the system.
- Rust or Corrosion: You see rust or corrosion around the valve. This signals possible damage leading to leakage.
Causes of Pressure Valve Leakage
Understanding why a pressure valve leaks can guide you in prevention and repairs:
- High Water Pressure: Excessive pressure in the tank can cause the valve to release water. If your supply pressure exceeds the recommended level, it may trigger leakage.
- Temperature Issues: Overheating can lead to valve failure. If the thermostat malfunctions, water temperature may exceed safe limits.
- Sediment Buildup: Mineral deposits can accumulate in the tank. This buildup might hinder the valve’s operation, leading to leaks.
- Wear and Tear: Age and usage can lead to valve deterioration. Regular maintenance checks can help identify potential issues early.
Identifying these signs and causes allows you to take proactive steps in maintaining your Rheem water heater and ensuring its performance.
Diagnosing the Problem
Identifying a leak from your Rheem water heater’s pressure relief valve involves a systematic approach. Follow these steps to diagnose the issue effectively.
Recommended Products

Made in United States

3/4" Male NPT Inlet x Female NPT outlet with 2" long shank
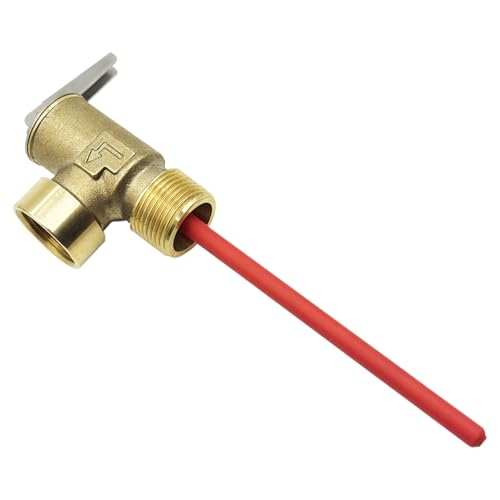
✅[Ultimate Safety & Peace of Mind]: This 3/4-inch NPT water heater relief valve is your essential safeguard. It automatically releases excess pressure, preventing tank explosions and ensuring complete peace of mind for your household.
Tools Needed for Diagnosis
Gather these essential tools for a thorough diagnosis:
- Wrench: Use a wrench to tighten or loosen fittings.
- Bucket: Place a bucket under the valve to catch any water.
- Pressure Gauge: Measure the water pressure in your system.
- Flashlight: Illuminate the area for better visibility.
- Screwdriver: Use to inspect any surrounding fixtures or covers.
- Inspect the Valve: Check for visible signs of leakage. Look for water pooling or constant dripping around the valve.
- Check the Water Pressure: Use the pressure gauge to measure the water pressure. Anything above 80 psi often causes leaks.
- Evaluate Temperature Settings: Ensure the thermostat isn’t set higher than 120°F. High temperatures can increase pressure, leading to leaks.
- Examine for Sediment Buildup: Flush the water heater regularly to prevent sediment from clogging and causing pressure spikes.
- Look for Corrosion and Damage: Check the valve for signs of rust or corrosion, as this indicates wear and might require replacement.
By following this diagnostic process, you can pinpoint the cause of the leak and decide on the appropriate corrective action, ensuring your Rheem water heater operates safely and efficiently.
Fixing a Leaking Pressure Valve
Fixing a leaking pressure relief valve can save you time and money. It’s crucial to address the issue promptly to prevent water damage and maintain your water heater’s efficiency.
Recommended Products

Size: Small.For best results, use only Rheem replacement parts for repairing your Rheem Water Heater
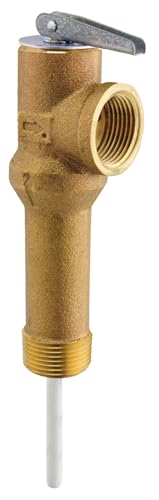
ASME rated and CSA listed

Allows the water heater to be drained for servicing or flushing of sediment.
DIY Repair Options
- Turn Off the Power and Water Supply
Safely shut off power to your water heater at the circuit breaker. Additionally, turn off the cold water supply valve connected to the unit. - Gather Necessary Tools
Collect tools like a wrench, bucket, Teflon tape, and a screwdriver. Make sure everything’s ready before you start the repair. - Drain the Tank
Connect a hose to the drain valve at the bottom of the tank. Open the valve and drain several gallons of water into a bucket to relieve pressure. - Inspect the Valve
Examine the pressure relief valve for signs of damage or corrosion. Check the connection points for tightness and leaks. - Replace the Valve if Necessary
If the valve is faulty, unscrew it with a wrench. Install a new valve by wrapping the threads with Teflon tape to ensure a snug fit. Screw it into place securely. - Restore Water Supply and Power
Open the cold water valve and allow the tank to refill. Once filled, restore power to the unit. - Monitor for Leaks
Check the newly installed valve for any leaks. Close observance after repair helps catch any persistent issues quickly.
When to Call a Professional
If your repair efforts fail or you’re uncomfortable performing the fix, don’t hesitate to call a professional. Consider seeking help in these situations:
- Persistent Leaks
If water continues leaking even after replacing the valve, it indicates a more serious problem requiring expert assessment. - Complex Issues
If the issues extend beyond the valve and involve your plumbing or water heater’s internal components, professionals can diagnose and fix them effectively. - Lack of Experience
If you’re unsure about any step in the repair process, a licensed plumber can ensure safety and compliance with local codes. - Frequent Pressure Fluctuations
Repeated changes in water pressure can signal underlying system issues. Professionals can evaluate and resolve these problems.
Following these steps allows you to address a leaking pressure relief valve and maintain the efficiency of your Rheem water heater.
Preventive Measures
Maintaining your Rheem water heater can prevent pressure relief valve leaks from occurring. Implement these preventive measures to enhance the longevity of your unit and ensure its efficient operation.
Recommended Products
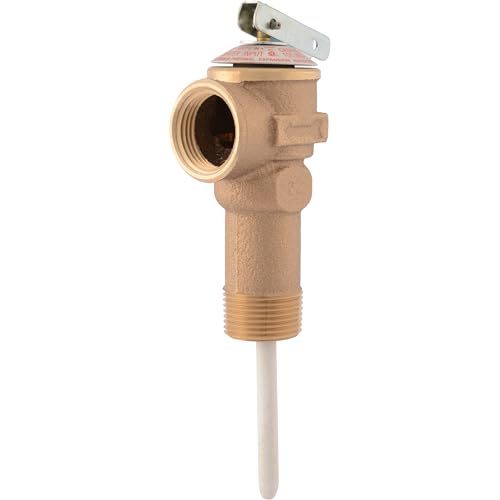
CASH ACME RELIEF VALVE: Cash Acme NCLX Combination Temperature and Pressure Relief Valves are designed for the protection of water heaters and storage tanks; incorporate an inert thermal element coating that provides effective isolation from mineral deposits (liming) and galvanic corrosion

Provides Protection: Helps protect your RV or home water heater from excess temperature and water pressure

For best results, use only Rheem replacement parts for repairing your Rheem Water Heater
Regular Maintenance Checks
Conduct regular maintenance checks on your water heater every six months. This involves inspecting the pressure relief valve for signs of rust, damage, or leaks. By addressing minor issues early, you can prevent them from escalating.
Monitor Water Pressure
Keep water pressure below 80 psi. Use a pressure gauge to monitor this. If the pressure exceeds the safe limit, consider installing a pressure-reducing valve. Adjusting the pressure can significantly reduce the likelihood of leaks.
Set Proper Temperature
Set the water heater temperature to no more than 120°F. Higher temperatures can create excessive pressure in the tank, leading to leaks. Adjust your thermostat accordingly for optimal performance.
Flush the Tank
Flush the tank annually to remove sediment build-up. Sediment can cause overheating and increase pressure. This simple step maintains efficiency and extends your water heater’s lifespan.
Inspect for Signs of Wear
Regularly inspect the plumbing connections and the relief valve. Look for signs of wear or corrosion. Addressing these issues promptly prevents leaks and potential damage.
Use Quality Components
When replacing parts, use high-quality components compatible with your Rheem model. Check the specifications from the manufacturer to ensure correct fitting. Quality replacements enhance durability and reliability.
Hire Professional Maintenance
Consider hiring a professional for annual inspections. A qualified technician can identify and resolve issues that may not be visible during routine checks, ensuring long-term performance.
By implementing these preventive measures, you maintain your Rheem water heater’s efficiency and safety, minimizing the risk of pressure relief valve leaks.
Conclusion
Addressing a leaking pressure relief valve in your Rheem water heater doesn’t have to be overwhelming. By staying proactive and understanding the common causes of leaks you can keep your water heater running smoothly. Regular maintenance and timely repairs are key to preventing bigger issues down the line.
Remember to monitor your water pressure and temperature settings while keeping an eye out for any signs of wear. If you ever feel unsure about a repair don’t hesitate to reach out to a professional. Taking these steps will not only enhance the efficiency of your water heater but also ensure a safer home for you and your family.
Frequently Asked Questions
What causes a pressure relief valve to leak in a Rheem water heater?
A leaking pressure relief valve can be caused by high water pressure, excessive temperature settings, sediment buildup, or general wear and tear. Regular maintenance can help prevent these issues.
How do I identify signs of a leaking pressure relief valve?
Signs include water accumulation near the valve, constant dripping, fluctuations in water pressure, and rust or corrosion around the valve. If you notice any of these, it’s essential to address the issue promptly.
How can I fix a leaking pressure relief valve?
To fix the valve, turn off the power and water supply to the heater, drain the tank, inspect the valve, and replace it if necessary. Always restore the water supply and power, then monitor for any leaks.
When should I call a professional to fix my water heater?
Contact a professional for persistent leaks, complex issues that you can’t resolve, or if you’re inexperienced with repairs. Frequent pressure fluctuations also warrant expert help to ensure safety.
What maintenance steps can I take to prevent pressure relief valve leaks?
Perform regular maintenance checks every six months, keep water pressure below 80 psi, set temperature to no higher than 120°F, flush the tank annually, and inspect for signs of wear to prevent leaks.

Hey, I’m Jake. I focus on cooling systems at Appliance Mastery, like fridges, freezers, and air conditioners.
I’ve worked in appliance repair for more than ten years and I’m certified through NASTeC. I’ve seen just about every fridge issue you can imagine.
My goal is to help you fix problems without stress. Whether it’s a freezer that won’t cool or an AC that keeps beeping, I’m here to walk you through it.