
Ever wondered what to do when your dryer stops heating up? Picture this: you’ve got a load of laundry ready to go, but your trusty dryer seems to have lost its heat. Fret not, as we dive into the solution to this common household dilemma. Can the heating element in a dryer be replaced? The answer might just surprise you!
Imagine the convenience of having your dryer back in action without the hefty cost of a new appliance. Discovering the possibility of replacing the heating element could save you time, money, and the hassle of dealing with a malfunctioning dryer. Stay tuned as we uncover the straightforward steps to reviving your dryer’s functionality and getting back to smooth sailing with your laundry routine.
Understanding Dryer Heating Elements
Dryer heating elements are essential components responsible for generating the heat needed to dry your clothes efficiently. Over time, these elements can wear out due to consistent use. When this happens, replacing the heating element can be a practical solution to restore your dryer’s functionality.
Signs of a Faulty Heating Element
- Clothes remain damp: If your dryer is running but your clothes are not drying properly, it could indicate a faulty heating element.
- No heat: The absence of heat during a drying cycle is a clear indicator that the heating element may need to be replaced.
- Visible damage: Inspect the heating element for any signs of damage, such as breaks or burns, which can affect its performance.
Why Replace the Heating Element
- Cost-effective: Replacing the heating element is often more economical than purchasing a new dryer.
- Saves time: Quickly resolving the issue allows you to continue using your dryer without prolonged downtime.
- Environmentally friendly: Extending the life of your dryer through repairs reduces electronic waste.
- Safety first: Before beginning any repairs, ensure the dryer is unplugged to prevent accidents.
- Access the element: Open the dryer cabinet to locate the heating element, typically found behind the drum.
- Remove the old element: Disconnect the wires and carefully take out the old heating element.
- Install the new element: Attach the new heating element by reconnecting the wires and securing it in place.
- Test the dryer: Plug in the dryer, run a test cycle to confirm the heat is working correctly.
By understanding the role of the heating element and recognizing the signs of a malfunction, you can take the necessary steps to replace it and restore your dryer’s efficiency.
Signs of a Faulty Heating Element
- Damp Clothes: Your clothes remain damp after a full drying cycle.
- Lack of Heat: The dryer is running, but your clothes are not getting warm.
- Long Drying Times: Clothes take much longer than usual to dry completely.
- Visible Damage: Look for visible signs of damage or breaks on the heating element.
| Key Points | Data/Statistics |
|---|---|
| Damp Clothes | Clothes feel damp to the touch after a drying cycle. |
| Lack of Heat | Clothes come out cool or slightly warm after drying. |
| Long Drying Times | Increase in drying time compared to usual cycles. |
| Visible Damage | Cracks, breaks, or discoloration on the heating element. |
Recommended Products
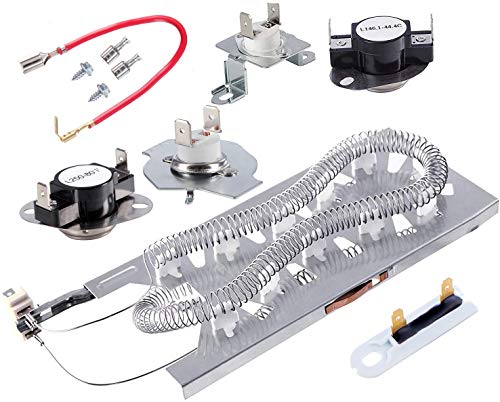
SECURE & DURABLE LONGEVITY:Wp3387747 is made from heat-resistant nickel and 279816 Thermostat and 279973 thermal cut-off fuse dual overheat safety protection. 3387747 has been well inspected and tested by manufacturer, you may kindly use it with full confidence.
8544771 PACKAGE INCLUDES:1 x wp8544771 dryer heating element, 1 x 279816 thermostat, 1 x 279973 thermal cut-off fuse, 2 x 3392519 thermal fuse. Full complete repair kit fixes dryer all heating issue with one purchase, eliminating the need for additional separate component orders.

【SUPERIOR PERFORMANCE MATERIALS】Our wp3387747 dryer heating element is made with high-quality nickel-chromium (Ni-Cr) content coil and galvanized steel support, ensuring quick and even heating, high anti-corrosion, and durability. With a spiral tight design that is 30% longer than other dryer coils, it increases resistance by more than 70%, providing high performance with low power consumption.(5400Watt 240 Volt)⚠️Be sure to disconnect the power supply before installation
Tools Needed for Replacement
When replacing the heating element in your dryer, you’ll need a few essential tools to get the job done efficiently. Here are the tools you’ll require:
- Screwdriver (to remove screws)
- Nut driver (for bolts and nuts)
- Needle-nose pliers (for gripping and maneuvering in tight spaces)
- Multimeter (to test for continuity)
- Putty knife (for prying components apart)
- Work gloves (for safety)
- Safety goggles (to protect your eyes)
- Owner’s manual (for specific instructions)
Recommended Products


【COMPATIBLE MODELS】: 279838 Dryer Heating Element Parts Compatible with Whirlpool heating element WED4815EW1 WED4800XQ0 WED4800BQ1 WED5300SQ0 MEDX655DW1 MEDC465HW0 ,Maytag heating element NED4655EW1,MEDC465HW0,MED7230HW1,MEDB765FC0,MEDX655DW1,MEDC215EW1, MEDC415EW0, MEDC555DW2, Amana heating element NED4655EW1,NED4655EW0 NED4600YQ1,NED5100TQ1, LER4634EQ0,NED4500VQ0,LER7646JQ0,EED4300SQ0, WED5100VQ1,LER4634JQ1,AED4475TQ1,NED4600YQ1.... compatible with Kenmore 70 80 90 300 400 500 600 series model 110, For more compatible models, please see Figure 6 and Figure 7If you do not confirm, please contact us immediately. We will reply you as soon as possible
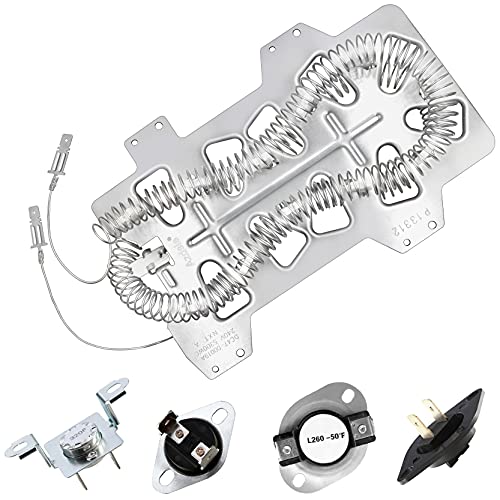
Azdele Heating element for samsung dryer: dc47-00019a samsung heating element wire is 25% longer than other dryer wires, increasing the resistance by 65% and producing stable heating.
Steps to Replace a Dryer Heating Element
So, you’ve discovered that your dryer’s heating element needs to be replaced. Don’t worry; you can handle it! Here are the steps to replace the dryer heating element:
- Unplug your dryer before starting any work. Safety first!
- Locate the heating element assembly. Refer to your dryer’s manual for guidance.
- Remove the back panel of the dryer to access the heating element.
- Disconnect the wires attached to the heating element terminals.
- Use your tools – a screwdriver, nut driver, and needle-nose pliers will come in handy.
- Take out the faulty heating element carefully.
- Install the new heating element in the same position as the old one.
- Reconnect the wires securely to the new heating element.
- Put back the back panel of the dryer.
- Plug in your dryer and test it to ensure the heating element works.
Recommended Products

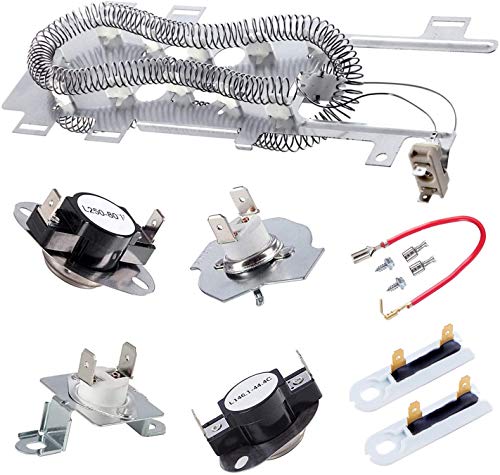
✅[QUALITY GROWTH] Excellent heat-proof and abrasion-proof. 2026 UPGRADE 279838 dryer heating element NICKEL-CHROMIUM content reaches 95% and the length of the heating wire is 25% longer than other common dryer replacement parts. So it will last longer than other brand and OEM parts.
![[UPGRADED] 279838 Dryer Heating Element for Whirlpool Kenmore Maytag Amana Roper, Dryer Heating Element Parts Include Dryer Thermostat Thermal Fuse, Replaces 2406026 3403585 w10724237](https://m.media-amazon.com/images/I/51KK+2MbciL._SL500_.jpg)
Dryer Heating Element Parts Compatible with: kenmore whirlpool roper maytag bravos amana estate cabrio crosley admiral inglis kitchenaid magic chef jenn-air dryers and electric dryers. 279838 dryer heating element replaces part numbers: 3403585 W10724237 3398063 3398064 8565582. Includes: 1 x 279838 dryer heating element,1 x WP3392519 thermal fuse, 1 x 3977393 thermal fuse, 1 x WP3977767 high-limit thermostat,1 x WP3387134 cycling thermostat.

【HEATING ELEMENT KIT PACKAGING】1 x 279838 dryer heating element, 1 x WP3392519 thermal fuse, 1 x 3977393 thermal fuse, 1 x WP3977767 high-temperature thermostat, 1 x WP3387134 circulating thermostat. These dryer parts can help you easily solve all the heating problems, such as no heat or insufficient heat; takes too long to dry clothes; shuts off too soon; and timer not advancing, etc
Testing the New Heating Element
- Plug in the dryer.
- Select a drying cycle and start the machine.
- Monitor the temperature to ensure it’s heating up properly.
- Feel for warmth near the dryer vent.
- Check for any error codes on the display.
| Data | Value |
|---|---|
| Temperature | 120-180°F |
| Warmth at vent | Yes |
| Error codes | None |
Conclusion
You’ve learned that replacing the heating element in a dryer is a manageable task that can save you time and money. By following the simple steps outlined in this article, you can test the new element to ensure it’s working effectively. Remember to check the temperature range, feel for warmth at the vent, and keep an eye out for any error codes. With a little bit of know-how and some troubleshooting, you can have your dryer up and running efficiently in no time. Happy drying!
Frequently Asked Questions
How can I test the new heating element in my dryer?
To test the new heating element in your dryer, plug in the machine, select a drying cycle, monitor the temperature, feel for warmth near the dryer vent, and check for error codes on the display. The recommended temperature range is 120-180°F, warmth should be felt at the vent, and there should be no error codes displayed.
What temperature range should I look for while testing the new heating element in my dryer?
The recommended temperature range to look for while testing the new heating element in your dryer is 120-180°F. Ensure that the dryer reaches this temperature during the drying cycle to confirm proper functioning of the heating element.
How can I check if the new heating element in my dryer is working correctly?
To check if the new heating element in your dryer is working correctly, feel for warmth near the dryer vent during a drying cycle. If you feel warmth and the temperature is within the recommended range of 120-180°F, this indicates that the heating element is functioning properly.
What should I do if I encounter error codes while testing the new heating element in my dryer?
If you encounter error codes on the display while testing the new heating element in your dryer, it may indicate a problem with the heating element or other components. Refer to the dryer manual or contact a professional for further troubleshooting and assistance.

Hi, I’m Charlie, and I cover all things laundry here at Appliance Mastery.
I’ve spent over eight years working on washing machines, dryers, and dishwashers. I also have a degree in mechanical engineering, which helps me understand how these appliances really work.
I try to make every guide clear and practical. If you’re stuck with a noisy dryer or a leaking washer, I’ll help you figure out what’s wrong and how to fix it.