
Tired of your Samsung dryer making that dreadful noise? Ever wondered if you could fix it yourself? Picture this: laundry piled up, and the dryer belt suddenly snaps. Fret not, you’re not alone in this. In this article, you’ll discover a simple solution to get your Samsung dryer back up and running in no time.
Imagine the satisfaction of fixing your dryer without the hassle of waiting for a technician. With just a few tools and a bit of guidance, you can tackle this repair like a pro. Say goodbye to the inconvenience of a malfunctioning dryer and hello to a smoothly running laundry routine. Let’s dive in and learn how you can easily replace the belt on your Samsung dryer.
Safety Precautions
When working on your Samsung dryer to fix the belt, it’s essential to prioritize safety. Here are some key safety precautions you should keep in mind:
- Unplug the dryer: Before you begin any repair work, ensure that your Samsung dryer is unplugged from the power source to avoid any electrical accidents.
- Gas supply: If your dryer operates on gas, make sure to shut off the gas supply before proceeding with the repair.
- Protective gear: Wear appropriate safety gear such as gloves and safety goggles to prevent any injuries during the repair process.
- Stability: Place your dryer on a stable surface before starting the repair to prevent it from tipping over.
- Tools: Use the right tools for the job and handle them with care to avoid accidents.
- Read the manual: Refer to the Samsung dryer manual for specific safety instructions and guidelines before conducting any repairs.
By following these safety precautions, you can ensure a secure and successful belt replacement on your Samsung dryer.
Tools Needed
When fixing the belt on your Samsung dryer, it’s essential to have the right tools on hand. Here are the tools you’ll need:
- Screwdriver: You’ll need a screwdriver to remove any screws holding the dryer panels in place.
- Putty Knife: A putty knife can be useful for prying off the panels without causing damage.
- New Belt: Make sure you have the correct replacement belt for your specific Samsung dryer model.
- Work Gloves: Protect your hands with work gloves to avoid any injuries during the repair.
- Safety Glasses: Keep your eyes safe from any debris or dust with a pair of safety glasses.
- Owner’s Manual: Consult your Samsung dryer manual for specific instructions and diagrams.
Having these tools ready will make the belt fixing process smoother and safer for you.
Disconnecting the Power
When fixing the belt on your Samsung dryer, the first step is to disconnect the power to ensure your safety throughout the repair process.
Here’s what you need to do:
- Unplug the dryer from the electrical outlet to cut off the power supply completely.
- For added safety, consider turning off the circuit breaker that powers the dryer.
Remember, safety should always be your top priority when working on any electrical appliance.
Accessing the Dryer Belt
- Unplug your Samsung dryer from the power outlet.
- Move the dryer away from the wall to give yourself space to work.
- Locate the screws at the back of the dryer.
- Use a screwdriver to remove the screws and the dryer’s back panel.
- Set the screws aside.
- Locate the dryer drum and the old belt around it.
- Take note of the belt’s positioning for when you install the new one.
Recommended Products
![Upgraded Pulley Belt Parts for Samsung Dryer, 6602 001655 Dryer Belt and DC93-00634A Idler Pulley [Enhanced ],DC61-01215B Tension Spring,Replacement dv45h7000ew,dv48h7400ew,dv42h5000ew,dv48j7700ew](https://m.media-amazon.com/images/I/41NrCXUvJ1L._SL500_.jpg)
Pulley for Samsung Dryer Include : 1 * UPGRADED DC93-00634A Samsung Dryer Idler [Dual Ball Bearings], 1 * UPGRADED 6602-001655 Dryer Belt[Double thickness as before], 1 * Screw,1*DC61-01215B Tension Spring.
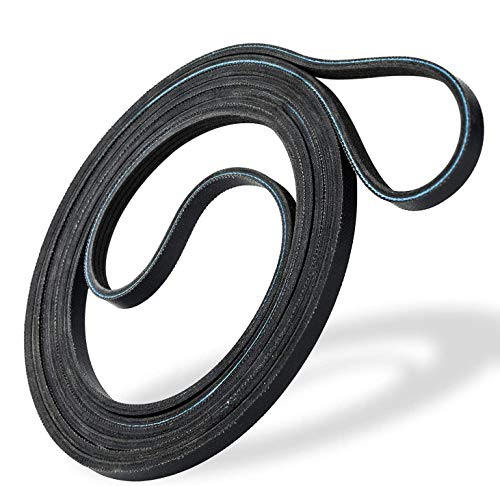
IDEAL FIT FOR MANY MODELS - 6602-001655 dryer belt is compatible with many popular branded dryers which include Samsung and Whirlpool.

❤PREMIUM QUALITY: The upgraded samsung dryer repair kit made of premium quality material. The rollers are strong and wear-resistant, which make the dryer run stably and quietly. It designed with a high-quality rubber overall structure. The 6602-001655 dryer belt 92’’Length X 0.3’’Width. It is thickness is twice as thick as before and it is more durable. The center of the idler has a triangular design, which is more firm and stable. Meets OEM manufacturing requirements.
Removing the Old Belt
- Disconnect the power: Before starting, unplug the dryer to ensure your safety.
- Access the back panel: Move the dryer away from the wall and locate the back panel.
- Unscrew the back panel: Use a screwdriver to remove the screws holding the back panel in place.
- Take note of the belt positioning: Observe how the old belt is positioned around the dryer drum for when you install the new belt.
Installing the New Belt
To install the new belt on your Samsung dryer, follow these steps:
- Step 1: Place the new belt around the dryer drum, making sure the grooves are facing inward.
- Step 2: Loop the belt over the motor and idler pulley, ensuring it’s positioned correctly on the pulley.
- Step 3: Rotate the drum to help align the belt and prevent it from slipping off the pulleys.
- Step 4: Reattach the back panel of the dryer by securing the screws in place.
- Step 5: Plug in the power cord and test the dryer to ensure the belt is working correctly.
| Step Number | Description |
|---|---|
| 1 | Place the new belt around the dryer drum. |
| 2 | Loop the belt over the motor and idler pulley. |
| 3 | Rotate the drum to align the belt. |
| 4 | Reattach the back panel of the dryer. |
| 5 | Plug in the power cord and test the dryer. |
Recommended Products
![[Upgraded Dual Ball Bearings] BlueStars DC93-00634A Dryer Idler Pulley with Sturdy Clip – Compatible with Samsung Dryers DV45H7000EW DV48H7400EW DV42H5000EW DV48J7700EW DC96-00882C AP4373659](https://m.media-amazon.com/images/I/31ICmQWhCQL._SL500_.jpg)
MODEL NUMBER: [UPGRADED Dual Ball Bearings] DC93-00634A Dryer Idler Pulley Assembly (6’’Length X 4’’Width). Please check the model number carefully before ordering. If you're unsure about the compatibility, send us your dryer model number and we can help you confirm if it fits or not
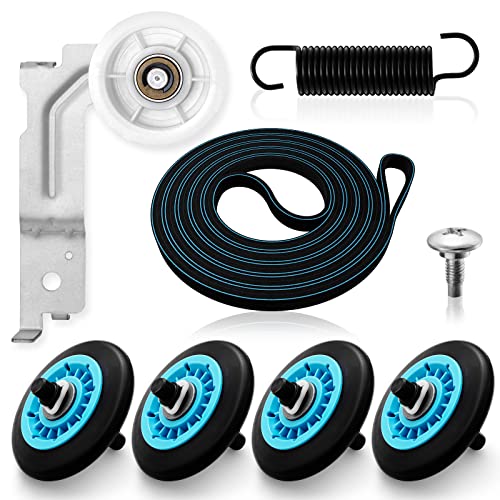
【MATERIAL UPGRADE】The samsung dryer roller replacement kit is designed with a high-quality rubber overall structure, which is strong and wear-resistant, not easy to crack. The samsung dryer roller bearing quality is more stable and quieter than ordinary bearings. The thickness of samsung dryer belt is upgraded and the length is standard. All samsung dryer repair kit has undergone strict quality inspection by the manufacturer---Meet OEM Samsung dryer parts standards.
![[UPGRADED DUAL BALL BEARINGS] DC93-00634a for Samsung Dryer Idler Pulley-1 year QA-Replaces Samsung Idler Pulley PD00032419 DC96-00882B DC96-00882C DC97-07509B AP6038887 PS11771601-BY AMI PARTS](https://m.media-amazon.com/images/I/31Y1gP1HnkL._SL500_.jpg)
[HIGH-QUALITY] Crafted with high-quality materials and upgraded dual ball bearings, the DC93-00634A Dryer Idler Pulley is exceptionally strong, wear-resistant, and non-cracking. It provides reliable support for your dryer, reducing noise and ensuring smooth operation
Reassembling the Dryer
To complete the belt replacement on your Samsung dryer, you’ll need to carefully reassemble the unit. Here’s how:
- Step 1: Fit the back panel of the dryer back into place and secure all the screws tightly.
- Step 2: Maneuver the dryer drum back into its original position, ensuring it sits correctly on the rear drum rollers.
- Step 3: Reconnect the wiring harnesses you disconnected earlier, ensuring each connection is snug and secure.
- Step 4: Carefully reattach the front panel of the dryer, making sure it aligns properly with the drum and the cabinet.
- Step 5: Slide the top panel of the dryer back into place and secure any screws or clips that hold it in position.
- Step 6: Plug the dryer back into the power source and test it by running a short drying cycle to ensure the belt is functioning correctly.
Following these steps will ensure that your Samsung dryer is reassembled correctly and ready to use with the new belt in place.
Testing the Dryer
After reassembling your Samsung dryer with the new belt installed, it’s time to test it. Here’s how to ensure everything is functioning properly:
- Plug In and Power On: Start by plugging in the dryer and turning it on.
- Run a Test Load: Place a small load of laundry inside and run a test cycle to check if the drum is rotating smoothly.
If you encounter any issues during testing, double-check the installation steps to make sure everything was done correctly.
Key Testing Points
Here are some key factors to consider during the testing phase:
| Aspects to Check | Details |
|---|---|
| Drum Rotation | Ensure the drum spins freely without any strange noises. |
| Heating Element | Confirm that the heating element is functioning properly to dry your clothes. |
Don’t hesitate to troubleshoot any inconsistencies you may notice during testing to guarantee your Samsung dryer is back in full working order with the new belt securely in place.
Conclusion
You’ve now successfully installed a new belt in your Samsung dryer following the step-by-step guide provided. By ensuring the belt is properly aligned and the dryer is reassembled correctly, you’ve set yourself up for smooth operation. Remember to test the dryer after reassembly to confirm that the belt is functioning as it should. Troubleshooting any issues during testing will help you address any potential concerns and ensure your Samsung dryer is back to its optimal performance. With these tips, you can confidently tackle belt replacement in your Samsung dryer whenever the need arises.
Frequently Asked Questions
Q: What are the steps involved in installing a new belt in a Samsung dryer?
A: Installing a new belt in a Samsung dryer involves placing the belt around the drum, looping it over the motor and idler pulley, and aligning the belt correctly.
Q: How do you reassemble the Samsung dryer after installing the new belt?
A: Reassembling the Samsung dryer includes fitting the back panel, positioning the drum correctly, reconnecting wiring harnesses, attaching the front panel, securing the top panel, and ensuring the new belt functions properly.
Q: What should be done after reassembly of the Samsung dryer?
A: After reassembly, it is advised to test the dryer by plugging it in, running a test load to check drum rotation and the heating element.
Q: How can any issues post-installation be addressed for a Samsung dryer with a new belt?
A: If any issues arise during testing, troubleshooting is recommended to ensure the Samsung dryer is fully operational with the new belt securely installed.

Hi, I’m Charlie, and I cover all things laundry here at Appliance Mastery.
I’ve spent over eight years working on washing machines, dryers, and dishwashers. I also have a degree in mechanical engineering, which helps me understand how these appliances really work.
I try to make every guide clear and practical. If you’re stuck with a noisy dryer or a leaking washer, I’ll help you figure out what’s wrong and how to fix it.