
Replacing a Whirlpool dryer door handle is a straightforward task that can enhance the functionality of your appliance. With the right tools and a clear guide, you can complete this repair in under an hour, saving time and money on professional services.
Whirlpool Dryer Handle Replacement Tools Needed
Before diving into the Whirlpool dryer door handle replacement process, it’s essential to gather the right tools. Having the necessary equipment on hand will streamline the task and ensure a smoother experience. This section outlines the specific tools you’ll need to effectively complete the replacement.
Before starting the replacement process, ensure you have all necessary tools and supplies on hand. This preparation will streamline your workflow and minimize interruptions. Here’s what you will need:
Screwdriver set (Phillips and flathead)
Replacement door handle compatible with your Whirlpool dryer
Pliers for grip
Towel or cloth to protect surfaces
Recommended Products
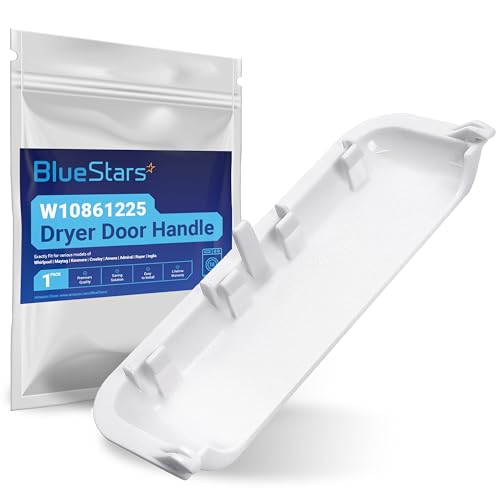
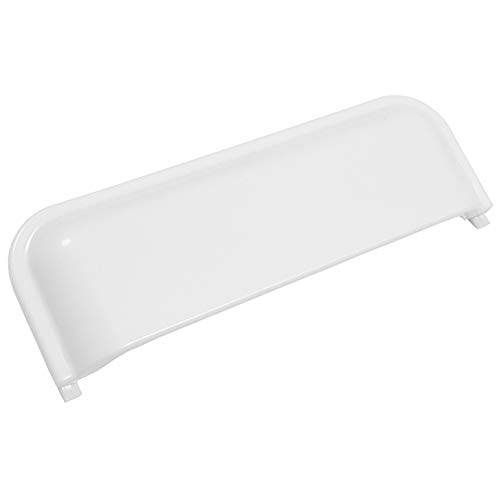
MODEL NUMBER: W10861225 Dryer Door Handle (5-3/4" x 2").

W10861225 W10714516 Dryer Door Handle: W10861225 Dryer Door Handle is used to open and close the dryer door. Unbreakable W10861225 dryer handle replacement is made of strong ABS with smooth surface, non-toxic and resistant, not easy to break.You’ll need to replace this w10861225 amana dryer handle if the locking tab has broken off or door won’t close, causing the handle to continuously fall out. W10861225 W10714516 whirlpool dryer door handle is unbreakable, Solve your problems effectively
Replacement Door Handle for Whirlpool, Amana, Crosley, Maytag, Kenmore, Roper and many more brands.
Whirlpool Dryer Safety Precautions Before Repair
Before diving into the Whirlpool dryer door handle replacement, it’s crucial to prioritize safety. Understanding the necessary precautions can help prevent accidents and ensure a smooth repair process. This section outlines essential safety measures to take before starting your project, making it a beginner-friendly guide to handling your appliance repairs confidently.
Taking safety precautions is crucial when working on appliances. Unplug the dryer before beginning any repair to avoid electrical hazards. Wear safety goggles to protect your eyes from debris, and keep your workspace organized to prevent accidents.
Whirlpool Dryer Handle Compatibility Guide
Understanding the compatibility of dryer door handles is crucial for a successful replacement. This guide will help you identify which handles fit your specific Whirlpool dryer model, ensuring you choose the right part for a seamless installation. With the right information, even beginners can confidently tackle this repair task.
Choosing the correct replacement handle is vital for a successful fix. Check your dryer’s model number, typically found on a sticker inside the door frame. This ensures compatibility with your specific Whirlpool dryer model.
| Model Number | Compatible Handle | Price Range |
|---|---|---|
| WED4815EW | Handle A | $15 – $25 |
| WED5000DW | Handle B | $20 – $30 |
| WED5620HW | Handle C | $18 – $28 |
Whirlpool Dryer Old Handle Removal Steps
Replacing the door handle on your Whirlpool dryer can seem daunting, but with the right guidance, it becomes a manageable task. This section outlines the essential steps for safely removing the old handle, ensuring you can proceed with the replacement process confidently and efficiently. Follow these instructions to get started on restoring your dryer’s functionality.
To replace the handle, start by removing the old one. Follow these steps:
Open the dryer door fully.
Locate the screws holding the handle in place. Use the screwdriver to remove them.
Gently pull the handle away from the door. If it resists, check for any hidden screws or clips.
Whirlpool Dryer New Handle Installation Steps
Replacing the door handle on your Whirlpool dryer can seem daunting, but this beginner-friendly tutorial breaks down the installation process into manageable steps. With clear instructions and helpful tips, you’ll be able to complete the task efficiently, ensuring your dryer remains functional and easy to use. Follow along to restore your appliance with confidence.
Once the old handle is removed, it’s time to install the new one. Follow these steps:
Align the new handle with the screw holes on the dryer door.
Insert screws through the handle and into the door. Tighten them securely but avoid overtightening to prevent damage.
Close the dryer door to ensure the handle operates smoothly.
Testing Whirlpool Dryer Door Handle Performance
Testing the performance of a Whirlpool dryer door handle is crucial to ensure it functions properly after replacement. This process involves checking for smooth operation, secure attachment, and overall durability. By following these steps, you can confirm that your new handle meets the necessary standards for reliable use.
After installation, it’s important to test the new handle. Open and close the dryer door several times to ensure it operates correctly. If the handle feels loose or doesn’t engage properly, check the screws for tightness.
Whirlpool Dryer Handle Installation Challenges
Replacing the door handle on a Whirlpool dryer can present a few challenges, especially for beginners. Understanding these potential hurdles is crucial for a smooth installation process. This section will address common issues you might encounter and provide practical solutions to help you navigate the replacement with confidence.
Sometimes, issues may arise during or after the installation. Here are common problems and their solutions:
Handle feels loose: Tighten screws further.
Door does not close properly: Check alignment of the handle.
Squeaking noise: Apply a small amount of lubricant to the hinges.
Whirlpool Dryer Handle Care Guidelines
Proper care of your Whirlpool dryer door handle is essential for maintaining its functionality and longevity. By following specific guidelines, you can prevent wear and tear, ensuring that the handle remains secure and easy to operate. This section outlines best practices for keeping your dryer handle in optimal condition.
To extend the life of your new handle, consider these maintenance tips:
Regularly check screws for tightness.
Clean the handle with a damp cloth to remove dirt and grime.
Avoid slamming the dryer door to reduce wear on the handle.
Whirlpool Dryer Handle Installation Tips
Replacing the door handle on your Whirlpool dryer can seem daunting, but with the right guidance, it becomes a manageable task. This section offers practical tips to help you install the handle correctly, ensuring a secure fit and smooth operation. Follow these straightforward steps to enhance your appliance’s functionality and appearance.
Replacing a Whirlpool dryer door handle is a simple yet effective way to maintain your appliance. Ensure you follow the steps carefully for a successful installation. If issues persist after replacement, consult a professional for further assistance.

Hey, I’m Jake. I focus on cooling systems at Appliance Mastery, like fridges, freezers, and air conditioners.
I’ve worked in appliance repair for more than ten years and I’m certified through NASTeC. I’ve seen just about every fridge issue you can imagine.
My goal is to help you fix problems without stress. Whether it’s a freezer that won’t cool or an AC that keeps beeping, I’m here to walk you through it.