
Installing a Whirlpool under sink water filter is a straightforward process that can enhance your drinking water quality. This guide provides a detailed, step-by-step approach to ensure a successful installation with minimal hassle.
Whirlpool Water Filter Installation Tools Needed
Before diving into the installation process of a Whirlpool under sink water filter, it’s essential to gather the right tools. Having the necessary equipment on hand will streamline the setup and ensure a smooth experience. This section outlines the specific tools required for a successful installation.
Before starting your installation, ensure you have all necessary tools and supplies ready. This preparation minimizes interruptions and makes the process smoother. The following items are typically required:
Whirlpool under sink water filter kit
Adjustable wrench
Screwdriver set
Teflon tape
Bucket or towel for spills
| Item | Purpose |
|---|---|
| Whirlpool filter kit | Main filtration system |
| Adjustable wrench | Tightening connections |
| Screwdriver set | Securing brackets and fittings |
| Teflon tape | Preventing leaks |
| Bucket or towel | Catching any excess water |
Recommended Products
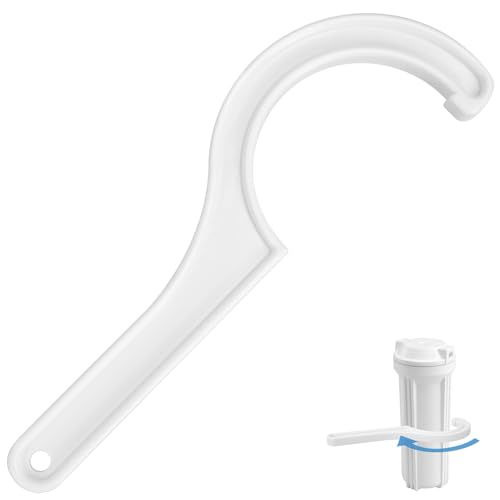
【Perfect Compatibility】: The reverse osmosis filter wrench fits most 10 x 2.5 inch cartridge housings, allowing convenient filter changes.This half-circle ro filter wrench is designed for easy use in tight spaces around reverse osmosis and under-sink systems ((Note: 10 x 2.5''refers to the internal cartridges size, not the size of the housing. )

【Perfect Compatibility】: The reverse osmosis filter wrench fits most 10 x 2.5 inch cartridge housings, allowing convenient filter changes.This half-circle ro filter wrench is designed for easy use in tight spaces around reverse osmosis and under-sink systems ((Note: 10 x 2.5''refers to the internal cartridges size, not the size of the housing. )

【Perfect Compatibility】: This undersink water filter housing wrench is compatible with pentair pentek slim line housing sumps, house water filter wrench fits for Pentek 5" and 10" Slim Line and 3G housings with 3/8" inlet/outlet connections; Ace Hardware 45335, 45449, 48166, 4001699, 4158515; American Plumber WLCS-500, WRO-3167; Culligan RVF-10, US-316; Ametek, Pentek, US Filter 158318, 158319 and more
Whirlpool Under Sink Installation Workspace Setup
Setting up your workspace is a crucial first step in the installation of a Whirlpool under sink water filter. A well-organized area ensures you have all necessary tools and materials at hand, making the process smoother and more efficient. This guide will walk you through the essential preparations to create an optimal installation environment.
Preparing your workspace is crucial for a successful installation. Clear out the area under your sink to provide ample room to work. Ensure you have good lighting to see all components clearly.
Turn off the water supply to avoid leaks during installation.
Clear out any items under the sink to prevent damage or obstruction.
Clean the area to ensure a smooth installation process.
Whirlpool Under Sink Water Filter Installation Steps
Installing a Whirlpool under sink water filter can significantly improve your home’s water quality. This step-by-step guide will walk you through the entire installation process, ensuring you have clean and safe drinking water right from your tap. Follow these detailed instructions to make the installation straightforward and efficient.
Follow these steps to install your Whirlpool under sink water filter effectively. Each step is designed to ensure proper functionality and safety.
Remove the existing faucet if applicable. Use the adjustable wrench to disconnect the water supply lines.
Install the mounting bracket for the filter. Position it on the side of the cabinet and secure it with screws.
Connect the filter to the water supply. Use Teflon tape on the threads to ensure a tight seal.
Attach the filter to the mounting bracket. Ensure it is securely locked in place.
Connect the output line from the filter to the faucet. Make sure all connections are tight to prevent leaks.
Recommended Products

WHIRLPOOL UNDER SINK FILTRATION SYSTEM reduces bad taste and odor from city and well water supplies.

Whirlpool Genuine Parts: Whirlpool undersink water filter replacement cartridge provides clean, fresh water drinking, cooking, and cleaning.

Less than $25.99 per replacement filter WD-RF10(Search " B085G66JTZ "on Amazon), save over 50% of cost on subsequent use. It is specifically designed for municipal tap water and can only be used with cold water sources. It is not suitable for well water or hot water.
Whirlpool Under Sink Filter Leak Testing Steps
Ensuring your Whirlpool under sink water filter is leak-free is crucial for optimal performance and safety. This section outlines the essential steps for conducting a thorough leak test, helping you identify any potential issues before they escalate. Follow these guidelines carefully to maintain the integrity of your water filtration system.
Once the installation is complete, it is essential to test for leaks and ensure the system is functioning correctly.
Turn the water supply back on slowly.
Check all connections for any signs of leaks.
Run water through the filter for a few minutes to flush out any carbon dust.
Taste the water to confirm the filter is working effectively.
Recommended Products

Less than $25.99 per replacement filter WD-RF10(Search " B085G66JTZ "on Amazon), save over 50% of cost on subsequent use.

Less than $35.99 per replacement filter WD-RF15 (Search "B085G78F7R" on Amazon), save over 50% of cost on subsequent use. This replacement filter is designed for long-term use with this under sink water filter system.

PATENTED DESIGN – The top-mounted fastener allows for easy countertop installation entirely from above, eliminating the hassle of tightening the nut from underneath the sink.
Whirlpool Under Sink Filter Maintenance Tips
Proper maintenance of your Whirlpool under sink water filter is essential for ensuring optimal performance and longevity. This section provides practical tips to keep your filter in top condition, helping you enjoy clean, great-tasting water while minimizing potential issues. Regular attention to these maintenance practices can enhance the efficiency of your filtration system.
Regular maintenance is vital for the longevity of your Whirlpool under sink water filter. Follow these guidelines for optimal performance.
Replace the filter every six months or as recommended by the manufacturer.
Inspect connections regularly for any signs of wear or leaks.
Clean the area around the filter to prevent dust buildup.
Whirlpool Under Sink Filter Installation Issues
Installing a Whirlpool under sink water filter can enhance your home’s water quality, but various issues may arise during the process. Understanding these potential challenges can help you troubleshoot effectively and ensure a smooth installation. This section addresses common problems and solutions to make your installation experience as seamless as possible.
Occasionally, issues may arise during or after installation. Understanding common problems can save time and frustration.
Low water pressure may indicate a clogged filter. Replace the filter promptly.
Water leaks can occur if connections are not tight. Recheck all fittings.
Unpleasant taste may suggest the filter needs replacement.
If problems persist, consult the manufacturer’s troubleshooting guide for further assistance.
Whirlpool Under Sink Installation Safety Tips
Installing a Whirlpool under sink water filter can enhance your drinking water quality, but safety should always be a priority. This section outlines essential safety tips to follow during the installation process, ensuring a smooth and secure setup. By adhering to these guidelines, you can minimize risks and protect both yourself and your plumbing system.
Always ensure the water supply is turned off before starting any installation. Proper installation will prevent leaks and ensure safe drinking water.

Hey, I’m Jake. I focus on cooling systems at Appliance Mastery, like fridges, freezers, and air conditioners.
I’ve worked in appliance repair for more than ten years and I’m certified through NASTeC. I’ve seen just about every fridge issue you can imagine.
My goal is to help you fix problems without stress. Whether it’s a freezer that won’t cool or an AC that keeps beeping, I’m here to walk you through it.