
Have you ever noticed water leaking from your front load washer? Maybe it’s time to check the rubber seal. Picture this: you’re doing laundry, and suddenly, you see a puddle forming around your washer. Frustrating, right? Well, fear not, because in this article, you’ll discover if you can replace the front load washer rubber seal yourself.
Signs of a Damaged Rubber Seal
When facing a leaky front load washer, identifying signs of a damaged rubber seal is crucial. Here are indicators to look out for:
- Visible Wear: Inspect the seal for cracks, tears, or discoloration.
- Water Leakage: If you notice water pooling near the washer, it may indicate a seal issue.
- Mold or Mildew: A damaged seal can lead to mold or mildew growth due to moisture seepage.
- Unusual Noise: The washer may produce unusual noise during operation if the seal is compromised.
Regularly checking for these signs can help you address the issue promptly.
Tools Required for Replacement
When considering replacing the rubber seal on your front load washer, having the right tools handy can make the process much smoother and more efficient. Here are the essential tools you’ll need for the replacement:
- Screwdriver: You may need this to remove screws holding the washer’s front panel in place.
- Pliers: Useful for gripping and maneuvering small parts during the seal replacement.
- Rubber mallet: Helps in gently tapping the new seal into place without causing damage.
- Replacement rubber seal: Make sure to have the correct model and size specific to your washer.
- Cleaning supplies: Prepare some soap, water, and a cloth to wipe down any surfaces before installing the new seal.
Being prepared with these tools beforehand can save you time and ensure a successful rubber seal replacement for your front load washer.
Steps to Replace Front Load Washer Rubber Seal
So, you’re ready to tackle the task of replacing the rubber seal on your front load washer. Here are the steps to guide you through the process:
- Step 1: Unplug your front load washer and turn off the water supply.
- Step 2: Remove the outer seal retaining spring using pliers.
- Step 3: Peel back the old seal from the drum.
- Step 4: Clean the groove where the seal sits.
- Step 5: Install the new seal by pressing it into the groove.
- Step 6: Secure the outer seal retaining spring back into place.
Remember, patience and attention to detail are key when replacing the rubber seal. This ensures a proper seal and prevents leaks in the future.
- Check the washer model and ensure you have the correct replacement seal.
- Inspect the seal groove for any debris or damage before installing the new seal.
- Refer to the washer manual for specific instructions tailored to your model.
- Test the washer after replacement to ensure proper functioning.
By following these steps and tips, you’ll have your front load washer up and running smoothly with a new rubber seal in no time.
Recommended Products

✔✔【COMPATIBLE MODEL】: The 4986ER0004F washer door gasket seal compatible with LG Kenmore washing machines, replaces 4986ER0004J, 4986ER0004K, 4986ER0004M, 4986ER0004N, 1377588, AP4439003, PS2461068, EAP2461068. 4986ER0004F washer door gasket replacement for 27" lg front load washer WM and CW , Kenmore Elite 796 series

Fit for Samsung Washer Door Seal: DC97-18094B front loader door seal fit for Samsung WF42H5000AW/A2 WF42H5200AW/A2 WF42H5200AF/A2 WF42H5200AP/A2;Designed to fit for Samsung Vrt washer,features accurate hole positions,leak-free washer door seal
Tips for Successful Replacement
- Check Compatibility: Ensure the replacement seal is compatible with your washer model to avoid issues.
- Clean Thoroughly: Clean the seal groove of any debris or mold buildup before installing the new seal.
- Follow Manufacturer’s Instructions: Refer to the washer manual for specific guidelines to ensure a proper seal replacement.
- Use Proper Tools: Have the necessary tools like pliers or screwdrivers on hand for a smoother replacement process.
- Test Before Use: After replacing the seal, run a test cycle to confirm that the washer is functioning without leaks.
Remember to stay patient and pay attention to detail throughout the process.
Recommended Products

【Compatible with Electrolux Part 5304505004】Door boot seal 5304505004 is compatible with Electrolux washer models: EFLS627UTT0 EFLS617STT0 EFLS527UIW0 EFLS517SIW0 EFLS627UIW0 EFLS627UTT1 EFLS527UTT1 EFLS517STT0 EFLS527UIW1 EFLS527UIW2 EFLS527UTT0 EFLS527UTT2 EFLS617SIW0 EFLS627UIW1 EFLS627UIW2 EFLS627UTT2 EFLS628WTT00 ELFW7537AT0 ELFW7537AT1 ELFW7537AW0 ELFW7537AW1 ELFW7637AT0 ELFW7637AT1 ELFW7637AW0 ELFW7637AW1 ELFW7637BT0 ELFW7637BT1 ELFW7637BW0 ELFW7637BW1 ELTE7600AT0 ELTE760CAT0 ELTG7600AT0 ELTG7600AW0. Notice: Please check the model number before purchasing washing machine replacement parts, if you have any questions please contact us

Compatible Washer Models: WH05X29521 washer door gasket seal replacement compatible with GE front load washers, including common models GFW550SSN0WW, GFW550SSN1WW, GFW550SSN2WW, GFW550SSN3WW, GFW550SSN4WW, GFW550SSN5WW, GFW550SPN0DG, GFW550SPN1DG, GFW550SPN2DG, GFW550SPN3DG, GFW550SPR0RS, GFW550SPR4RS, GFW550SPR5RS, GFW510SCN0WW, GFW510SCN1WW, GFW510SCN2WW, GFW510SCN3WW, GFW510SCN4WW, GFW510SCN5WW and GFW510SCV0WW. Please confirm your washer model before ordering.

KEEP WASHER CLEAN AND PREVENT ODORS - The magnetic washer door prop includes a 6 in 1 strong magnet and a 360degree adjustable waterproof and anti-rust flexible hose, which helps keep your washing machine door ajar so its gasket won’t get damp. It ensures that your washer is dry and ventilated to prevent odors. 【NOTICE】: Please make sure your washing machine’s panel is made of magnetic metal materials before purchasing, otherwise you will not be able to use it.
Testing the New Seal
When testing the new seal on your front load washer, it’s crucial to ensure that the replacement process was successful and that your machine operates as intended. Here are some steps to test the seal:
- Visual Inspection: Check around the seal for any signs of leaks.
- Run a Cycle: Start a wash cycle without any clothes to observe the seal during operation.
- Monitor for Leaks: Keep an eye out for any water leakage from the seal area.
- Check Functionality: Ensure that the washer door closes properly, and there are no unusual noises during operation.
| Aspects | Results |
|---|---|
| Visual Inspection | No visible leaks |
| Cycle Operation | Smooth and quiet |
| Door Closure | Secure and tight |
Remember, testing the new seal is crucial to confirm the success of the replacement and prevent any future issues with your front load washer.
Conclusion
Ensuring the successful replacement of the rubber seal on your front load washer is vital. By conducting thorough testing post-replacement, you can verify the seal’s effectiveness. Remember to visually inspect for leaks, observe the washer during a cycle, and check the door’s functionality. These simple steps can help prevent any future issues with your washer. Happy washing!
Frequently Asked Questions
What should I do after replacing the seal on my front load washer?
After replacing the seal, visually inspect for leaks, run a cycle without clothes to observe the seal, monitor for leaks during operation, and check the functionality of the washer door.
Why is testing the new seal important?
Testing the new seal is important to confirm its effectiveness. It ensures there are no visible leaks, the cycle operation is smooth and quiet, and the washer door securely closes.
How can I prevent future issues with my washer?
Testing the new seal is crucial in preventing future issues with the washer, as it verifies that the replacement process was successful and the seal is functioning as intended.
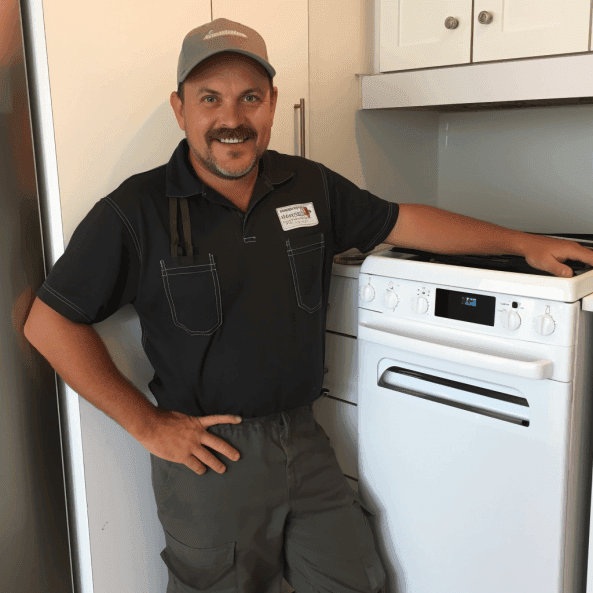
Hi, I’m Charlie, and I cover all things laundry here at Appliance Mastery.
I’ve spent over eight years working on washing machines, dryers, and dishwashers. I also have a degree in mechanical engineering, which helps me understand how these appliances really work.
I try to make every guide clear and practical. If you’re stuck with a noisy dryer or a leaking washer, I’ll help you figure out what’s wrong and how to fix it.