
Common Maytag Dryer Issues
If you’re dealing with Maytag dryer issues, here are some common problems you might encounter and ways to troubleshoot them:
- Dryer Not Heating:
- Check if the dryer is properly plugged in and that the circuit breaker hasn’t tripped.
- Ensure the dryer vent is not clogged or blocked.
- Strange Noises:
- Squeaking, grinding, or thumping noises can indicate worn-out drum rollers or idler pulleys.
- Remove the top of the dryer to access these components for inspection.
- Clothes Taking Longer to Dry:
- Clean the lint screen after every load and check for lint buildup in the vent hose regularly.
- Make sure the dryer is not overloaded, as this can impact drying efficiency.
- Dryer Not Starting:
- Confirm that the door is fully closed and latched properly.
- Check the power supply and control settings to ensure everything is functioning correctly.
- Error Codes Displayed:
- Error codes like “AF” (air flow issue) or “F01” (main control board failure) may require professional assistance.
- Refer to the user manual for specific error code meanings and troubleshooting steps.
- Burning Smell:
- A burning smell could be due to lint buildup in the dryer or a faulty heating element.
- Unplug the dryer and inspect it for any visible signs of burning or damage.
Remember, regular maintenance and timely repairs can help prolong the life of your Maytag dryer and ensure it operates efficiently.
How to Troubleshoot a Maytag Dryer
When your Maytag dryer is acting up, troubleshooting can help you pinpoint the issue quickly. Here’s how to troubleshoot your Maytag dryer effectively:
Check Power Connections:
- Ensure the dryer is plugged in.
- Look for any tripped circuit breakers or blown fuses.
Inspect for Lint Buildup:
- Clean the lint screen after every load.
- Check and clear any lint buildup in the exhaust vent.
Examine Drum Rollers and Idler Pulleys:
- Look for signs of wear or damage.
- Replace any worn-out components as needed.
Verify the Heating Element:
- Check if the dryer is heating properly.
- Replace the heating element if it’s faulty.
Test the Start Switch:
- Make sure the start switch is functioning correctly.
- Replace the switch if necessary.
- Refer to the manual for error code meanings.
- Take appropriate actions based on the error displayed.
Remember, regular maintenance and timely repairs are key to keeping your Maytag dryer running smoothly.
Recommended Products

Includes: -- Dryer / washer replacement parts -- 1) 303373 dryer drum support roller drumroller kit (2 Pcs) -- 2) WP33002535 dryer belt / washer belt -- 3) WP6-3700340 dryer pulley motor idler pulley transmission and bearing repair kit

【High-Quality Parts】: The dryer maintenance kit 4392065 includes: 1 x 341241 whirl-pool Dryer Drum Belt is 92-1/4" long, 1/4" wide, 4 ribs 3 grooves, high quality neoprene material for higher tensile strength,Thickened BeltLonger Lifespan. 1 x 691366 Idler Pulley: thickened metel exceptionally strong, one-piece molding technology durable and long-lasting, 2 x 349241T Roller: reinforced metal bearing smooth and silent, thickened rubber wheel sturdy and wear-resistant
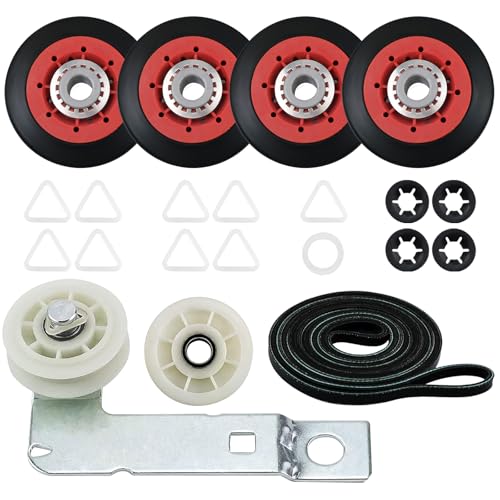
[FIX YOUR DRYER PROBLEMS]: The 4392067 dryer repair kit and W10837240 Dryer Idler Pulley are essential maytag dryer parts designed to address common issues such as noisy operation, non-starting cycles, lack of heat, and drum rotation failures
Tools Needed for Maytag Dryer Repair
When it comes to repairing your Maytag dryer, having the right tools on hand can make the process much smoother. Here are essential tools you may need:
- Screwdriver: Useful for removing panels and accessing internal components.
- Multimeter: Helps test electrical components for proper functionality.
- Putty knife: Handy for prying apart components without causing damage.
- Needle-nose pliers: Useful for handling small parts and making precise adjustments.
- Flashlight: Essential for illuminating dark spaces within the dryer.
- Vacuum: Great for cleaning out lint and debris from the dryer’s interior.
- Replacement parts: Keep commonly replaced items like belts, fuses, and switches on hand.
With these tools at your disposal, you’ll be well-equipped to tackle common issues with your Maytag dryer and keep it running smoothly.
Recommended Products

𝐂𝐎𝐌𝐏𝐋𝐄𝐓𝐄 𝟒𝟑𝟗𝟐𝟎𝟔𝟕 𝐃𝐑𝐘𝐄𝐑 𝐑𝐄𝐏𝐀𝐈𝐑 𝐊𝐈𝐓 --Dryer repair kit 4392067 includes all parts to fix Dryer Problems like Noisy,will not tumble,leaves marks on clothes or will not start etc. include 4 *8536974/WPW10314173 dryer drum support roller wheels; 1 * 661570V dryer drum belt ( 93 1/2" long); 1 * 279640 dryer idler pulley ( pulley wheel keeps tension on the dryer belt.❗️The belt size is 93.5 inches in length and 0.25 inches in width. When purchasing, please make sure that our product is compatible with your dryer.

[Package Includes] 4x WPW10314173 roller wheel repair kit (4pcs red wheels, 8pcs tri-rings 4 pcs retaining washer),1x 661570V drum belt, 1x279640 idler pulley.
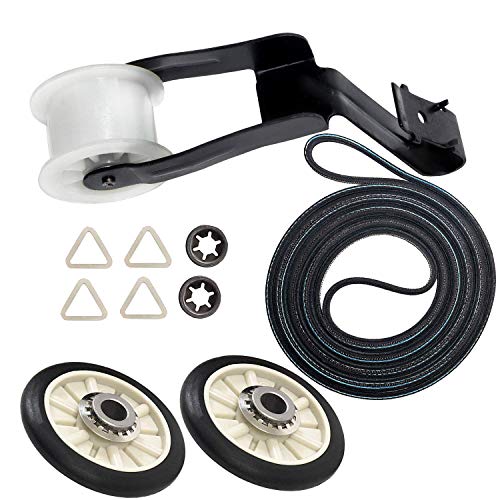
COMPLETE REPAIR KIT: Includes x2 349241T Dryer Rear Drum Support Rollers, x1 691366 Dryer Idler Pulley Assembly, x1 341241 Dryer Drum Belt (1/4" wide, 92 1/4" long, 4 ribs, 3 grooves), x4 Tri-rings, and x2 Clips. The 4392065 Dryer Repair Kit is a direct replacement for part numbers AP3131942, 587636, 4392065, 2014, 26000279435, 26000279436, 279435, 279436, 279708, 279708MS, 279709, 279709MS, 279860, 279948, 4392065VP, 80046, 8106, 8237, 8238, PS373087.
Step-by-Step Guide to Repairing Your Maytag Dryer
Repairing your Maytag dryer can seem daunting, but with the right tools and knowledge, you can tackle common issues efficiently.
1. Check for Power Issues:
- Before starting any repairs, ensure the dryer is unplugged to avoid accidents.
- Use a multimeter to test the power outlet for electricity.
2. Inspect the Dryer Belt:
- If your dryer drum isn’t spinning, a broken belt might be the cause.
- Locate the belt and check for any signs of wear or damage.
3. Test the Thermal Fuse:
- A non-functional thermal fuse can lead to overheating issues.
- Use a multimeter to check for continuity in the fuse.
4. Examine the Door Switch:
- If your dryer doesn’t start, the door switch could be faulty.
- Test the switch for continuity with a multimeter.
5. Clean the Ventilation System:
- Ensure your dryer’s vents are clear of lint to prevent fire hazards.
- Use a vacuum to remove any built-up debris.
6. Replace Faulty Parts:
- Order replacement parts like belts, fuses, or switches to fix identified issues.
- Follow manufacturer instructions or online tutorials for proper installation.
7. Test the Dryer:
- After repairs, plug in your dryer and test it to ensure the issues have been resolved.
- Monitor the appliance for any abnormal sounds or performance issues.
- Clean the lint trap after each use to maintain optimal dryer performance.
- Schedule annual maintenance checks to catch potential issues early.
Ready to tackle your Maytag dryer repairs? With these steps, you can keep your appliance running smoothly without the need for a professional service call.
Recommended Products

High-Quality Parts: The dryer belts kit is made of premium quality material, and our dryer parts replacement proves extremely durable and highly corrosion-resistant under continuous high-temperature exposure tests. Our 4392065 dryer parts meet or exceed all original manufacturer specifications for fit and performance. They offer the durability you need at a fraction of the cost of other alternatives.

4392067 Dryer Repair Kit: The upgraded 5-wheel 4392067 Dryer Repair Kit includes 5 x WPW10314173 dryer drum support roller wheel kit (5 red wheels; 9 tri-rings; 4 retaining washer); W10837240 dryer idler pulley assembly with Bracket; 1 x 661570V dryer drum belt (93 1/2"); 1 x 279640 dryer idler pulley .PLEASE NOTE:The belt in this kit is part number 661570V, please check to see if your dryer uses this part number for the belt before ordering

Fits Dryer Models: Our 4392065 kit is suitable for brands like Whirlpool Kenmore Maytag Sears Kenmore Kitchen-Aid and Roper. Fits for models wed4815ew1 ned4655ew1 ned4600yq1 wed4800bq1 wed7300dw0 mgdc215ew0, etc
Safety Tips for DIY Maytag Dryer Repair
When tackling repairs on your Maytag dryer, safety should be your top priority. Follow these essential safety tips to prevent accidents and ensure a smooth repair process:
- Always unplug your dryer before attempting any repairs. This will protect you from electric shocks and other dangers.
- Wear appropriate safety gear, such as gloves and safety goggles, to shield yourself from sharp edges and potential debris.
- Work in a well-lit area to clearly see what you’re doing and avoid mistakes that could lead to injury.
- Keep your work area clean and clutter-free to prevent tripping hazards and maintain a safe environment.
- Read the manufacturer’s instructions carefully before starting any repair to understand the process and any specific safety considerations.
- If you’re unsure about a repair step, seek professional help. It’s better to be safe than risk causing further damage or harm.
Remember, your safety comes first when working on DIY Maytag dryer repairs. By following these safety guidelines, you can successfully complete your repair tasks without putting yourself at risk.
Conclusion
Prioritizing safety is key when embarking on DIY Maytag dryer repairs. By following the safety tips outlined in this article, you can ensure a smooth and accident-free repair process. Remember to always unplug the dryer, wear appropriate safety gear, and work in a well-lit environment. Consulting the manufacturer’s instructions is crucial for a successful repair. If you ever feel unsure about a repair step, don’t hesitate to seek professional assistance. Your well-being is paramount, so take the necessary precautions to complete your repair tasks effectively.
Frequently Asked Questions
Is DIY Maytag dryer repair safe?
Yes, DIY Maytag dryer repair can be safe if proper safety precautions are followed. This includes unplugging the dryer, wearing safety gear, working in a well-lit and clean area, and carefully following the manufacturer’s instructions.
What should I do if I’m unsure about a repair step?
If you are unsure about a repair step, it’s best to seek professional help. Prioritizing safety is crucial, and seeking guidance from experts can help prevent accidents and ensure a successful repair process.
How can I ensure a successful repair process?
To ensure a successful repair process, make sure to prioritize safety by following all safety guidelines, including unplugging the dryer, wearing safety gear, and working in a well-lit and clean area. Additionally, carefully follow the manufacturer’s instructions for repairing your Maytag dryer.
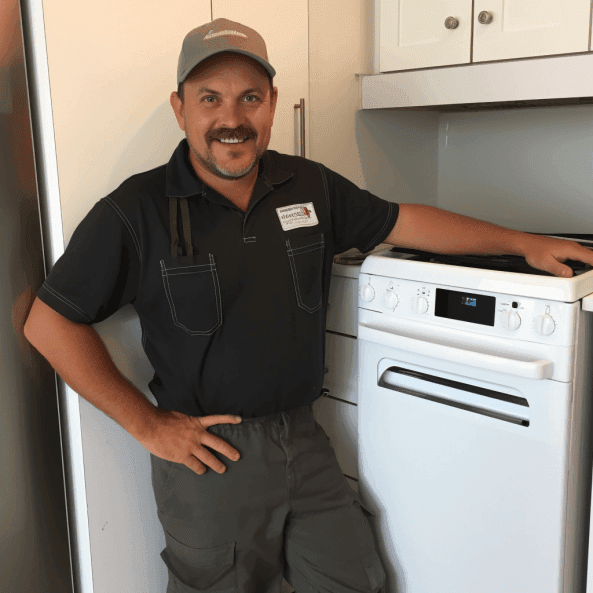
Hi, I’m Charlie, and I cover all things laundry here at Appliance Mastery.
I’ve spent over eight years working on washing machines, dryers, and dishwashers. I also have a degree in mechanical engineering, which helps me understand how these appliances really work.
I try to make every guide clear and practical. If you’re stuck with a noisy dryer or a leaking washer, I’ll help you figure out what’s wrong and how to fix it.