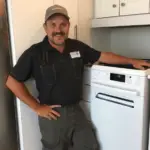
Is your dryer taking longer than usual to dry your clothes? Picture this: you’ve got a load of laundry to do, but the dryer vent seems to be causing a delay. Fret not, as we’ve got your back! In this article, we’ll guide you through the simple steps to fix your dryer vent efficiently.
Signs of a Clogged Dryer Vent
If you notice any of the following signs, it’s highly likely that your dryer vent is clogged:
- Clothes take longer to dry
- The dryer feels hot to the touch
- Burning smell when the dryer is running
- Excessive lint buildup in the dryer trap
Address these signs promptly to avoid serious issues like fire hazards.
Tools You’ll Need
When fixing a dryer vent, having the right tools ready can make the process smooth and efficient. Here are some essential tools to have on hand:
- Screwdriver: To remove and reattach any screws holding the vent in place.
- Vent brush: For cleaning out debris and lint that may be clogging the vent.
- Vacuum cleaner with hose attachment: Useful for reaching deep into the vent and removing trapped lint.
- Duct tape: To secure any connections or seal off potential leaks.
- Safety gloves: Protect your hands while handling sharp edges or debris.
- Flashlight: Helps you see inside the vent for a thorough inspection.
Click here to preview your posts with PRO themes ››
Remember to prioritize safety and ensure the dryer is unplugged before beginning any repairs.
Step 1: Disconnecting the Dryer
- Locate the dryer’s power cord and unplug it from the electrical outlet.
- For added safety, it’s recommended to turn off the gas supply to gas dryers.
- Once disconnected, you’re ready to move on to the next steps in fixing your dryer vent.
Step 2: Inspecting and Cleaning the Vent
Onto the next crucial step in fixing your dryer vent – inspecting and cleaning. Here’s how you can effectively tackle this task:
- Start by removing the vent cover outside your home. Ensure it’s free from any debris or blockages.
- Inspect the vent opening for any buildup of lint, debris, or other obstructions. Use a flashlight to get a clear view.
- Check the entire length of the vent for any blockages. A clogged vent can lead to longer drying times and even pose a fire risk.
- Clean the vent using a vent cleaning brush or a vacuum with a long hose attachment. Make sure to remove any accumulated lint and dirt.
- Reattach the vent cover securely after cleaning to prevent animals or pests from entering the vent.
Remember, regular vent inspection and cleaning are essential to keep your dryer running efficiently and safely. Now, let’s move on to the next steps in resolving your dryer vent issue.
Step 3: Reconnecting and Testing the Dryer
After cleaning the vent, reconnect it to the dryer exhaust port and secure it tightly. Make sure there are no kinks or bends in the vent hose that can restrict airflow.
Click here to preview your posts with PRO themes ››
Plug in the dryer and turn it on to test if the airflow is improved. You can do this by running it for a few minutes with a load of damp clothes.
Check the airflow outside to ensure that the vent is expelling moist air properly and there are no obstructions.
If you notice poor airflow, double-check the connection and look for any blockages in the vent. Re-clean the vent if necessary.
Remember, regular maintenance of your dryer vent is important for preventing fire hazards and ensuring your dryer works efficiently.
Conclusion
Ensuring your dryer vent is clean and properly connected is crucial for efficient performance and safety. By following the steps outlined in this article, you can maintain good airflow and prevent potential fire hazards. Remember to test your dryer after cleaning the vent to confirm improved airflow. Regular maintenance is key to keeping your dryer running smoothly. Keep these tips in mind to enjoy hassle-free laundry days and peace of mind knowing your dryer is working efficiently.
Frequently Asked Questions
How do I know if my dryer vent is clogged?
Check for signs like longer drying times, hot exterior of the dryer, or musty smell on clothes. These indicate potential vent clogging.
What should I do after cleaning the dryer vent?
Reconnect the vent securely, remove any airflow obstructions, and run the dryer with damp clothes to test improved airflow.
Why is regular maintenance of dryer vents important?
Regular maintenance prevents fire hazards, ensures efficient dryer performance, and prolongs the appliance’s lifespan.
Click here to preview your posts with PRO themes ››
What should I do if my dryer still has poor airflow after cleaning the vent?
Check for any remaining obstructions, ensure proper vent installation, and consider seeking professional help if needed.
Charlie Thomson is Appliance Mastery's expert on laundry appliances. With a degree in mechanical engineering and over 8 years of experience in the appliance repair industry, Charlie is a go-to resource for homeowners who want to tackle common issues with their washing machines, dryers, and dishwashers.


