
Got a hole in your aluminum AC line? Ever wondered how to tackle this pesky problem without breaking a sweat? Picture this: a scorching summer day, and your AC decides to take an unexpected break. Fret not, because we’ve got your back! In this article, we’ll walk you through the simple steps to fix that pesky hole in your aluminum AC line.
Assessing the Damage
When assessing the damage to an aluminum AC line, it’s crucial to pinpoint the location and extent of the hole. Here’s how you can efficiently evaluate the situation:
- Look for Signs: Begin by examining the area around the line for any oil or refrigerant leaks. These could indicate a puncture in the line.
- Check for Hissing Sounds: Turn on the AC and listen for any hissing sounds near the line. This often signals leakage.
- Feel for Cold Spots: Run your hand along the line while the AC is on to detect any abnormal cold spots. These can indicate a break in the line.
- Inspect for Physical Damage: Visually inspect the entire length of the aluminum line for any visible damage such as dents, bends, or corrosion.
Remember, a thorough assessment will help you determine the best course of action to repair the hole effectively.
Gathering the Necessary Materials
When fixing a hole in an aluminum AC line, the first step is Gathering the Necessary Materials to ensure a successful repair. Here’s what you’ll need:
- Aluminum repair epoxy: Look for a high-quality epoxy specially designed for aluminum repairs.
- Clean cloth: To wipe down the area around the hole and ensure a clean surface for the repair.
- Sandpaper: Use fine-grit sandpaper to roughen the surface around the hole for better adhesion.
- Rubbing alcohol: Helps to further clean and degrease the area to promote adhesion.
- Protective gloves: Essential for keeping your hands clean and protected during the repair process.
- Safety goggles: Protect your eyes from any debris or chemicals involved in the repair.
- Leak sealant: Consider using a leak sealant for an added layer of protection after the repair.
Once you have these materials ready, you’ll be well-prepared to tackle the next steps in fixing the hole in your aluminum AC line.
Recommended Products

✔ ALUMINUM-FILLED METAL REPAIR COMPOUND – Professional-grade aluminum-filled polymer designed to permanently repair cracks, blow holes, and casting imperfections in aluminum components including radiators, engine blocks, housings, tanks, and HVAC parts.

QUICK UNDERWATER REPAIRS - Designed for emergency fixes on aluminum boats, outdrives, and underwater aluminum parts, this product hardens rapidly to provide efficient, durable repairs.

1. METAL EPOXY REPAIR SYSTEM FOR PARTS THAT MUST HOLD — AOJEL S300 is a 2-part cold-weld style metal epoxy for prepared aluminum, steel, stainless steel, cast iron, cast aluminum, brackets, housings, pipe fittings, tools, frames, and other non-flexing metal repairs that need to hold after cure.
Preparing the Work Area
When tackling the task of fixing a hole in your aluminum AC line, Preparing the Work Area is crucial to ensure a smooth repair process. Here are some steps to help you get ready:
- Clear the Area: Remove any obstacles around the AC line to have easy access.
- Ensure Adequate Ventilation: Work in a well-ventilated space to avoid inhaling fumes from the repair materials.
- Gather Your Materials: Have all the required materials at hand for a seamless workflow.
- Put on Safety Gear: Don your protective gloves and safety goggles before starting the repair.
Preparation sets the foundation for a successful repair job.
Repairing the Hole in the Aluminum AC Line
Repairing a hole in your aluminum AC line is a manageable task, especially with the proper guidance. Here are key steps to help you through the process:
- Locate the Hole: Start by identifying the exact location of the hole on the aluminum AC line.
- Prepare the Area: Clean the area around the hole to ensure a smooth repair process.
- Select the Repair Method: Depending on the size of the hole, choose an appropriate repair method such as patching or soldering.
- Apply the Fix: Follow the instructions for your chosen repair method carefully to effectively seal the hole.
- Test for Leaks: After repairing the hole, conduct a thorough check to ensure there are no leaks in the line.
Remember, safety is crucial throughout the repair process. By following these steps diligently, you can successfully fix a hole in your aluminum AC line.
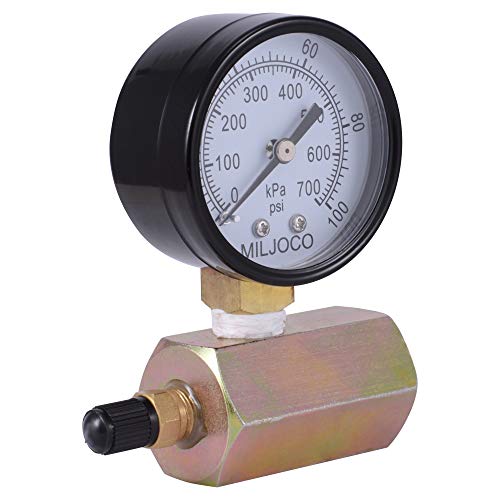
Testing the Repaired AC Line
When testing the repaired AC line, it’s essential to ensure that the fix is reliable before recharging the system. Here are some key steps to follow:
- Visual Inspection: Begin by examining the repaired area for any signs of leaks or damage.
- Pressure Test: Use a pressure gauge to check the system for any leaks under pressure.
- Apply soapy water on the repaired section and look for bubbles forming, indicating a leak.
- Monitor pressure levels to ensure they remain stable after the repair.
During the testing phase, if you detect any leaks or issues, it’s crucial to address them promptly to prevent future problems. Remember, thorough testing is key to a successful repair.
Recommended Products

𝐏𝐥𝐞𝐚𝐬𝐞 𝐍𝐨𝐭𝐞: The 3 Pieces AC Manifold Gauge Hose Kit can be used for R22, R12, R502 system, but the pressure of the hose can’t big than 2500 PSI.
SHARKBITE PRESSURE TEST GAUGE: This FNPT test gauge is ideal for pressure testing air or gas; features a bleed port and connects to 3/4 inch MNPT

HIGH-PERFORMANCE 4 CFM VACUUM PUMP: Single-stage rotary vane pump delivers fast, deep evacuation for automotive and home HVAC systems; Removes moisture before refrigerant chargin;. Die-cast aluminum body with anti-slip base ensures long-lasting use
Conclusion
Now that you’ve learned the importance of proper preparation and the steps to fix a hole in an aluminum AC line, you’re well-equipped to tackle this task with confidence. Remember to clear the work area, choose the right repair method, and thoroughly test for leaks. Visual inspection and pressure testing are key to ensuring a reliable fix before recharging the system. By monitoring pressure levels and promptly addressing any issues, you’ll be on your way to a successful repair. Good luck with fixing your aluminum AC line!
Frequently Asked Questions
How important is preparing the work area before fixing a hole in an aluminum AC line?
It’s crucial to prepare the work area by cleaning and ensuring safety. Clear space to work comfortably and avoid any hazards that could interfere with the repair process.
What steps are involved in fixing a hole in an aluminum AC line?
The key steps include clearing the work area, selecting an appropriate repair method such as brazing or using a repair kit, and thoroughly testing for leaks post-repair.
Why is testing for leaks after fixing the AC line important?
Testing helps ensure the repair is effective and there are no remaining leaks. Visual inspection and pressure testing are essential for verifying the reliability of the fix.
What should be monitored when testing the repaired AC line?
Pressure levels should be monitored closely to detect any irregularities. Promptly addressing leaks or issues that arise during testing is critical for a successful repair.
How can one ensure the repaired AC line is reliable before recharging the system?
By performing thorough visual inspections and implementing pressure testing, one can ensure that the repair is effective and reliable before recharging the AC system.

Hi, I’m Charlie, and I cover all things laundry here at Appliance Mastery.
I’ve spent over eight years working on washing machines, dryers, and dishwashers. I also have a degree in mechanical engineering, which helps me understand how these appliances really work.
I try to make every guide clear and practical. If you’re stuck with a noisy dryer or a leaking washer, I’ll help you figure out what’s wrong and how to fix it.