
Ever wondered why your clothes take forever to dry, leaving you in a bind when you need that favorite shirt ASAP? Picture this: you load up the dryer, press start, and… nothing. No heat, no dry clothes. Frustrating, right? Don’t worry, you’re not alone in facing this issue.
Common Signs of a Faulty Dryer Heating Element
If your dryer isn’t drying your clothes effectively, it could be a result of a faulty heating element. Here are some common signs to look out for:
- Clothes Take Excessively Long to Dry: If you find that your clothes are taking longer than usual to dry, even after multiple cycles, it might indicate an issue with the heating element.
- Dryer Feels Cold to the Touch: After running your dryer for a while, if you notice that it feels cold inside instead of warm, the heating element might not be working properly.
- Clothes Remain Damp or Cool: When you take out your clothes after a full drying cycle and they are still damp or cool to the touch, this could signal a problem with the heating element.
- Visible Damage: Check the heating element for any visible damage or signs of wear. If you see any unusual spots, cracks, or breaks, it’s likely affecting the performance.
Remember, fixing the heating element can help your dryer function efficiently and get your clothes dried in no time.
Tools Needed for Repairing the Dryer Heating Element
To effectively repair your dryer heating element, you’ll need a few essential tools. Here’s what you should have on hand:
| Tools |
|---|
| Multimeter |
| Screwdriver |
| Nut driver |
| Needle-nose pliers |
| Gloves |
Recommended Products

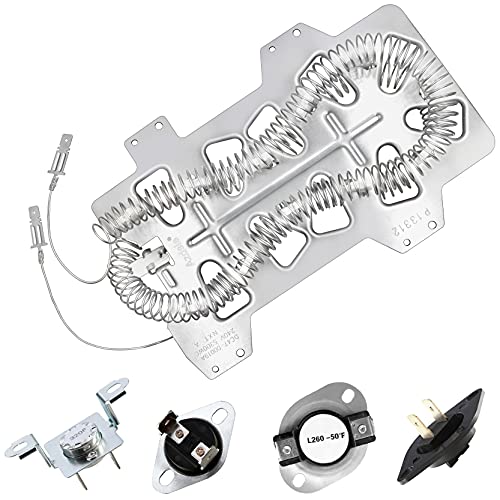
Azdele Heating element for samsung dryer: dc47-00019a samsung heating element wire is 25% longer than other dryer wires, increasing the resistance by 65% and producing stable heating.

✅[QUALITY GROWTH] Excellent heat-proof and abrasion-proof. 2026 UPGRADE 279838 dryer heating element NICKEL-CHROMIUM content reaches 95% and the length of the heating wire is 25% longer than other common dryer replacement parts. So it will last longer than other brand and OEM parts.
Step-by-Step Guide to Fixing the Dryer Heating Element
Repairing your dryer heating element is a straightforward process that you can do yourself. Here’s a simple guide to help you tackle this task effectively:
Step 1: Safety First
- Before starting any repairs, unplug your dryer from the power source to avoid any accidents.
- It’s also a good idea to wear protective gloves to shield your hands during the repair process.
Step 2: Access the Heating Element
- Depending on the dryer model, you may need to remove the back panel or front lower panel to access the heating element.
Step 3: Test the Heating Element
- Use a multimeter to check the continuity of the heating element. A continuity reading indicates that the heating element is working correctly.
Step 4: Replace the Heating Element
- If the heating element is faulty, disconnect the wires and remove the old element from the dryer.
- Install the new heating element and reconnect the wires securely.
- Put back the panels you removed to access the heating element.
- Once everything is back in place, plug in your dryer and test to ensure the heating element is functioning properly.
Following these steps will help you fix your dryer heating element efficiently and get your dryer up and running in no time.
Testing the Dryer Heating Element After Repair
Now that you’ve replaced the faulty dryer heating element, it’s time to ensure everything is in working order before putting your dryer back together. Testing the heating element is crucial to verify that your repair was successful.
- Plug-in the dryer: Connect the dryer to the power source but keep the back panel off.
- Turn on the dryer: Start a drying cycle to allow the heating element to begin its operation.
- Feel for heat: Reach towards the back of the dryer where the heating element is located. You should feel warmth emanating from the element.
- Observe the heating cycle: The heating element should cycle on and off throughout the drying process to maintain the desired temperature.
- Use a multimeter: If you have a multimeter, you can perform a more detailed test by checking the continuity of the heating element.
Remember, safety always comes first. If you notice any irregularities during the testing process or if the heating element fails to produce heat, it may be necessary to revisit the repair steps or seek professional assistance.
Ensuring that the dryer heating element is functioning properly is essential for the overall performance of your dryer. By following these testing steps, you can confirm that your repair was successful and have peace of mind knowing that your dryer will continue to operate efficiently.
Maintenance Tips to Prevent Future Issues
Here are some practical steps to keep your dryer heating element in good shape:
- Clean the Lint Screen Regularly: Remove lint after every load to prevent buildup and ensure proper airflow.
- Inspect Vents and Ducts: Check for obstructions or blockages that can restrict airflow and cause overheating.
- Avoid Overloading the Dryer: This can strain the heating element and other components, leading to inefficiency.
- Use Fabric Softener Sheets Sparingly: Excessive use can leave a residue on the heating element, affecting its performance.
- Schedule Annual Maintenance: Consider a professional check-up to catch potential issues early and prolong the lifespan of your dryer.
| Statistical Data | |
|---|---|
| Dryer Fires Caused by Lint Buildup | 2,900 per year in the US |
| Average Cost of Dryer Repair | $100-$400 |
| Potential Cost of a Dryer Fire | $2,500-$6,000 |
Remember, regular maintenance can help extend the life of your dryer and prevent costly repairs down the line.
Recommended Products

[Stretch Universal Connector] PetOde dryer lint vacuum cleaner attachment is designed with a premium elasticated stretch universal connector that can be connected to most vacuum cleaners! Say goodbye to the worry of purchasing incompatible attachment models

Home Essentials: Holikme dryer vent cleaner kit can easily help you to remove years of built up lint from your dryer vent, making your appliance runs more efficiently and securely; Suitable for most dryer types, please kindly check our product size information for reference in order to better shopping experience

【3-Piece High-Value Set】 — Includes vent duct brush, lint trap brush, and flexible crevice tool. One kit replaces multiple single-purpose brushes — better value than buying separately.
Conclusion
You now have the knowledge and tools to tackle any issues with your dryer’s heating element. By following the maintenance tips provided, you can ensure your dryer operates efficiently and safely for years to come. Remember to clean the lint screen regularly, inspect vents and ducts, avoid overloading, use fabric softener sheets sparingly, and schedule annual maintenance. By staying proactive, you can prevent costly repairs and potential dryer fires. Keep your dryer in top condition by implementing these simple steps. Your efforts will not only extend the lifespan of your dryer but also give you peace of mind knowing you’re taking the necessary precautions to keep your home safe and your appliance running smoothly.
Frequently Asked Questions
What are some maintenance tips for preventing dryer heating element issues?
Regularly clean the lint screen, inspect vents and ducts, avoid overloading the dryer, use fabric softener sheets sparingly, and schedule annual maintenance.
How do I fix a faulty dryer heating element?
Follow a step-by-step guide for fixing a faulty dryer heating element.
Why is regular dryer maintenance important?
Regular maintenance extends the dryer’s lifespan, prevents expensive repairs, and ensures efficient and safe operation.
What statistical data is provided in the article?
The article includes statistics on dryer fires caused by lint buildup, the average cost of dryer repair, and the potential cost of a dryer fire.

Hi, I’m Charlie, and I cover all things laundry here at Appliance Mastery.
I’ve spent over eight years working on washing machines, dryers, and dishwashers. I also have a degree in mechanical engineering, which helps me understand how these appliances really work.
I try to make every guide clear and practical. If you’re stuck with a noisy dryer or a leaking washer, I’ll help you figure out what’s wrong and how to fix it.