
Struggling to beat the heat this summer? Imagine having your own oasis of cool, refreshing air right in your home. But the thought of installing a split system AC on your own might seem daunting. Don’t worry, you’re not alone in feeling that way. The good news is that with the right guidance, you can breeze through the installation process and enjoy the comfort it brings.
Understanding the Basics of Split System AC
To successfully install a split system air conditioner, you need to understand its key components and how they work together. Here’s a breakdown:
- The indoor unit contains the evaporator coil, fan, and air filter, which absorbs heat from inside your home.
- The outdoor unit houses the compressor, condenser coil, and fan, where heat from indoors is released outside.
- Refrigerant is the substance that helps transfer heat between the indoor and outdoor units.
- The copper tubing and electrical wiring connect the indoor and outdoor units, enabling the system to function.
When installing a split system AC:
- Placement is crucial. Ensure the indoor unit is mounted high on a wall for optimal airflow.
- Sizing matters. Choose a unit that matches the size of the area you want to cool.
- Drainage is necessary. Properly angle the indoor unit to allow condensation to drain outside.
- Electrical connections must be done by a qualified electrician to ensure safety and compliance.
By having a good grasp of these basics, you’ll be better equipped to tackle the installation process confidently.
Choosing the Right Location for Your AC Unit
When selecting the location for your split system AC unit, keep these factors in mind:
- Avoid areas with direct sunlight to enhance efficiency.
- Provide ample space around the unit for proper airflow.
- Ensure the area is not near sources of heat or humidity to prevent overloading.
Remember, a well-chosen location can significantly impact the performance of your AC system.
Preparing for Installation: Tools and Safety Measures
When getting ready to install your split system AC, it’s crucial to have the right tools and prioritize safety. Here are some key steps to ensure a smooth and secure installation process:
- Tools You’ll Need:
- Screwdrivers
- Drill
- Level
- Pliers
- Tape measure
- Insulation tape
- Safety Measures to Remember:
- Always turn off the power before starting any work.
- Use appropriate safety gear like gloves and goggles.
- Ensure stable positioning of ladders or scaffolding.
- Check for any sharp edges or obstacles that could cause accidents.
- Useful Tips:
- Double-check the manufacturer’s instructions for specific tools required.
- Keep a fire extinguisher nearby as a precaution.
- If unsure about any step, consult a professional to avoid risking damage to your unit or injury.
Remember, a well-equipped and safety-conscious approach sets the foundation for a successful split system AC installation.
Recommended Products

Compatible with Common HVAC Locking Caps: Designed for many R-410A and R-22 refrigerant safety locking caps used on AC units, mini-split systems, and HVAC service valves. Please confirm the cap keyway shape before purchase

R410A-Only Compatibility for Mini Splits Engineered for R-410A refrigerant systems, this 5/16" female quick connect to 1/4" male SAE flare adapter ensures a secure fit between mini split AC service ports and standard HVAC hoses or manifold tools. Not for R32 or other refrigerants.

DURABLE ELECTRICAL CONNECTION FOR MULTIPLE APPLICATIONS: DuctlessAire's AC power whip features 10-gauge copper wire with three conductors, ideal for powering HVAC units, pools, spas, solar panels, and outdoor lighting. The 6-foot length and 1/2-inch trade size provide flexibility for short-run exterior uses. Its sturdy design supports consistent electrical performance across various residential and commercial applications.
Step-by-Step Guide to Installing a Split System AC
To successfully install a split system AC on your own, follow these straightforward steps:
- Choose an Ideal Location:
Select a spot on the wall where you want to install the indoor unit. Make sure it’s close to an electrical outlet and away from direct sunlight or heat sources. - Install the Mounting Plate:
Secure the mounting plate to the interior wall using a level to ensure it’s straight. This plate will support the indoor unit. - Drill Holes for Piping:
Drill a hole through the wall to connect the indoor and outdoor units. Ensure the hole is slightly downward to prevent water from entering the room. - Mount the Indoor Unit:
Carefully hang the indoor unit on the mounting plate and connect the piping and electrical wires following the manufacturer’s instructions. - Secure the Outdoor Unit:
Place the outdoor unit on a flat surface, ensuring it’s stable and level. Connect the piping between the indoor and outdoor units. - Test the System:
Turn on the power and test the unit to ensure it’s functioning properly. Check for any unusual sounds or leaks. - Finish the Installation:
Wrap any exposed piping with insulation tape to prevent energy loss. Seal the hole where the piping enters the room to prevent air leaks.
Important: If you’re uncertain at any point, it’s best to seek professional help to ensure a safe and accurate installation process.
| Steps | Details |
|---|---|
| Choose Location | Near an outlet, away from sunlight |
| Install Mounting Plate | Secure straight & level on interior wall |
| Drill Holes | Connect indoor and outdoor units |
| Mount Indoor Unit | Follow manufacturer’s instructions |
| Secure Outdoor Unit | Place on stable surface, connect piping |
| Test System | Ensure proper function, no leaks |
| Finish Installation | Insulate piping, seal holes |
Recommended Products

UNIVERSAL COMPATIBILITY: The DuctlessAire Outdoor Wall Bracket is designed to support mini split systems ranging from 9,000 to 36,000 BTU, offering a reliable and secure solution for a wide variety of systems. This product features an adjustable design, allowing for easy installation and secure placement. Ideal for both residential and commercial use, it supports up to 300 lbs, making it a versatile choice for mini split brackets for outside installations.

Universal Size - Our air conditioner support bracket is designed to fit mini split units, heat pumps units, and AC compressors ranging from 7000 - 15000 BTU. Its dimensions of 14" 3/8 x 17”1/8 make it a versatile and hassle-free option for all applications.

Strong Weight Capacity: This air conditioner wall bracket can support up to 400(490) pounds and is suitable for 7000-12000 BTU air conditioners(universal mini split, ductless air conditioner, heat pumps, AC compressors & HVAC systems), allowing your air conditioner to be safely and stably mounted on the wall
Testing and Troubleshooting Your New AC
Now comes the crucial step of testing and troubleshooting your freshly installed split system AC to ensure everything works smoothly.
Here’s what you should do next:
- Power On: Turn on the system and check if the indoor and outdoor units power up without any issues.
- Thermostat Test: Set the thermostat to different temperatures to see if the system responds correctly.
- Airflow Inspection: Feel the airflow from the indoor unit to confirm it’s strong and consistent.
- Cooling Test: Allow the system to run for a bit to ensure it’s cooling effectively.
- Inspect for Leaks: Check for any visible leaks around connections and joints.
If you encounter any problems during the testing phase, here are some troubleshooting tips:
- No Cooling: Make sure the thermostat is set correctly and there are no blockages in the airflow.
- Strange Noises: Unusual sounds could indicate loose components or debris in the system.
- Leaks: Address any leaks promptly to prevent damage to your AC unit and the surrounding area.
- Electrical Issues: If you notice electrical problems, turn off the system immediately and seek professional help.
Remember, thorough testing and timely troubleshooting can help you catch any issues early on, ensuring your AC functions effectively for the long haul.
Recommended Products

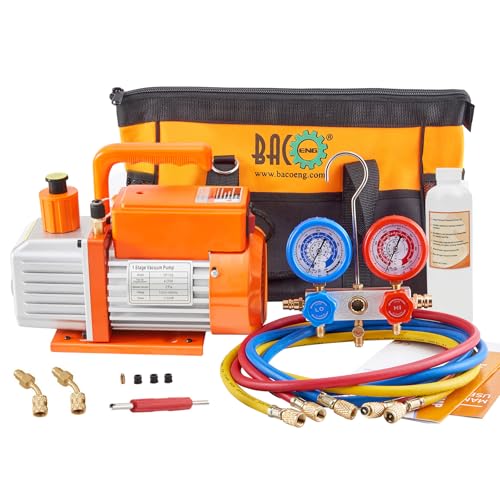
HVAC Vacuum Pump Kit: This AC vacuum pump and gauge set includes a 1/3 HP 4.5 CFM Single Stage vacuum pump, a three-way manifold gauge, three hoses, a low-pressure quick coupler, a high-pressure quick coupler, two R410a adapters( from1/4'' male to 5/16'' female),2 R134a can taps( puncture-style and self-sealing ),a bottle of vacuum oil,a thickened and durable trifold storage case,and other tools like valve core wrench and screwdriver;the vacuum pump,gauge and all other accessories neatly packed in the storage case for easy carry
Auto/Mini Split AC Service Set: BACOENG AC vacuum pump kit includes a sparkless 4cfm 1/3 hp vacuum pump, a 3-way manifold gauge, 5ft hoses x3, 1/4" SAE Male to 5/16" SAE Female R410a Adapters x2

Auto AC Service Set: Orion Motor Tech's auto AC vacuum pump kit includes a powerful 1/3 hp vacuum pump, a 4-way manifold gauge, a leak detector, R134a can taps, R134a quick couplers, R410a adapters, vacuum oil, and 4 hoses for most AC repair works
Conclusion
Ensuring your split system AC is installed correctly is key to its long-term performance. By following the testing and troubleshooting steps outlined in this article, you can address any issues promptly. Remember to test the thermostat, airflow, and cooling efficiency, and keep an eye out for leaks. If you encounter any problems like lack of cooling or strange noises, don’t hesitate to seek professional assistance. Taking the time to test and troubleshoot your AC system now will save you headaches later on. Enjoy the cool comfort of your properly installed split system AC!
Frequently Asked Questions
What are the crucial steps for testing and troubleshooting a newly installed split system AC?
Testing a newly installed split system AC involves powering on the system, testing the thermostat and airflow, ensuring effective cooling, and checking for leaks. Troubleshooting tips are provided for common issues like lack of cooling, strange noises, leaks, and electrical problems.
Why is it important to address AC problems promptly?
Addressing AC problems promptly is crucial to ensure the long-term effectiveness of the system. Neglecting issues can lead to further damage and costly repairs. Seek professional help if needed to resolve problems efficiently.
How can I ensure the effectiveness of my AC system?
Regular testing and troubleshooting of your AC system are essential to ensure its effectiveness. By following maintenance guidelines and addressing issues promptly, you can maintain the performance and longevity of your AC unit.

Hi, I’m Charlie, and I cover all things laundry here at Appliance Mastery.
I’ve spent over eight years working on washing machines, dryers, and dishwashers. I also have a degree in mechanical engineering, which helps me understand how these appliances really work.
I try to make every guide clear and practical. If you’re stuck with a noisy dryer or a leaking washer, I’ll help you figure out what’s wrong and how to fix it.