
Tired of dealing with a hot and humid laundry room every time you run the dryer? Ever wondered if there’s a simple solution to this problem? What if I told you that properly installing a dryer vent could be the key to a cooler and more efficient laundry space?
Imagine being able to dry your clothes without feeling like you’re stepping into a sauna each time you open the dryer door. Picture a laundry room that stays comfortably cool while your clothes are being dried to perfection. In this article, you’ll discover the step-by-step guide on how to put on a dryer vent, making your laundry routine a breeze.
Assessing the Location for the Dryer Vent
When assessing the location for your dryer vent, ensure it’s easily accessible and close to the dryer to maximize efficiency. Consider these factors:
- Look for a straight path from the dryer to the exterior wall to minimize bends.
- Avoid lengthy duct runs to prevent lint buildup and maintain optimal airflow.
- Choose a vent location that allows for proper ventilation to the outside.
Remember, the right placement can make a significant difference in your laundry room’s temperature and dryer’s performance.
Choosing the Right Dryer Vent Kit
When selecting a dryer vent kit, you want to ensure it matches your dryer model and the space where it will be installed. Here are some key considerations to help you make the right choice:
- Vent Type: Decide between metal or flexible ducts based on your setup and local building codes.
- Size: Match the vent diameter to your dryer’s outlet for optimal airflow and performance.
- Length: Choose a kit that provides enough duct length to reach the exterior vent without unnecessary loops.
To make a wise selection, check your dryer’s manual for any specific requirements and consider seeking professional advice if unsure.
Recommended Products

Universal 4inch through wall dryer vent kit : The 4" Flexible Dryer Vent Wall Ducting Kit compatible with Broan-Nutone Ventilation Fan, and other universal 4” diameter vent opening, easy installation with 3" to 4" foam adapter. Stainless steel louvered vent cover with ease for maximum exhaust flow to exhaust hot air from the clothes dryer vent and bathroom fan venting. PLS measure duct diameter to ensure the size is right before purchasing.

GENUINE OEM QUALITY: Whirlpool parts and accessories are engineered specifically for your appliance to help ensure proper fit, reliable performance, and lasting quality

Extra Thick Aluminum: Our dryer vent hose, with wire helix and foil accordion structure, is twice thicker than many 3-ply thin options on the market. It overturns people's misperception to aluminum foil ducting. No longer flimsy! It is reinforced for tear and puncture resistance but maintaining flexibility for easy movement.
Gathering the Necessary Tools and Materials
To successfully put on a dryer vent, it’s essential to gather the right tools and materials beforehand. Here’s a list to ensure you’re well-prepared:
- Vent Kit: Choose a vent kit that matches your dryer’s outlet size to ensure a proper fit.
- Duct: Opt for a rigid metal duct for better airflow and to reduce the risk of lint buildup.
- Vent Hood: Select a vent hood that opens easily when the dryer is running and closes to prevent drafts.
- Screws and Screwdriver: You’ll need these to secure the ductwork and vent hood in place.
- Foam Sealant: Use this to seal any gaps between the vent and the wall for optimal efficiency.
- Measuring Tape: Measure the distance between the dryer and the exterior wall to determine the required duct length.
When gathering your tools and materials, ensure that you have everything on hand before starting the installation process to avoid unnecessary delays.
Step-by-Step Guide to Installing the Dryer Vent
So, you’ve gathered your tools and materials and you’re ready to dive into installing your dryer vent. Follow these clear steps to ensure a successful and efficient installation process.
- Locate the Ideal Spot: Choose a location close to your dryer with a clear path to the exterior wall for optimal ventilation.
- Prepare the Area: Clear the space where the vent will go and make sure there are no obstructions.
- Install the Vent Hood: Secure the vent hood to the exterior wall using screws, ensuring it’s sealed properly.
- Connect the Duct: Attach the rigid metal duct to the vent hood using foil duct tape or clamps, making sure it’s secure.
- Connect to the Dryer: Link the other end of the duct to the dryer’s vent outlet, securing it tightly in place.
- Securing the Connection: Use additional foil duct tape or clamps to ensure a tight connection at both ends of the duct.
- Test the Vent: Turn on your dryer and check for proper air ventilation through the vent hood.
- Seal Any Gaps: Inspect the connections for any gaps or leaks and seal them with foam sealant if needed.
- Final Checks: Ensure the vent is working efficiently and that there are no blockages in the duct.
Remember, a well-installed dryer vent not only promotes efficient drying but also helps prevent potential hazards.
Recommended Products

STOPS AIR LEAKS & SAVES ENERGY: Designed for HVAC contractors and DIYers. This heavy-duty aluminum foil tape creates an airtight seal on air ducts, furnace pipes, and foamboard insulation. By blocking cold or hot air leaks, it immediately improves your HVAC efficiency and helps lower your home energy bills.

【Multi Purpose Duct Tape】Aluminum foil duct tape with adhesive backing is suitable for sealing, repairs and patching HVAC air duct system, wrap pipes insulation, waterproof sealing aluminum, sealing hot and cold air ducts, dryer vent tape, heavy duty ducts tapes, stainless steel and plastic joints/joints, temporary repair of metal surfaces, fixing hose and copper pipe, etc. Aluminum foil duct tape heavy duty waterproof tape is suitable for smooth flat and irregular surfaces to heat resistant.
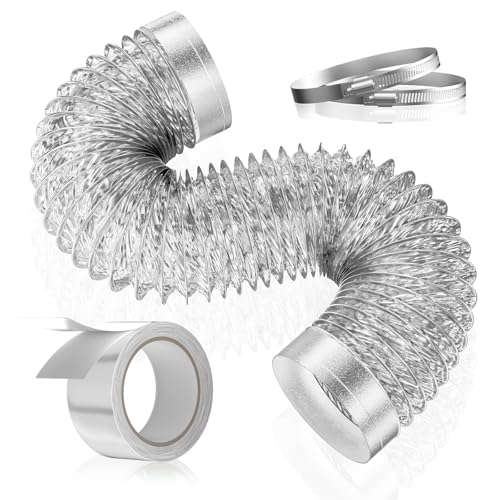
Puncture Resistant: Our dryer vent hose boasts 6 thickened layers for exceptional puncture resistance. It outperforms ordinary 3-layer hoses, ensuring lasting durability
Testing and Ensuring Proper Ventilation
When it comes to testing your dryer vent, there are a few key steps you should follow to ensure proper ventilation and optimal performance:
- Turn on your dryer, and place your hand near the vent outside. You should feel warm, moist air being pushed out. If there’s no airflow, there may be a blockage.
- Inspect the vent hood to make sure it opens and closes properly. Ensure there are no obstructions like lint or debris.
- Check all connections for leaks or gaps. Use a flashlight to look for any signs of damage or loosened seals.
- Consider using a vent flow meter to measure the airflow. Consult your dryer’s manual for recommended airflow rates.
Remember, proper ventilation is crucial for efficient drying and to prevent potential hazards. Be diligent in checking your dryer vent regularly to maintain optimal performance.
Conclusion
You now have all the essential steps for successfully installing a dryer vent. Remember to choose the best location, ensure secure connections, and test for proper airflow. Regular maintenance is key to efficient drying and safety. By following these guidelines, you’ll have a smoothly functioning dryer vent system that keeps your laundry routine hassle-free. Stay proactive in checking for any leaks or gaps, and use a vent flow meter to measure airflow. Your diligence will pay off in the long run, ensuring your dryer operates at its best while minimizing potential risks. Keep up with these practices, and your dryer vent will continue to work efficiently for years to come.
Frequently Asked Questions
How do I choose the ideal location for installing a dryer vent?
Select a spot close to the dryer where the vent can be routed with minimal bends for efficient airflow.
Why is it important to test the dryer vent for proper airflow?
Testing ensures that the vent is not obstructed, allowing the dryer to function effectively and preventing potential fire hazards.
How can I inspect the vent hood for any issues?
Check for blockages, debris, or damage on the outside vent hood to maintain proper ventilation from the dryer.
Why should I check for leaks or gaps in the vent connections?
Leaks or gaps can lead to air loss, reducing dryer efficiency and potentially causing lint buildup, which is a fire risk.
How can I measure the airflow in the dryer vent?
Use a vent flow meter to quantify airflow, ensuring optimal performance and safety of the dryer vent system.
Why is regular maintenance of the dryer vent important?
Regular upkeep prevents lint accumulation, maintains efficient airflow, and reduces the risk of dryer-related fires.

Hi, I’m Charlie, and I cover all things laundry here at Appliance Mastery.
I’ve spent over eight years working on washing machines, dryers, and dishwashers. I also have a degree in mechanical engineering, which helps me understand how these appliances really work.
I try to make every guide clear and practical. If you’re stuck with a noisy dryer or a leaking washer, I’ll help you figure out what’s wrong and how to fix it.