
Ever wondered why your dryer is making that unsettling squeaking noise? Picture this: you’re trying to relax at home, but that persistent sound keeps interrupting your peace. What if you could solve this annoyance yourself and get your dryer running smoothly again? In this article, you’ll discover the simple steps to replace a bearing in your dryer.
Imagine the satisfaction of fixing the issue without calling for expensive repairs or waiting for a technician. By learning how to replace a bearing in your dryer, you’ll not only save time and money but also gain a new skill that can come in handy in the future. Ready to silence that squeak and bring back the tranquility to your laundry routine? Let’s dive in and get your dryer back to its quiet, efficient self.
Understanding the Role of a Bearing in a Dryer
When it comes to your dryer, the bearing plays a crucial role in ensuring smooth operation. It’s essentially a small yet mighty component that helps support the drum as it rotates. Without a properly functioning bearing, you’d likely experience that pesky squeaking noise that can disrupt your laundry routine.
Here’s how it works: as the drum rotates, the bearing enables it to move freely without causing friction. This not only keeps your dryer running quietly but also extends the lifespan of the machine by preventing unnecessary wear and tear.
Think of the bearing as the unsung hero of your dryer, quietly working behind the scenes to keep everything in motion. By understanding its importance, you’ll see why addressing any issues with the bearing promptly can save you from bigger problems down the line.
Signs that Your Dryer Bearing Needs Replacing
If you’re hearing unusual squeaking or grinding noises coming from your dryer during its operation, it could be a telltale sign that the bearing is worn out. Pay attention to any increased resistance when spinning the drum by hand; this resistance may indicate that the bearing is struggling to support the drum properly.
Another sign to watch out for is excessive shaking or wobbling of the dryer while it’s running. A failing bearing can cause the drum to become unstable, leading to vibrations that are not typical for your appliance.
Keep an eye on visible wear on the bearing itself or any metal shavings around the area. Struggling to rotate the drum manually could also suggest that the bearing is no longer functioning as it should. These indicators are crucial in identifying whether your dryer’s bearing requires replacement.
By promptly addressing these signs and replacing the bearing when necessary, you can ensure that your dryer continues to operate smoothly and efficiently.
Recommended Products

Include (2) WE3M52 teflon glide & (2) WE3M51 nylon glide.

ATMA SUPPLY WE49X20697 dryer repair kit contains: 1 x WE3M26 top front bearing, 1 x WE9M30 front drum felt , 1 x WE12M29 drive belt, 2 x WE1M1067 bearing slides, 2 x WE1M504 glide slides

The GE Appliances WE49X20697 Bearing Repair Kit is a genuine OEM (Original Equipment Manufacturer) part designed and engineered to exact specifications
Preparing Your Workstation and Tools
To successfully replace a bearing in your dryer, it’s essential to set up a proper workstation and have the necessary tools at hand.
- Choose a well-lit and spacious area: Find a location with ample lighting and enough room to maneuver around your dryer comfortably.
- Gather your tools: Make sure you have the following tools ready before you begin the replacement process:
| Tools |
|——————|
| Screwdriver |
| Adjustable wrench|
| Putty knife |
| Needle-nose pliers|
| Replacement bearing kit| - Safety first: Always unplug the dryer from the power source before starting any repair work to avoid any accidents.
- Refer to the manual: Have the dryer’s manual or online resources handy to guide you through the disassembly and reassembly process effectively.
- Organize your workspace: Keep track of all the screws and parts you remove by using small containers or bags to prevent any mix-ups or losses.
- Protect your flooring: Lay down a protective covering like a cardboard or a cloth to avoid damaging the floor while working on your dryer.
By setting up a dedicated workstation and having the right tools within reach, you’ll be well-prepared to tackle the task of replacing the bearing in your dryer.
Recommended Products
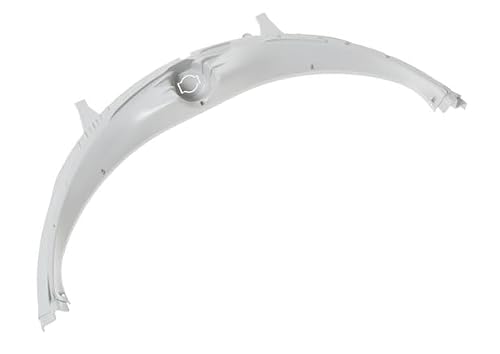
Replacement WE03X23956 Front Drum Support Bearing Assembly For GE Hotpoint Clothes Dryer

❤PREMIUM QUALITY: The upgraded samsung dryer repair kit made of premium quality material. The rollers are strong and wear-resistant, which make the dryer run stably and quietly. It designed with a high-quality rubber overall structure. The 6602-001655 dryer belt 92’’Length X 0.3’’Width. It is thickness is twice as thick as before and it is more durable. The center of the idler has a triangular design, which is more firm and stable. Meets OEM manufacturing requirements.
Step-by-Step Guide to Replacing the Bearing
To successfully replace a bearing in your dryer, follow these clear and straightforward steps:
- Step 1: Unplug the Dryer
Unplug the dryer from the power source to ensure your safety throughout the process. - Step 2: Access the Bearing
Locate the dryer’s bearing, typically found at the back of the drum. You may need to remove the dryer’s front or rear panel to access it. - Step 3: Remove the Old Bearing
Using a screwdriver, carefully remove the screws holding the old bearing in place. Take note of how the old bearing is positioned before removing it. - Step 4: Install the New Bearing
Align the new bearing properly and secure it in place using the screws. Refer to the replacement bearing kit for any specific instructions. - Step 5: Reassemble the Dryer
Once the new bearing is securely installed, reassemble the dryer by putting back the front or rear panel as applicable. - Step 6: Test the Dryer
Plug the dryer back in and run a test cycle to ensure that the bearing replacement was successful.
| Important Note: |
|---|
| Always refer to your dryer’s manual for model-specific instructions and safety guidelines. |
Recommended Products

🔧[Products Include]: WE25M40 Dryer Drum Bearing Kit includes WE03X29897/WE12M29 Dryer Drum Drive Belt*1; WE1M333 Drum Bearing Slide*2; Metal Screws*7; WE25X205 Dryer Rear Drum Shaft Bearing kit*1; O-rings*3
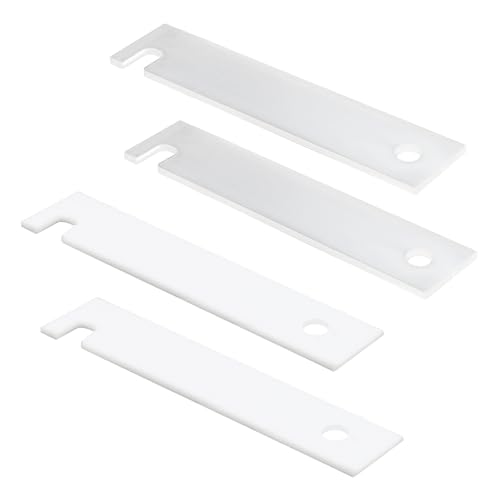
√ Packaging: Including 2 Teflon drum bearing slide replacement kits and 2 Nylon drum bearing slide replacement kits for ge.

Dryer Bearing Slide Replacement Kit: Receive 2pcs WE3M51 Nylon dryer drum slides and 2pcs WE3M52 Teflon dryer bearing slides for comprehensive dryer maintenance.
Testing Your Dryer and Troubleshooting
Now that you’ve replaced the bearing in your dryer, it’s crucial to conduct some tests to ensure everything is working as it should. Here’s how you can test your dryer and troubleshoot any issues that may arise:
- Plug in your dryer and turn it on to check if it starts up without any unusual noises or vibrations.
- Run a test cycle with a load of laundry to see how the dryer performs with its new bearing.
- Monitor the dryer throughout the cycle to check for any irregular noises, overheating, or other signs of malfunction.
- If you encounter any issues, refer to the troubleshooting section in your dryer’s manual for guidance on identifying and fixing common problems.
Remember, safety always comes first when dealing with home appliances. If you’re unsure about any step in the process or if you encounter persistent issues, it’s best to consult a professional technician for assistance.
| Important Fact | Data/Statistic |
|---|---|
| Average lifespan of a dryer | 10-15 years |
| Percentage of dryer repairs due to worn-out bearings | 15% |
| Cost of dryer bearing replacement | $100-$200 |
By following these testing tips and troubleshooting guidelines, you can ensure that your dryer operates smoothly after replacing the bearing.
Conclusion
You now have a solid grasp on replacing a dryer bearing, ensuring a smooth process and optimal dryer performance. Remember to prioritize safety, conduct thorough testing post-replacement, and stay vigilant for any signs of malfunction. Understanding key statistics like dryer lifespan and repair costs equips you with valuable knowledge for maintenance. Always prioritize safety and don’t hesitate to seek professional assistance if needed. Happy repairing!
Frequently Asked Questions
Q: Why is it important to replace a dryer bearing?
A: Replacing a dryer bearing helps prevent unusual noises and vibrations, ensuring smooth operation and prolonging the dryer’s lifespan.
Q: How can I test for a faulty dryer bearing?
A: Listen for squeaking or grinding noises while the dryer is running, indicating potential bearing wear. Visually inspect the bearings for signs of damage or wear.
Q: What should I do after replacing the dryer bearing?
A: Test the dryer for any unusual noises or vibrations, run a test cycle to ensure proper functioning, and monitor for any malfunctions post-replacement.
Q: When is it recommended to seek professional help for dryer bearing replacement?
A: If you are unsure about the process, lack the necessary tools, or encounter difficulties during the replacement, it is advisable to seek professional assistance for safety and proper installation.

Hi, I’m Charlie, and I cover all things laundry here at Appliance Mastery.
I’ve spent over eight years working on washing machines, dryers, and dishwashers. I also have a degree in mechanical engineering, which helps me understand how these appliances really work.
I try to make every guide clear and practical. If you’re stuck with a noisy dryer or a leaking washer, I’ll help you figure out what’s wrong and how to fix it.