
Ever found yourself with a pile of wet laundry and a dryer that’s suddenly decided to take a break? Frustrating, right? What if I told you that fixing that dryer belt on your Whirlpool could be easier than you think?
Imagine skipping the hassle of waiting for a repair technician and saving some bucks while you’re at it. With a little know-how and a sprinkle of DIY magic, you could have that dryer up and running in no time.
Gather the Necessary Tools and Materials
When it comes to replacing a dryer belt in your Whirlpool dryer, having the right tools and materials on hand is crucial. Here’s what you’ll need:
- Tools:
- Screwdriver
- Putty knife
- Nut driver
- Needle-nose pliers
- Materials:
- New dryer belt compatible with your Whirlpool model
- Owner’s manual (for reference)
Before diving into the repair process, ensure you have all these items within reach.
Unplug the Dryer and Locate the Belt
First, unplug the dryer from the power source to ensure your safety. Then, move the dryer away from the wall to locate the access panel on the back.
Using a nut driver, begin removing the screws that secure the panel in place. Once the panel is off, you’ll be able to locate the dryer belt wrapped around the drum.
Inspect the belt for any signs of wear, damage, or fraying. Take note of the belt’s positioning for when you install the new one.
Remove the Old Belt
When tackling the task of replacing a dryer belt in your Whirlpool appliance, removing the old belt is a crucial first step. Here’s a breakdown of how you can successfully accomplish this:
- Locate the Tension Pulley: Find the tension pulley connected to the motor bracket, which keeps the belt snug against the drum.
- Release the Tension: Using a nut driver, push the pulley to release the tension on the old belt. This will allow you to remove the belt with ease.
- Take Note of the Belt Path: Before completely removing the old belt, make a mental note or take a picture of how it is threaded around the motor and idler pulleys.
- Slide Off the Old Belt: Carefully slide the old belt off the drum and motor pulley, ensuring not to damage any other components within the dryer.
- Inspect for Wear: While removing the old belt, take a moment to inspect it for signs of wear, damage, or fraying. This will help you understand the condition of the belt and why it needs replacement.
Remember, safety first – always unplug the dryer before starting any repairs or maintenance work. This will prevent any accidents and ensure a smooth replacement process.
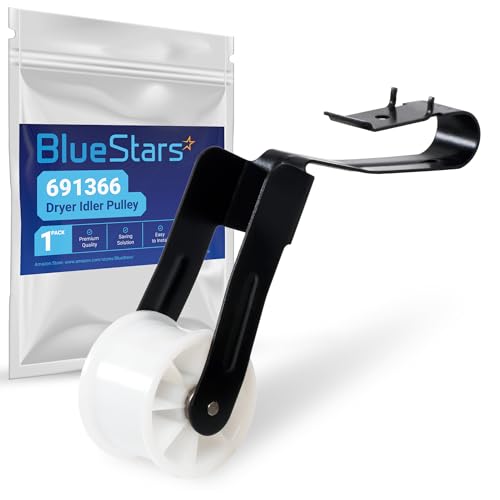
Recommended Products

279640 Dryer Idler Pulley - Replaces 279640VP, 2958, 3388672, 697692, AP3094197, ER279640, W10468057
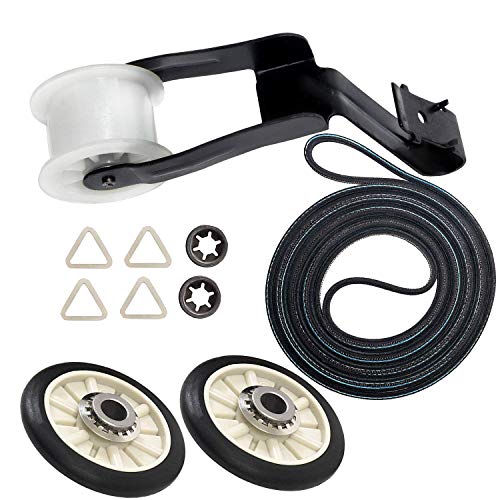
COMPLETE REPAIR KIT: Includes x2 349241T Dryer Rear Drum Support Rollers, x1 691366 Dryer Idler Pulley Assembly, x1 341241 Dryer Drum Belt (1/4" wide, 92 1/4" long, 4 ribs, 3 grooves), x4 Tri-rings, and x2 Clips. The 4392065 Dryer Repair Kit is a direct replacement for part numbers AP3131942, 587636, 4392065, 2014, 26000279435, 26000279436, 279435, 279436, 279708, 279708MS, 279709, 279709MS, 279860, 279948, 4392065VP, 80046, 8106, 8237, 8238, PS373087.
IMPORTANT NOTE: Please check the model number carefully before ordering. You can send us your dryer model number, we can help you confirm if it fits or not
Install the New Belt
- Step 1: Place the new belt around the drum with the grooved side facing the drum.
- Step 2: Navigate the belt through the idler pulley and around the motor pulley.
- Step 3: Pull back the idler pulley to apply tension to the belt, ensuring it fits snugly in place.
- Step 4: Rotate the drum a few times by hand to make sure the belt aligns properly.
- Step 5: Reassemble the dryer by reversing the disassembly steps you followed earlier.
| Important Data |
|---|
| New Belt Installation Steps: |
| 1. Place the new belt around the drum. |
| 2. Navigate the belt through the idler and motor pulley. |
| 3. Apply tension by pulling back the idler pulley. |
| 4. Rotate the drum to align the belt. |
| 5. Reassemble by reversing disassembly steps. |
Test the Dryer
Now that you’ve replaced the dryer belt in your Whirlpool appliance, it’s time to ensure everything is working smoothly. Testing the dryer is a crucial step to confirm that the belt replacement was successful.
- Plug in your dryer and turn it on to check if the drum is spinning.
- Listen for any unusual noises that could indicate a problem.
- Check if the dryer is heating up properly and drying your clothes efficiently.
- Run a normal drying cycle to verify that the belt is functioning correctly under operating conditions.
Remember: Testing the dryer after replacing the belt helps ensure that your appliance is back in working order. If you encounter any issues during the testing phase, it’s essential to troubleshoot and address them promptly.
Conclusion
You’ve now completed the replacement of your Whirlpool dryer belt successfully. Remember to test the dryer thoroughly by checking the drum, listening for any unusual sounds, and ensuring proper heating and drying efficiency. Running a normal drying cycle will confirm the belt’s functionality under operational conditions. Testing the dryer post-replacement is crucial to ensure everything is in working order. If you encounter any issues during testing, make sure to address them promptly. Enjoy your freshly working dryer!
Frequently Asked Questions
How do I know if my dryer belt needs replacing?
Inspect your dryer for signs of wear and tear on the belt, such as fraying or cracking. If the drum is not spinning or you hear loud noises, the belt may need replacement.
What precautions should I take before replacing the dryer belt?
Before starting, always unplug the appliance to avoid electrical shock. Familiarize yourself with the dryer’s layout by referring to the user manual or online guides.
Can I replace the dryer belt myself?
Yes, replacing a dryer belt is a DIY task that can be done with basic tools and following the step-by-step instructions provided in the article.
How long does it take to replace a dryer belt?
Typically, replacing a dryer belt can take around 1 to 2 hours, depending on your experience with appliance repairs.
How do I test the dryer post-belt replacement?
After replacing the belt, test the dryer by ensuring the drum spins smoothly, there are no unusual noises, proper heating, efficient drying, and running a full drying cycle for confirmation.

Hi, I’m Charlie, and I cover all things laundry here at Appliance Mastery.
I’ve spent over eight years working on washing machines, dryers, and dishwashers. I also have a degree in mechanical engineering, which helps me understand how these appliances really work.
I try to make every guide clear and practical. If you’re stuck with a noisy dryer or a leaking washer, I’ll help you figure out what’s wrong and how to fix it.