
Gather the necessary tools and materials
- Vent Hose: Make sure you have the correct size and material for your dryer setup.
- Screwdriver: You’ll need this to loosen and tighten clamps.
- Measuring Tape: Useful for getting accurate hose lengths.
- Duct Tape: Helps secure connections and prevent air leaks.
- Vacuum: Clean out any lint buildup in the vent.
- Safety Gear: Consider using gloves and goggles for protection.
Don’t forget to double-check your dryer’s requirements before starting the replacement process.
Recommended Products

【HIGH QUALITY】Made of high quality 304 stainless steel with high performance of corrosion resistance and acid resistance, they are strong and durable, when installing on the pipe, you will no longer worry about them rusting and breaking.

𝗜𝗠𝗣𝗢𝗥𝗧𝗔𝗡𝗧 𝗦𝗜𝗭𝗘 𝗡𝗢𝗧𝗜𝗖𝗘: Fits 3.5″–4.3″ OD hoses/ducts (measure with fittings attached). ❌ NOT compatible with 4″ PVC/steel pipes (OD ≈ 4.5″)

Extra Thick Aluminum: Our dryer vent hose, with wire helix and foil accordion structure, is twice thicker than many 3-ply thin options on the market. It overturns people's misperception to aluminum foil ducting. No longer flimsy! It is reinforced for tear and puncture resistance but maintaining flexibility for easy movement.
Turn off the dryer and unplug it
When it’s time to replace your dryer vent hose, the first step is crucial: turn off your dryer. This ensures your safety during the process. You must also unplug it from the power source to avoid any accidents. These basic steps create a safer environment for you to work on the vent hose.
Remember, safety comes first! Always take the time to disconnect your dryer from the electricity before beginning any maintenance work.
Locate the vent connection point
When replacing your dryer vent hose, the first step is to locate the vent connection point on the back of your dryer.
Important Tip: The vent connection point is typically located near the bottom of the back of the dryer.
- Check Behind the Dryer: Move your dryer slightly away from the wall to access the back.
- Look for a Circular or Rectangular Opening: The vent connection point can be a round or rectangular opening where the hose attaches.
- Ensure Accessibility: Make sure there is enough space to work comfortably around the vent connection point.
By finding and identifying the vent connection point, you’re ready to proceed with the dryer vent hose replacement.
Remove the old vent hose
To remove the old vent hose from your dryer, follow these steps:
- Disconnect the Dryer: Unplug your dryer from the power source.
- Loosen the Clamp: Use a screwdriver to loosen the clamp that attaches the vent hose to the dryer.
- Detach the Hose: Gently pull the vent hose off the dryer’s exhaust.
- Inspect for Damage: Check the old vent hose for any tears, holes, or blockages.
- Clean the Area: Wipe down the dryer’s vent connection point to remove any dust or debris.
Remember, a smooth removal process ensures a hassle-free installation of the new vent hose.
Recommended Products
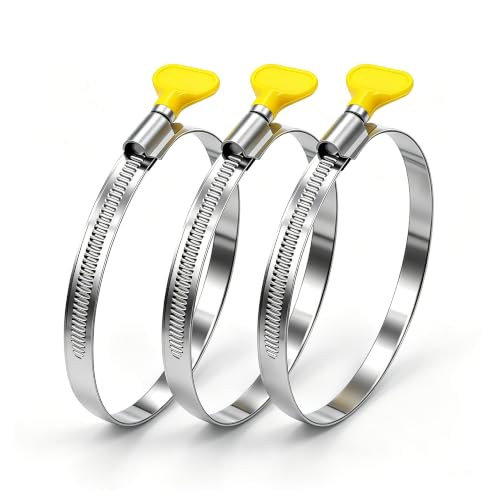

Premium 304 Stainless Steel Construction:These dryer vent clamps are crafted from high-grade 304 stainless steel, Built for long-term durability, they maintain structural integrity even in moist or outdoor environments, ensuring reliable performance over time.

Includes: (2) 4” Double Loop Quick Release Hose Clamps
Install the new vent hose
When installing the new vent hose, follow these steps for a successful replacement process:
- Slide one end of the new vent hose over the dryer’s exhaust outlet.
- Secure the hose in place with a clamp.
- Position the other end of the vent hose over the vent connection point on the wall.
- Use a screwdriver to tighten the clamp securely on both ends.
Remember to check for any leaks or loose connections after installation to ensure optimal performance.
For a seamless transition, make sure the hose runs as straight and short as possible, reducing the risk of lint buildup and enhancing efficiency.
Recommended Products

Durable Material: made of high quality 304 stainless steel, rust-proof, water-proof, corrosion-resistant, strong, durable and long lasting use.

Easy To Use - Can be simply loosened or tightened by using the adjustable handle without any other tools.Just place the clamp where its needed then simply turn the key to loosen or tighten them.

Extra Thick Aluminum: Our dryer vent hose, with wire helix and foil accordion structure, is twice thicker than many 3-ply thin options on the market. It overturns people's misperception to aluminum foil ducting. No longer flimsy! It is reinforced for tear and puncture resistance but maintaining flexibility for easy movement.
Data and Statistics
| Aspect | Data |
|---|---|
| Optimal hose length | 4 feet |
| Maximum number of bends | 2 |
| Efficiency improvement | up to 30% |
By following these steps and tips, you’ll have a properly installed dryer vent hose that contributes to a safe and efficient laundry environment.
Secure the new vent hose in place
To prevent any issues with airflow and maintain efficiency, properly securing the new vent hose is crucial. Here’s how you can ensure your vent hose stays in place securely:
- Use Metal Clamps: Secure the hose at both ends using metal clamps to prevent any slippage or disconnection.
- Follow Manufacturer’s Instructions: Refer to the dryer and vent hose manufacturer’s guidelines for specific recommendations on securing the hose.
- Avoid Sharp Bends: Make sure the vent hose is not kinked or bent sharply to maintain a smooth airflow.
- Check for Leaks: After securing the hose, inspect for any leaks or gaps that could lead to air escaping.
By following these steps, you’ll guarantee that your new vent hose is securely in place, allowing for optimal dryer performance.
Reconnect the dryer and test the vent system
Now that you’ve securely installed the new vent hose, it’s time to reconnect your dryer and ensure everything is working properly. Here’s what you need to do:
- Reattach the vent hose: Connect one end of the vent hose to the dryer exhaust port and the other end to the vent opening in the wall. Ensure they are firmly in place.
- Secure the connections: Use metal clamps to secure the vent hose at both ends. This will prevent any air leaks and maintain efficient airflow.
- Plug in your dryer: Once the vent hose is properly connected, plug in your dryer to the power source.
- Turn on the dryer: Start your dryer and allow it to run for a few minutes to ensure that the air is properly venting to the outside.
- Check for airflow: Place your hand near the vent opening outside your home to feel if there is a steady flow of warm air. This indicates that the vent system is working correctly.
- Inspect for leaks: While the dryer is running, check the connections for any signs of leaks or loose fittings. Address any issues promptly to prevent problems in the future.
By following these steps, you can make sure that your new vent hose is correctly installed and that your dryer is operating efficiently and safely.
Conclusion
That’s it! By following these simple steps, you’ve successfully replaced your dryer vent hose. Remember, reconnecting the dryer and testing the vent system are crucial for ensuring efficient and safe operation. Secure those connections, plug in your dryer, and check for proper airflow and leaks. With your new vent hose in place, you can enjoy worry-free drying knowing that your appliance is working at its best. Great job on taking care of your dryer maintenance – keep up the good work!
Frequently Asked Questions
How should I ensure the new vent hose is securely installed after reconnecting the dryer?
After reconnecting the dryer, ensure the new vent hose is securely installed by reattaching the vent hose, securing connections with metal clamps, plugging in the dryer, and checking for proper airflow and leaks. This ensures the hose is correctly installed, promoting efficient and safe dryer operation.

Hi, I’m Charlie, and I cover all things laundry here at Appliance Mastery.
I’ve spent over eight years working on washing machines, dryers, and dishwashers. I also have a degree in mechanical engineering, which helps me understand how these appliances really work.
I try to make every guide clear and practical. If you’re stuck with a noisy dryer or a leaking washer, I’ll help you figure out what’s wrong and how to fix it.