
Choosing the Right AC Unit
When selecting an AC unit, consider the following factors:
- Size matters: Ensure the unit is appropriately sized for your space.
- Energy efficiency: Look for units with a high Energy Efficiency Ratio (EER) or Seasonal Energy Efficiency Ratio (SEER).
- Type of unit: Decide between central AC, window units, or portable AC units based on your needs.
- Budget: Set a budget range and explore units within that price range.
- Noise level: Check the decibel rating to ensure the unit operates quietly.
Remember, Choosing the Right AC Unit is crucial for optimal cooling efficiency.
Recommended Products

Efficient Cooling - Cooling Coverage up to 250 Square feet, this unit is ideal for smaller spaces like living room, home and office. The air conditioner also allows for manual adjustment of air direction to suit specific room layouts and preferences.

Effortless Cooling: Achieve optimal comfort with customizable temperature settings and two fan speeds; Effortless Temperature Control helps to maintain your preset temperatures for consistent comfort
Preparing for Replacement
When getting ready to replace your AC unit, there are several key steps to take to ensure a smooth process.
- Research AC Units: Begin by researching different AC units to find the right one for your needs.
- Measure Space: Take measurements of the area where the new unit will be installed to ensure a proper fit.
- Assess Energy Needs: Consider your energy efficiency goals and research units with high EER or SEER ratings for optimal performance.
- Check Ductwork: Inspect and, if needed, repair or replace any damaged ductwork before installation.
- Arrange Installation: Contact an HVAC professional to schedule the installation of your new AC unit.
- Prepare Budget: Set a clear budget range for the replacement, factoring in costs for the unit, installation, and any additional supplies needed.
By taking these preparatory steps, you’ll be well-equipped to seamlessly transition to a new and more efficient AC unit.
Removing the Old AC Unit
When Removing the Old AC Unit, you need to ensure it’s done safely and efficiently. Here are the key steps to guide you:
- Turn Off Power: Before anything else, make sure to turn off the power to the unit. Safety first!
- Discharge Capacitor: The capacitor stores electricity, so be sure to discharge it to avoid any unpleasant surprises.
- Disconnect Wiring: Carefully disconnect the wiring connecting the unit to the power source.
- Remove Refrigerant: If your unit uses refrigerant, have a professional remove it according to regulations.
- Unscrew Mounting: Using the appropriate tools, unscrew the mounting bolts holding the unit in place.
- Lift with Caution: With help if needed, lift the unit out of its position and onto a safe, flat surface.
- Dispose Responsibly: Once removed, make sure to dispose of the old unit responsibly, following proper guidelines.
By following these steps, you’ll safely and effectively complete the process of removing your old AC unit.
Installing the New AC Unit
Now that you’ve safely removed the old AC unit, it’s time to install the new one. Here’s how to do it:
- Placement: Choose a location with good airflow and space for maintenance.
- Leveling: Use a leveling tool to ensure the unit sits evenly on the ground.
- Connections: Connect the refrigerant lines, electrical wiring, and ductwork securely.
- Testing: Turn on the power and test the unit to ensure it’s running efficiently.
Remember to consult the manufacturer’s instructions for specific guidance on your new AC unit.
Recommended Products
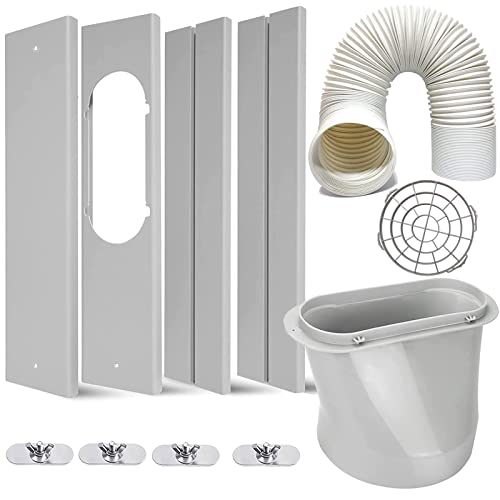
❄️【Strengthen sealing】:This window kit keeps your room cool for longer and save electricity charges. It effectively diffuse the hot air out of the window, preventing warm air circulating in your room meanwhile.
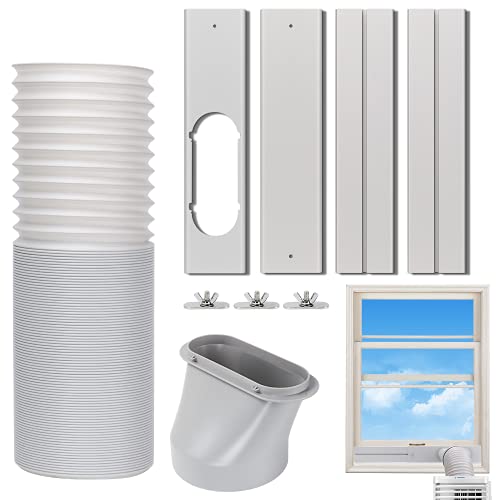
ANTI-CLOCKWISE UNIVERSAL FIT: Our AC exhaust hose has an anti-clockwise thread direction so make sure to check this is correct for your AC before purchasing. The diameter of our AC hose is 5.9 inches, the length has two options for 1.5m/59" and 2m/78.7" respectively, which means it can fit most portable air conditioners on the market.

ADVANCED MICROAIR TECHNOLOGY WITH INSTALLATION KIT: Micro-Air EasyStart Flex is the most advanced and versatile soft starter, designed for all sizes of residential AC units up to 6 tons (72,000 BTUs). It provides a controlled, gentle startup that reduces mechanical stress, extending your AC system’s lifespan. This air conditioner soft start kit includes everything needed for an easy installation, making it an optimal choice for home and commercial applications.
Testing and Maintenance
When everything’s in place, it’s time to test your new AC unit to ensure everything works correctly. Here are the key steps to follow:
- Turn It On: Start by turning on the unit and setting it to the desired temperature. You should feel cool air coming out of the vents within a few minutes.
- Check Airflow: Take a walk around your home to confirm that there’s consistent airflow from all vents. Uneven airflow could indicate an issue with your ductwork.
- Monitor Temperature: Use a thermometer to check the air temperature coming out of the vents. It should align with the temperature you’ve set on the thermostat.
- Inspect for Leaks: Look out for any water leaks around the unit or on the connecting pipes. Address any leaks promptly to prevent water damage.
- Change Filters: Regularly check and replace the filters in your AC unit. Clogged filters can reduce efficiency and lead to costly repairs.
- Schedule Maintenance: Consider scheduling professional maintenance at least once a year to keep your AC unit running smoothly.
Remember, proper Testing and Maintenance are crucial for maximizing the lifespan and efficiency of your new AC unit.
Recommended Products

Genuine AprilAire 213 Filters are engineered to the exact specifications of your AprilAire Air Purifier, delivering superior filtration, a perfect airtight fit and seal, and the best overall system protection. To maintain peak performance, always choose certified AprilAire Replacement Filters.

Complete MERV 8 Air Vent Filters Kit:This 20x100 inch 0.2inch ultra-thin & breathable electrostatic filter is premium furnace filter material that captures dust, pet hair & particles as small as 0.2μm, delivering fresh air—ideal for households prioritizing cleaner indoor air quality for home ventilation systems

Easy Valve Core Replacement: Orion Motor Tech's AC valve core removal tool kit effortlessly removes and installs valve cores without any refrigerant loss. This comprehensive ac valve core kit includes high & low-pressure valve removers, R1234yf couplers, R134a & R22 cores, along with O-rings
Conclusion
You’ve now learned the essential steps for replacing your AC unit safely and effectively. Remember to follow the manufacturer’s instructions closely to ensure a successful installation. Testing the new unit, checking airflow and temperature, and staying on top of maintenance are key to keeping your AC running smoothly. By taking these precautions, you’ll enjoy a cool and comfortable home environment for years to come. Keep up with regular filter changes and schedule professional maintenance to maximize the efficiency and lifespan of your new AC unit. Your diligence in testing and maintaining your AC system will pay off in the long run.
Frequently Asked Questions
How important is it to consult the manufacturer’s instructions when replacing an AC unit?
It’s crucial to consult the manufacturer’s instructions for safety and proper installation of the new AC unit.
What are the steps for testing a new AC unit after installation?
After installation, test the new AC unit by turning it on, checking airflow and temperature, inspecting for leaks, and ensuring proper functionality.
Why is changing filters regularly important for AC units?
Changing filters regularly helps maintain good air quality, improves efficiency, and extends the lifespan of the AC unit.
How often should professional maintenance be scheduled for AC units?
Professional maintenance should be scheduled at least once a year to ensure optimal performance and longevity of the AC unit.

Hi, I’m Charlie, and I cover all things laundry here at Appliance Mastery.
I’ve spent over eight years working on washing machines, dryers, and dishwashers. I also have a degree in mechanical engineering, which helps me understand how these appliances really work.
I try to make every guide clear and practical. If you’re stuck with a noisy dryer or a leaking washer, I’ll help you figure out what’s wrong and how to fix it.