
Replacing a light bulb in a Whirlpool refrigerator is a straightforward task that can enhance visibility inside your fridge. This guide provides step-by-step instructions to help you complete the replacement safely and efficiently.
Essential Tools for Whirlpool Light Bulb Replacement
Before diving into the light bulb replacement process for your Whirlpool refrigerator, it’s important to gather the right tools. Having the necessary equipment on hand will streamline the task and ensure you complete it safely and efficiently. This section outlines the essential tools you’ll need to make the job as straightforward as possible.
Before starting the light bulb replacement, ensure you have the necessary tools and supplies. This preparation minimizes interruptions during the process. You will need:
New light bulb compatible with your Whirlpool model
Screwdriver (if applicable)
Gloves for safety and cleanliness
Towel or cloth to catch any debris
| Item | Purpose |
|---|---|
| Light bulb | Provides illumination |
| Screwdriver | Removes any covers |
| Gloves | Protects hands |
| Towel | Catches debris |
Recommended Products

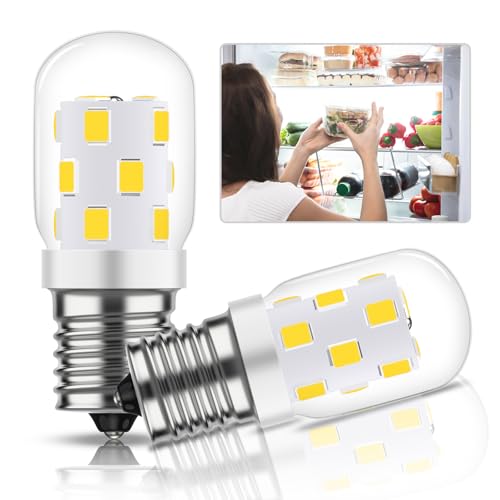
Led light W11527432 part number:W11101384, W11333374, W11387579,W11245960,W11387581,W11042554

Low Heat, High CRI: Designed to replace heat-emitting bulbs, our waterproof refrigerator bulb operates efficiently in low temperatures while producing minimal heat—helping your fridge maintain optimal cooling performance. With a high Color Rendering Index (CRI) of 85, it emits a clear, natural white light rather than a harsh blue-white, illuminating your fridge brightly and accurately.

NO-HEAT BULB FOR REFRIGERATOR: A waterproof alternative to heat-emitting bulbs, Vgogfly refrigerator light bulb emits not the usual blue-white light, but pure white light. It not only brightens your fridge or freezer but also gives it a new life
Whirlpool Refrigerator Light Bulb Safety Tips
Safety is paramount when replacing a light bulb. Always unplug the refrigerator before starting the process to avoid electrical shock. Additionally, ensure that the new bulb is the correct wattage, as using the wrong wattage can cause overheating or damage.
Unplug the refrigerator to cut power.
Wear gloves to protect your hands.
Check the wattage of the new bulb against the old one.
Whirlpool Refrigerator Old Bulb Removal Steps
Replacing a light bulb in your Whirlpool refrigerator can seem daunting, but with the right steps, it’s a straightforward task. This section will guide you through the process of safely removing the old bulb, ensuring your refrigerator’s interior remains well-lit and functional. Follow these steps to tackle the replacement with confidence.
To replace the light bulb, you must first remove the old one. This process varies slightly depending on the model of your Whirlpool refrigerator. Follow these steps:
Locate the light bulb socket inside the refrigerator.
If there is a cover, use the screwdriver to remove it.
Twist the old bulb counterclockwise to remove it from the socket.
Be cautious when handling the old bulb, especially if it is broken.
Whirlpool Refrigerator New Light Bulb Installation
Installing a new light bulb in your Whirlpool refrigerator is a straightforward task that can enhance visibility and efficiency. This guide will walk you through the necessary steps to ensure a successful replacement, making it easy for you to tackle this DIY project with confidence. Follow along to restore your refrigerator’s lighting quickly and effectively.
Now that the old bulb is removed, you can install the new one. This step is crucial for restoring light to your refrigerator. Follow these instructions:
Insert the new bulb into the socket.
Twist the bulb clockwise until it is secure.
If there was a cover, reattach it using the screwdriver.
Make sure the bulb is snugly fit to prevent flickering.
Recommended Products

【ENERGY SAVING】:ENERGY SAVINGS: 4w refrigerator lamps replace 40w traditional incandescent lamps, enjoy bright lighting while dramatically lowering your electricity bill, saving 90% of energy

Low Heat Refrigerator Light Bulb: This fridge light bulb operates with a surface temperature below 50°C, ensuring it is safe for both people and appliances. It poses no burn risk, making it safer to handle, while also being fridge-friendly by reducing heat buildup and helping maintain optimal cooling efficiency
Energy Saving: LED refrigerator light bulb 3w emit 380lm of light output, bright enough to replace 40w refrigerator bulbs, saving up on your energy bill. No lead or mercury. low power consumption provides over 25,000 hours of lifespan.
Verify Whirlpool Refrigerator Light Bulb Functionality
Before diving into the replacement process, it’s essential to ensure that the light bulb in your Whirlpool refrigerator is indeed malfunctioning. This step will help you avoid unnecessary replacements and confirm that the issue lies with the bulb itself. Follow these straightforward methods to verify its functionality and make your DIY repair more efficient.
After installation, it is essential to test the new bulb to ensure it works properly. This step confirms that your efforts were successful.
Plug the refrigerator back in.
Open the refrigerator door to check if the light illuminates.
If the light does not turn on, double-check the bulb installation.
Whirlpool Refrigerator Light Bulb Problems
Whirlpool refrigerators are designed for efficiency, but light bulb issues can disrupt their functionality. Common problems include flickering lights, burned-out bulbs, or complete failure to illuminate. Understanding these issues is essential for maintaining optimal visibility and ensuring your refrigerator operates smoothly.
If the new light bulb does not work, several factors could be at play. Consider the following common issues:
Faulty bulb: Ensure the new bulb is functional.
Socket issues: Inspect the socket for damage or corrosion.
Electrical problems: Check the refrigerator’s power supply.
Whirlpool Refrigerator Light Socket Inspection
Inspecting the light socket in your Whirlpool refrigerator is a crucial step before replacing the bulb. This process ensures that the socket is functioning properly and free from any damage, which could affect the new bulb’s performance. A thorough inspection can save you time and prevent further issues down the line.
A damaged light socket can prevent the bulb from functioning. Here’s how to inspect it:
Turn off the refrigerator and unplug it.
Examine the socket for any signs of wear or damage.
If necessary, replace the socket or consult a technician.
Whirlpool Refrigerator Light Bulb Selection Tips
Choosing the right light bulb for your Whirlpool refrigerator is essential for optimal performance and energy efficiency. Understanding the specific requirements, such as wattage and type, will ensure that your fridge remains well-lit and functions properly. This section provides practical tips to help you select the ideal bulb for your appliance.
Selecting the correct light bulb is vital for optimal performance. Consider these factors when purchasing a new bulb:
Wattage: Match the wattage to the original bulb.
Type: Use an appliance bulb designed for refrigerators.
Energy efficiency: Consider LED options for longevity and lower energy consumption.
Whirlpool Refrigerator Bulb Installation Checks
When replacing a light bulb in your Whirlpool refrigerator, it’s essential to ensure proper installation for optimal performance. This section outlines key checks to confirm that the new bulb is securely in place and functioning correctly, helping you avoid common pitfalls during the replacement process. Follow these guidelines to ensure your refrigerator’s lighting operates efficiently.
Once the new bulb is installed and working, perform a final check to ensure everything is in order. Regular maintenance can extend the life of your refrigerator’s lighting system.
Regularly inspect bulbs for signs of wear.
Keep the interior clean to prevent dust buildup on bulbs.
Replace bulbs promptly to maintain visibility.
This straightforward process allows you to maintain your Whirlpool refrigerator effectively. Following these steps ensures a well-lit interior and enhances the overall functionality of your appliance.

Hey, I’m Jake. I focus on cooling systems at Appliance Mastery, like fridges, freezers, and air conditioners.
I’ve worked in appliance repair for more than ten years and I’m certified through NASTeC. I’ve seen just about every fridge issue you can imagine.
My goal is to help you fix problems without stress. Whether it’s a freezer that won’t cool or an AC that keeps beeping, I’m here to walk you through it.