
Ever wondered why your car’s AC seems to have a mind of its own? Picture this: you’re cruising down the highway, the sun blazing outside, and suddenly your air conditioning decides to take a vacation. Frustrating, right? But fear not, because in this article, you’ll uncover the secrets of testing the AC clutch cycling switch.
Have you ever found yourself sweating bullets in your car, desperately trying to figure out why the AC is acting up? Well, you’re not alone. Learning how to test the AC clutch cycling switch can save you time, money, and a whole lot of discomfort. Get ready to take control of your car’s climate with a few simple steps.
By the end of this article, you’ll be equipped with the knowledge and confidence to tackle the AC clutch cycling switch like a pro. Say goodbye to sweltering drives and hello to cool, comfortable journeys. Let’s dive in and unravel the mystery behind your car’s temperamental AC system.
Understanding the AC Clutch Cycling Switch
When it comes to your car’s air conditioning, the AC clutch cycling switch plays a crucial role in regulating the compressor’s operation. Let’s delve into what this component does and how understanding it can help you maintain a comfortable driving experience.
What Does the AC Clutch Cycling Switch Do?
- The AC clutch cycling switch is responsible for monitoring the pressure in the air conditioning system.
- It controls when the compressor engages to maintain optimal pressure levels.
- This switch prevents the compressor from overworking and helps regulate the system’s overall performance.
Why Understanding It Matters
- By knowing how the AC clutch cycling switch functions, you can diagnose potential issues early on.
- Understanding this component enables you to perform tests to ensure it is working correctly.
- Identifying problems with the switch early can save you time and money on repairs down the road.
Testing the AC Clutch Cycling Switch
- To test the switch, you can use a multimeter to check for continuity.
- Start by locating the switch in your vehicle’s AC system, usually found near the compressor.
- Follow step-by-step instructions to perform the testing process accurately.
- Regularly check and test your AC clutch cycling switch to maintain optimal performance.
- Familiarize yourself with the testing procedures to address any issues promptly and effectively.
Signs of a Faulty AC Clutch Cycling Switch
- Your AC not cooling properly, even when set to maximum cooling.
- Inconsistent cooling where the air gets cold and then warm again.
- Excessively frequent cycling of the AC compressor on and off.
- Visible damage or corrosion on the AC clutch cycling switch.
- Unusual noises coming from the AC system during operation.
Remember, a faulty AC clutch cycling switch can lead to discomfort while driving and potential damage to other AC components.
Recommended Products

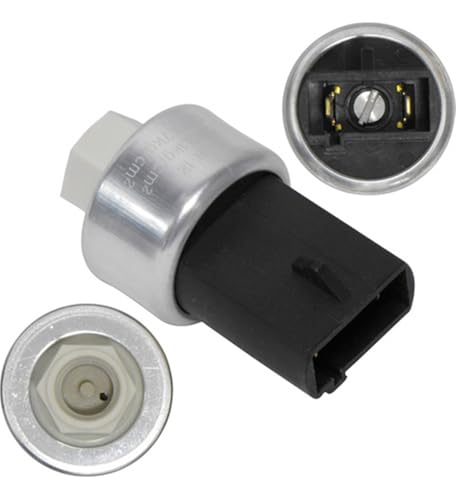
Brand New, OE replacement: UAC branded Clutch Cycling Switch

Brand New, OE replacement: UAC branded Clutch Cycling Switch.Material:Metal, Plastic

Brand New, OE replacement: UAC branded Clutch Cycling Switch
Tools Needed for Testing
To test your AC clutch cycling switch accurately, you’ll need the right tools. Here are the essentials:
- Multimeter: This tool helps measure electrical resistance and voltage, crucial for diagnosing switch functionality.
- Safety Gloves: Always prioritize safety; wear gloves to protect your hands during the testing process.
- Safety Goggles: Shield your eyes from any potential debris or hazards while working around the AC system.
- Screwdriver Set: Useful for accessing and removing the switch for testing.
Remember, having these tools on hand ensures a smooth and efficient testing process.
Recommended Products
Brand New, OE replacement: UAC branded Clutch Cycling Switch

Brand New, OE replacement: UAC branded Clutch Cycling Switch

Brand New, OE replacement: UAC branded Clutch Cycling Switch
Steps to Test the AC Clutch Cycling Switch
To check if your AC clutch cycling switch is functioning correctly, follow these steps:
- Step 1: Locate the Switch
- Find the AC clutch cycling switch usually located near the accumulator or on the compressor.
- Step 2: Preparing for Testing
- Turn off the vehicle and let the engine cool down before proceeding with the test.
- Safety First: Put on your safety gloves and goggles to protect yourself during the testing process.
- Step 3: Testing for Continuity
- Use a multimeter to test for continuity in the switch.
- Place the multimeter probes on each terminal of the switch and check for a reading of zero ohms to confirm continuity.
- Step 4: Testing for Voltage
- Set your multimeter to measure voltage.
- Connect the multimeter probes to the switch terminals.
- Start the engine and turn on the AC. You should read a voltage close to 12 volts.
- Step 5: Switch Functionality
- With the AC running, manually engage and disengage the AC clutch.
- Monitor the voltage on the multimeter. It should show 12 volts when engaged and zero volts when disengaged.
- Step 6: Interpreting Results
- If your readings do not align with these specifications, you may need to replace the AC clutch cycling switch.
By following these steps, you can effectively test your AC clutch cycling switch to determine if it is operating as it should.
Interpreting the Test Results
Testing the AC clutch cycling switch allows you to diagnose issues and determine if a replacement is needed. Here’s how you can interpret the test results:
- Continuity Test Results:
- If your multimeter shows continuity when the switch is engaged, it indicates that the switch is functioning properly.
- No continuity could mean a faulty switch, requiring replacement.
- Voltage Test Results:
- Expected voltage levels when the switch is engaged are typically between 12-14 volts.
- Lower voltage readings may point to electrical issues in the system.
- Functionality Test:
- Engage and disengage the AC clutch while monitoring for changes in voltage.
- Stable voltage when engaging and disengaging is an indicator of switch functionality.
- Interpretation:
- Consistent results across tests show a healthy switch.
- Inconsistent readings or lack of expected outcomes may signify a failing switch.
Remember, accurate interpretation of test results is crucial for making informed decisions about the condition of your AC clutch cycling switch.
Conclusion
You now have a clear understanding of how to test your AC clutch cycling switch. By following the outlined steps and using the necessary tools, you can determine the health of your switch accurately. Remember to prioritize safety by wearing the recommended gear throughout the testing process. Interpreting the test results correctly is key to identifying any issues with the switch. By engaging and disengaging the AC clutch and observing the continuity and voltage readings, you can make informed decisions about the next steps for your vehicle’s air conditioning system. Stay proactive in maintaining your AC system to ensure optimal performance and cooling efficiency.
Frequently Asked Questions
How can I tell if my AC clutch cycling switch is faulty?
If your AC system is blowing warm air, making strange noises, or frequently cycling on and off, your AC clutch cycling switch might be faulty.
What tools do I need to test the AC clutch cycling switch?
You will need a multimeter to measure resistance and voltage, safety gloves, safety goggles, and a screwdriver set to access the switch.
How do I test the AC clutch cycling switch?
To test the AC clutch cycling switch, locate the switch, wear safety gear, test for continuity and voltage using a multimeter, check the switch by engaging and disengaging the AC clutch, and interpret the results accurately.

Hi, I’m Charlie, and I cover all things laundry here at Appliance Mastery.
I’ve spent over eight years working on washing machines, dryers, and dishwashers. I also have a degree in mechanical engineering, which helps me understand how these appliances really work.
I try to make every guide clear and practical. If you’re stuck with a noisy dryer or a leaking washer, I’ll help you figure out what’s wrong and how to fix it.