
Is your dryer taking longer than usual to dry your clothes? You might have a clogged dryer vent. Picture this: You keep hitting the start button, but your laundry remains damp. Frustrating, right? In this article, you’ll discover the best way to clean your dryer vent and say goodbye to those never-ending drying cycles.
By learning how to properly clean your dryer vent, you can prevent potential fire hazards and improve the efficiency of your appliance. Imagine the peace of mind knowing you’ve reduced the risk of a lint fire in your home. Stay tuned to uncover the simple yet crucial steps to keep your dryer vent clean and your laundry routine running smoothly.
Signs of a Clogged Dryer Vent
When it comes to Signs of a Clogged Dryer Vent, it’s essential to pay attention to the following indicators:
- Clothes taking longer to dry than usual
- Excessive heat in the laundry room
- Burning smell while the dryer is running
- The dryer feels hot to the touch
- Lint buildup around the dryer vent opening
- Increased energy bills without a clear explanation
Keeping an eye out for these signs can help you identify if your dryer vent is in need of cleaning.
Importance of Cleaning Your Dryer Vent
Cleaning your dryer vent is essential for maintaining the efficiency and safety of your dryer. Here’s why it matters:
- Preventing Fire Hazards: A clogged dryer vent can lead to lint buildup, increasing the risk of a fire in your home. Cleaning the vent regularly reduces this danger significantly.
- Improving Energy Efficiency: A clear dryer vent allows for proper air circulation, helping your dryer operate more efficiently. This, in turn, can save you money on energy bills.
- Extending Appliance Lifespan: Regular vent cleaning can prolong the life of your dryer by reducing strain on the motor and components. It’s a simple way to ensure your appliance lasts longer.
- Ensuring Proper Performance: A clean dryer vent helps your dryer dry clothes effectively and in less time. You’ll notice quicker drying times and be able to complete your laundry tasks more efficiently.
- Maintaining Indoor Air Quality: A blocked vent can cause lint and debris to accumulate in your laundry room, affecting the air you breathe. Cleaning the vent regularly can help maintain good indoor air quality.
- Meeting Manufacturer Recommendations: Many dryer manufacturers recommend regular vent cleaning to maintain warranty coverage. By adhering to these guidelines, you can protect your investment in the appliance.
Regularly cleaning your dryer vent is a simple yet effective way to prevent potential safety hazards, save money, and ensure your dryer operates at its best.
Tools Needed for Cleaning
To effectively clean your dryer vent, you’ll need the right tools for the job. Here’s a list of items you’ll want to have on hand:
- Vent brush: Essential for removing lint and debris from the vent.
- Vacuum with crevice attachment: Helps suction out trapped lint in the vent.
- Screwdriver: For loosening clamps or screws holding the vent in place.
- Lint trap brush: Ideal for cleaning the lint trap inside the dryer.
- Dryer vent cleaning kit: Contains flexible rods and brushes to reach deep into the vent.
- Safety gear: Don’t forget to wear gloves and a mask to protect yourself from dust and debris.
With these tools in your arsenal, you’ll be well-equipped to tackle the task of cleaning your dryer vent effectively.
Recommended Products

Home Essentials: Fireplace chimney brushes includes two high quality synthetic brush head and flexible rods that extend up to 30 feet
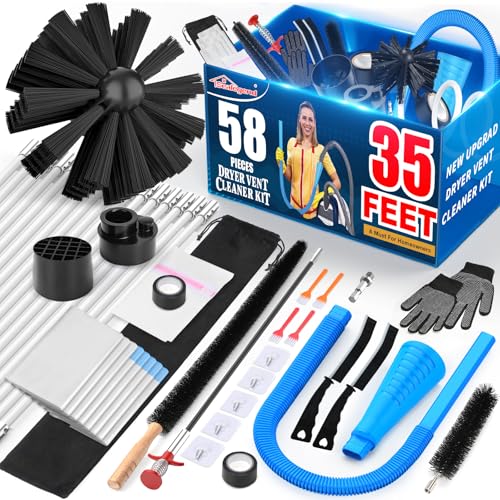
【Efficient dryer cleaning tool set】-Professional cleaning tool set can help you deep clean buildup lint in the dryer. Including 35feet Dryer Vent Brush × 1, Dryer Lint Vacuum Attachment × 1, Lint Trap Brush × 1, Vacuum Cleaner Adapter x1, Dryer Adapter x1, Drill Bit x 1, Multi-Use Lint Cleaner Brush x1, Anti-SLip Gloves x1, Strong Tape x2, Rods Collection Bag x1, Laundry Bag x1, Lint Collection Bag x33, Lint Grabber x1, Blockage Removal Tool x1, Gap Brush x2,MULT-FUNCTIONALCLEANINGBRUSH x4,SELF-ADHECIVEHOOK x5

【All-in-One Dryer Duct Cleaning Kit】No more running to the hardware store for missing parts. This complete vent cleaning kit includes a heavy-duty dryer vent cleaning brush for 4-inch pipes, a set of flexible nylon rods, a dedicated lint brush, a dryer vent cleaner drill attachment, and protective gloves—everything you need in one box, ready to use right away.
Step-by-Step Guide to Cleaning Your Dryer Vent
Cleaning your dryer vent is essential for both safety and efficiency. Here are the steps to follow when cleaning your dryer vent:
- Step 1: Disconnect the Dryer
Turn off your dryer and unplug it from the power source. Pull the dryer away from the wall to access the vent. - Step 2: Clean the Lint Trap
Start by removing the lint trap and cleaning it. Use a lint trap brush to remove any trapped lint or debris. - Step 3: Vacuum the Area
Use a vacuum cleaner with a crevice attachment to clean the area around the lint trap and remove any remaining lint. - Step 4: Disconnect the Vent
Disconnect the vent from the back of the dryer. Depending on the type of vent, you may need a screwdriver to loosen the clamp. - Step 5: Clean the Vent
Attach a vent brush to a flexible rod and feed it into the vent to remove built-up lint. Move the brush back and forth to loosen the lint. - Step 6: Vacuum the Vent
Use the vacuum with a crevice attachment to clean out the loose lint from the vent. Continue until no more lint comes out. - Step 7: Reattach the Vent
Once the vent is clean, reattach it to the dryer using the clamp and ensure it’s secured tightly. - Step 8: Test the Dryer
Plug in the dryer, turn it on, and run it for a few minutes to ensure everything is functioning properly.
Regularly cleaning your dryer vent is crucial for safety and efficiency. By following these steps, you can ensure that your dryer works effectively and reduce the risk of fire hazards caused by lint buildup.
Maintenance Tips for a Clean Dryer Vent
Maintaining a clean dryer vent is crucial for the safety and efficiency of your dryer. Here are some practical tips to help you keep your dryer vent in top condition:
- Regular Cleaning: Make it a habit to clean the lint trap before or after each load of laundry to prevent lint buildup in the vent.
- Deep Cleaning Routine: Consider a deep clean of your dryer vent at least once a year to remove any accumulated lint and debris.
- Use the Right Tools: Invest in a dryer vent cleaning kit that includes a brush and a vacuum attachment to effectively clean the vent.
- Inspect for Damage: Check the vent for any signs of wear or damage. Replace any damaged parts to ensure proper airflow.
- Keep the Surrounding Area Clean: Clear any obstructions around the dryer vent to prevent airflow blockages.
- Safety First: Before cleaning the vent, always unplug the dryer to avoid any accidents.
- Professional Help: If you’re unsure or uncomfortable cleaning the vent yourself, consider hiring a professional for a thorough inspection and cleaning.
| Key Fact | Value |
|---|---|
| Importance of Regular Cleaning | Prevents fire hazards |
| Recommended Frequency | At least once a year |
| Essential Tools | Cleaning kit with brush and vacuum attachment |
Remember, maintaining a clean dryer vent not only improves the efficiency of your dryer but also reduces the risk of fire hazards in your home.
Conclusion
Keeping your dryer vent clean is crucial for safety and efficiency. By following the practical tips mentioned in this article, such as regular lint trap cleaning, annual deep cleans, and using the right tools, you can ensure your dryer operates smoothly. Remember to prioritize safety by unplugging the dryer before cleaning and checking for any damage. By maintaining a clean dryer vent, you not only improve its performance but also reduce the risk of fire hazards in your home. Don’t overlook the importance of regular maintenance to keep your dryer running safely and efficiently.
Frequently Asked Questions
Why is it important to maintain a clean dryer vent?
It is crucial to maintain a clean dryer vent to prevent fire hazards and enhance the efficiency of your dryer. Lint buildup can restrict airflow, causing the dryer to overheat and potentially catch fire.
How often should I clean the lint trap?
It is recommended to clean the lint trap before or after every load to ensure optimal airflow and reduce the risk of lint buildup in the vent system.
How frequently should I conduct a deep clean of my dryer vent?
A deep clean of the dryer vent should be done at least once a year to remove accumulated lint and debris that regular cleaning may not reach.
What tools do I need for cleaning my dryer vent?
You will need a proper cleaning kit that includes a brush and vacuum attachment to effectively remove lint and debris from the vent system.
Should I unplug the dryer before cleaning the vent?
Yes, always unplug the dryer before cleaning the vent to avoid any electrical hazards. Safety should be a top priority during maintenance procedures.
When should I consider seeking professional help for cleaning my dryer vent?
If you notice any signs of damage, clogs that cannot be removed with basic cleaning tools, or if you are unsure about how to perform the cleaning safely, it is best to seek professional help.

Hi, I’m Charlie, and I cover all things laundry here at Appliance Mastery.
I’ve spent over eight years working on washing machines, dryers, and dishwashers. I also have a degree in mechanical engineering, which helps me understand how these appliances really work.
I try to make every guide clear and practical. If you’re stuck with a noisy dryer or a leaking washer, I’ll help you figure out what’s wrong and how to fix it.