
Replacing the door spring on a Whirlpool dishwasher is a straightforward process that can restore proper functionality. This guide provides step-by-step instructions to help you complete the replacement efficiently.
Whirlpool Dishwasher Spring Replacement Tools
When replacing the door spring on your Whirlpool dishwasher, having the right tools is essential for a smooth and efficient process. This section outlines the specific tools you’ll need to successfully complete the replacement, ensuring that you can tackle the task with confidence and precision. Equip yourself with these essentials to make the repair straightforward and effective.
Before starting the replacement, ensure you have all necessary tools and supplies on hand. This preparation will streamline the process and minimize interruptions.
Replacement door spring specific to your Whirlpool model
Screwdriver set (flathead and Phillips)
Pliers
Safety goggles
Work gloves
| Tool/Supply | Purpose |
|---|---|
| Replacement door spring | Restores door functionality |
| Screwdriver set | Removes screws securing the door |
| Pliers | Assists in manipulating springs |
| Safety goggles | Protects eyes during the process |
| Work gloves | Protects hands from sharp edges |
Recommended Products
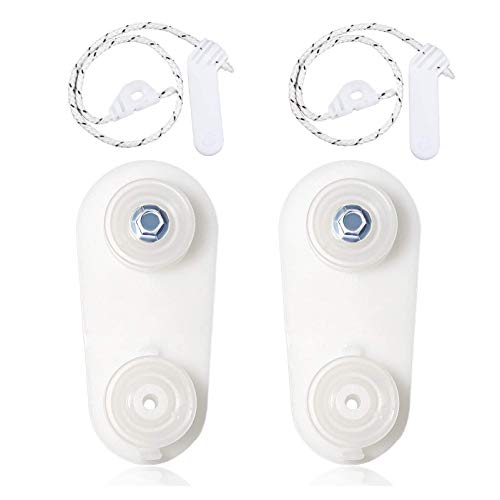
MODEL NUMBER: 8194001 Dishwasher Door Link Kit EASY TO INSTALL: It is made exactly fit for most top name brands (Whirlpool, Maytag, KitchenAid, Jenn-Air, Amana, Magic Chef,...
Whirlpool Dishwasher Repair Preparation Steps
Before diving into the replacement of your Whirlpool dishwasher door spring, it’s crucial to prepare adequately. This section outlines the essential steps to ensure you have the right tools and knowledge, helping you tackle the repair process efficiently and safely. Proper preparation can make a significant difference in the ease and success of your repair.
Proper preparation is crucial for a safe and effective repair. Start by disconnecting the dishwasher from power and water sources.
Unplug the dishwasher from the electrical outlet.
Turn off the water supply to prevent leaks.
Remove the lower dish rack to access the door mechanism.
Ensure the workspace is clean and organized to avoid losing small parts.
Whirlpool Dishwasher Old Door Spring Removal
Removing the old door spring from your Whirlpool dishwasher is a crucial step before installing a new one. This process requires careful attention to detail to ensure safety and proper functionality. Follow these instructions to effectively detach the old spring and prepare your appliance for the replacement.
With the dishwasher prepared, begin the removal of the old door spring. This step requires careful handling to avoid damaging other components.
Locate the door spring on both sides of the dishwasher door.
Use pliers to detach the spring from the mounting brackets.
Remove any screws securing the door panel if necessary.
Be cautious of any tension in the spring as you detach it.
Whirlpool Dishwasher Door Spring Installation Steps
Replacing the door spring on your Whirlpool dishwasher is a crucial maintenance task that ensures smooth operation. This section provides detailed installation steps to guide you through the process, making it easier to restore your appliance’s functionality. Follow these instructions carefully to achieve a successful replacement and enhance your dishwasher’s performance.
Installing the new door spring is a critical step that requires precision. Follow these instructions to ensure proper installation.
Position the new spring in the same location as the old one.
Attach the spring to the mounting brackets using pliers.
Ensure the spring is securely fastened and free from obstructions.
Verify that the spring operates smoothly before proceeding.
Recommended Products

【Compatible With】: Works seamlessly with Whirlpool, Kenmore, Amana, Maytag, Ikea, Magic Chef, and more—ideal for most common household dishwasher models.

Replacement part numbers include: AP3115106, 2866, 3367658, 674759, 716425, 8220, AH382742, EA382742, K35 - 636, PS382742
Whirlpool Dishwasher Door Functionality Test
Testing the functionality of your Whirlpool dishwasher door is crucial to ensure proper operation after a spring replacement. This process helps identify any issues that may affect the door’s ability to close securely and operate efficiently. Understanding how to perform this test will ensure your appliance runs smoothly and effectively.
After installation, testing the door functionality is essential to confirm the repair’s success.
Reconnect the power and water supply.
Open and close the door several times to check for smooth operation.
Listen for any unusual noises that may indicate improper installation.
If the door functions correctly, you have successfully replaced the door spring.
Whirlpool Dishwasher Spring Replacement Challenges
Replacing the door spring on a Whirlpool dishwasher can present several challenges that may complicate the process. From identifying the correct spring type to dealing with tight spaces and potential obstructions, understanding these hurdles is essential for a successful repair. This section outlines common difficulties encountered during the replacement and offers practical solutions to navigate them effectively.
Even with careful installation, issues may arise. Understanding these common problems can help you address them quickly.
Door does not stay open: Check if the spring is too loose or improperly installed.
Unusual noises when opening: Inspect for any obstructions or misalignments.
Door closes too quickly: Ensure the spring tension is adequate.
Maintenance Tips for Whirlpool Dishwashers
Proper maintenance is essential for ensuring the longevity and efficiency of your Whirlpool dishwasher. By following these practical tips, you can keep your appliance in optimal working condition, preventing common issues and enhancing its performance. Regular care not only extends the life of your dishwasher but also ensures that your dishes come out sparkling clean every time.
Regular maintenance can prolong the life of your dishwasher and prevent future issues. Implement these practices to keep your appliance in top condition.
Clean the door seals regularly to prevent leaks.
Inspect the springs every few months for wear and tear.
Run cleaning cycles with dishwasher-safe cleaners to remove buildup.
By following these maintenance tips, you can enhance the performance and longevity of your Whirlpool dishwasher.
Whirlpool Dishwasher Spring Replacement Follow-Up Steps
After successfully replacing the door spring on your Whirlpool dishwasher, it’s important to follow a series of essential steps to ensure everything functions properly. This section outlines the necessary follow-up actions to verify the repair and maintain optimal performance, helping you avoid potential issues down the line. Properly completing these steps will enhance the longevity of your appliance.
Completing the door spring replacement is just the beginning. Proper follow-up ensures your dishwasher remains functional.
Monitor the door operation over the next few days.
Keep tools and supplies organized for future repairs.
Document any issues for future reference.
Taking these final steps will help maintain your dishwasher’s efficiency and reliability.

Hey, I’m Jake. I focus on cooling systems at Appliance Mastery, like fridges, freezers, and air conditioners.
I’ve worked in appliance repair for more than ten years and I’m certified through NASTeC. I’ve seen just about every fridge issue you can imagine.
My goal is to help you fix problems without stress. Whether it’s a freezer that won’t cool or an AC that keeps beeping, I’m here to walk you through it.