
Replacing the dryer rollers on your Whirlpool dryer is essential for smooth operation and quiet performance. This guide provides a straightforward installation process to help you complete the task efficiently.
Whirlpool Dryer Roller Replacement Tools Needed
Before starting the Whirlpool dryer roller replacement, it’s essential to gather the right tools to ensure a smooth and efficient process. Having the necessary equipment on hand will not only save time but also help prevent any potential complications during the installation. This section outlines the specific tools required for a successful roller replacement.
Before starting the roller replacement, ensure you have all necessary tools and supplies. This preparation will streamline the process and minimize downtime. The following items are essential:
Replacement rollers specific to your Whirlpool model
Screwdriver set (Phillips and flathead)
Pliers
Socket wrench
Work gloves for safety
Towel or blanket to protect surfaces
| Item | Purpose |
|---|---|
| Replacement rollers | New parts for installation |
| Screwdriver set | Remove screws from the dryer |
| Pliers | Grip and pull components |
| Socket wrench | Tighten bolts securely |
| Work gloves | Protect hands during work |
| Towel or blanket | Prevent scratches on surfaces |
Recommended Products

Fits Dryer Models: Our 4392065 kit is suitable for brands like Whirlpool Kenmore Maytag Sears Kenmore Kitchen-Aid and Roper. Fits for models wed4815ew1 ned4655ew1 ned4600yq1 wed4800bq1 wed7300dw0 mgdc215ew0, etc

New Belt Upgrade: The dryer belts kit is made of premium quality material, and our dryer parts replacement proves extremely durable and highly corrosion-resistant under continuous high-temperature exposure tests.

High-Quality Parts: The dryer belts kit is made of premium quality material, and our dryer parts replacement proves extremely durable and highly corrosion-resistant under continuous high-temperature exposure tests. Our 4392065 dryer parts meet or exceed all original manufacturer specifications for fit and performance. They offer the durability you need at a fraction of the cost of other alternatives.
Whirlpool Dryer Safety Steps Before Repair
Before undertaking any repair on your Whirlpool dryer, it’s essential to prioritize safety. This section outlines crucial safety steps to follow, ensuring that you protect yourself and your appliance during the roller replacement process. Adhering to these guidelines will help prevent accidents and ensure a smooth installation.
Prioritizing safety is crucial when working on appliances. Always disconnect the dryer from the power source before beginning any repairs. This step prevents accidental electrocution and ensures your safety throughout the process.
Unplug the dryer from the wall outlet.
Turn off the gas supply if applicable.
Wear safety goggles to protect your eyes from debris.
Whirlpool Dryer Drum Removal Steps
Removing the drum from your Whirlpool dryer is a crucial step in replacing the rollers. This process requires careful attention to detail to ensure that all components are handled correctly. Follow these steps to safely and efficiently remove the drum, setting the stage for a successful roller replacement.
Accessing the rollers requires removing the dryer drum. Follow these steps carefully to avoid damaging components.
Open the dryer door and remove the screws securing the front panel.
Lift the front panel off and set it aside.
Disconnect any wires attached to the door switch.
Remove the drum by lifting it out of the dryer cabinet.
Recommended Products

Enhanced Performance: The W10314173 dryer drum roller kit is a top-quality product designed to enhance the performance of your dryer. With smooth and efficient operation, this kit ensures your dryer runs at its best. Its durable construction ensures long-lasting performance and reliability for your dryer.
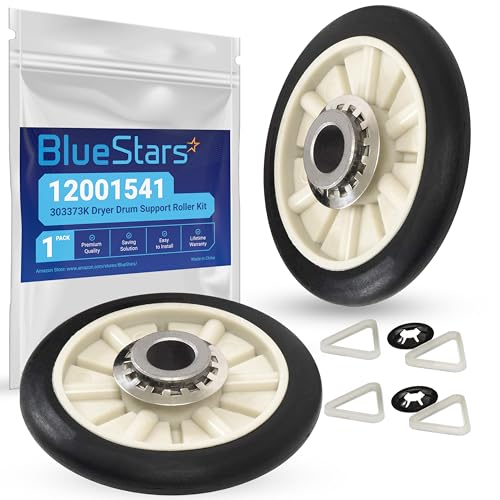
MODEL NUMBER: 349241T Dryer Rear Drum Support Roller Kit, includes: 2 x Drum Rollers, 4 x Tri-rings, 2 x Retaining Washer
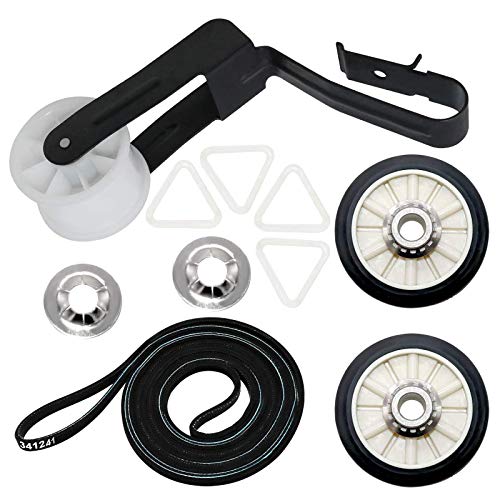
✔✔【4392065 Dryer Repair Kit】:4392065 Dryer Repair Kit for 29" wide dryers with the lint filter located on the top of the dryer.▶691366 Idler Pulley sits between the motor and drum to keep tension on the drive belt. It allows the belt to turn so that the dryer’s drum spins and helps dry your clothes.▶341241 Dryer Drum Belt attaches to the drum, idler pulley, and motor pulley. As the armature of the motor rotates, the belt begins to move and turns the drum. This belt features 4 ribs and 3 grooves
Whirlpool Dryer Roller Installation Precautions
Before starting the installation of your Whirlpool dryer roller, it’s essential to understand the necessary precautions to ensure a safe and effective process. Taking the time to prepare properly can prevent damage to your appliance and enhance your overall experience. This section outlines key safety measures and steps to follow during the installation.
Ensure that no wires are pinched or damaged during the removal process.
Whirlpool Dryer Roller Assembly Installation Steps
Replacing the roller assembly in your Whirlpool dryer can enhance its efficiency and extend its lifespan. This guide provides clear, step-by-step instructions to help you complete the installation quickly and effectively. Follow these directions to ensure your dryer operates smoothly and quietly once again.
Once the drum is out, you can replace the roller assembly. This step is vital for restoring the dryer’s efficiency.
Locate the old rollers on either side of the drum.
Remove the retaining clips using pliers.
Slide off the old rollers and discard them.
Install the new rollers by sliding them onto the shaft.
Secure the rollers with the retaining clips.
Recommended Products
![[Newest] 4392067 Dryer Repair Kit and W10837240 Dryer Idler Pulley for Maytag Bravos Whirlpool Duet Kenmore Elite Dryers,with WPW10314173 Drum Roller&661570V Belt&279640 Idler Pulley by TOMOON](https://m.media-amazon.com/images/I/51ZYjJg3RRL._SL500_.jpg)
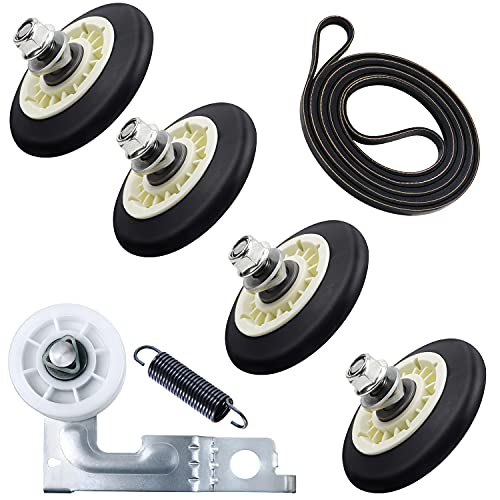
𝐂𝐎𝐌𝐏𝐋𝐄𝐓𝐄 𝟒𝟑𝟗𝟐𝟎𝟔𝟕 𝐃𝐑𝐘𝐄𝐑 𝐑𝐄𝐏𝐀𝐈𝐑 𝐊𝐈𝐓 --Dryer repair kit 4392067 includes all parts to fix Dryer Problems like Noisy,will not tumble,leaves marks on clothes or will not start etc. include 4 *8536974/WPW10314173 dryer drum support roller wheels; 1 * 661570V dryer drum belt ( 93 1/2" long); 1 * 279640 dryer idler pulley ( pulley wheel keeps tension on the dryer belt.
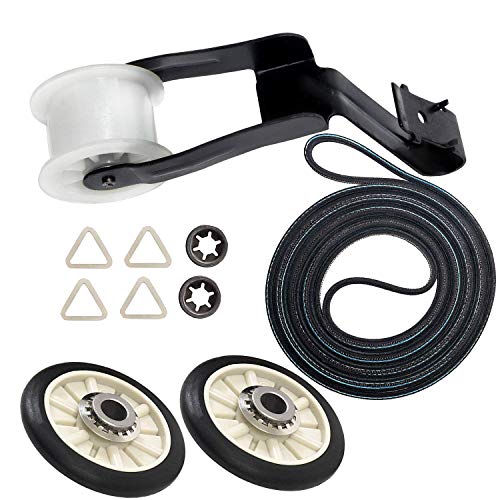
COMPLETE REPAIR KIT: Includes x2 349241T Dryer Rear Drum Support Rollers, x1 691366 Dryer Idler Pulley Assembly, x1 341241 Dryer Drum Belt (1/4" wide, 92 1/4" long, 4 ribs, 3 grooves), x4 Tri-rings, and x2 Clips. The 4392065 Dryer Repair Kit is a direct replacement for part numbers AP3131942, 587636, 4392065, 2014, 26000279435, 26000279436, 279435, 279436, 279708, 279708MS, 279709, 279709MS, 279860, 279948, 4392065VP, 80046, 8106, 8237, 8238, PS373087.
【High-quality upgrade】This dryer repair kit for LG Kenmore includes①1* spring; ②4*4581EL2002C Dryer Drum Roller (using high-quality rubber overall structure design, will not crack, sturdy and durable); ③1* 4561EL3002A Dryer Pulley(it is made of high quality galvanized steel and high strength plastic, wear resistant, sturdy and longevous); ④1*4400EL2001A dryer belt (thickness: 0.12in /3mm. length: 92in. It consists of a non-cracking rubber providing long-lasting wear and durability)
Whirlpool Dryer Roller Spin Check
Before replacing the rollers in your Whirlpool dryer, it’s essential to perform a spin check to ensure they are functioning properly. This step helps identify any issues that may affect the dryer’s performance and efficiency. By conducting this simple assessment, you can confirm whether roller replacement is necessary for optimal operation.
Check that the new rollers spin freely before reassembling the dryer.
Whirlpool Dryer Reassembly Steps After Roller Replacement
After replacing the rollers in your Whirlpool dryer, it’s essential to reassemble the unit correctly to ensure optimal performance. This section outlines the necessary steps to reattach components and secure the dryer, making the process straightforward and efficient. Following these guidelines will help you restore your dryer to its full functionality.
After replacing the rollers, it’s time to put the dryer back together. Follow these steps to ensure everything is secure.
Carefully place the drum back into the cabinet.
Reconnect any wires to the door switch.
Reattach the front panel and secure it with screws.
Plug the dryer back in to the power source.
Whirlpool Dryer Functionality Test After Installation
After replacing the rollers in your Whirlpool dryer, it’s essential to conduct a functionality test to ensure everything is operating smoothly. This step will help confirm that the installation was successful and that the dryer is running efficiently, preventing potential issues down the line. Follow these guidelines to verify proper performance and avoid unnecessary repairs.
Testing the dryer post-installation is essential to confirm that everything is functioning correctly.
Turn on the dryer and set it to a low heat cycle.
Listen for unusual noises that may indicate improper installation.
Check for smooth drum rotation without any wobbling.
Whirlpool Dryer Installation Safety Precautions
When replacing the rollers in your Whirlpool dryer, it’s crucial to prioritize safety to prevent accidents and ensure a smooth installation process. This section outlines essential safety precautions that should be taken before you begin the replacement, helping you to work efficiently and protect yourself throughout the task.
If any issues arise during testing, immediately disconnect the power and recheck your installation.
Whirlpool Dryer Post-Replacement Issues
After replacing the rollers in your Whirlpool dryer, you may encounter a few common issues that can affect its performance. Understanding these potential problems is crucial for ensuring your dryer operates smoothly and efficiently. This section addresses typical post-replacement concerns and offers solutions to help you troubleshoot effectively.
If the dryer still exhibits problems after roller replacement, consider these potential issues.
Worn belt: Check the drive belt for wear and replace if necessary.
Misaligned drum: Ensure the drum is seated correctly on the rollers.
Debris buildup: Inspect for lint or debris obstructing the rollers.
Whirlpool Dryer Maintenance Strategies for Longevity
Maintaining your Whirlpool dryer is essential for ensuring its longevity and optimal performance. By implementing effective maintenance strategies, you can prevent common issues and extend the life of your appliance. This section will explore key practices that will help keep your dryer running smoothly for years to come.
To prolong the life of your Whirlpool dryer, consider the following maintenance tips.
Regularly clean the lint filter after each use.
Inspect the rollers every few months for wear.
Ensure proper ventilation to prevent overheating.
Following these steps will help ensure that your Whirlpool dryer operates efficiently and quietly. Proper installation and maintenance of the dryer rollers are key to achieving optimal performance.

Hey, I’m Jake. I focus on cooling systems at Appliance Mastery, like fridges, freezers, and air conditioners.
I’ve worked in appliance repair for more than ten years and I’m certified through NASTeC. I’ve seen just about every fridge issue you can imagine.
My goal is to help you fix problems without stress. Whether it’s a freezer that won’t cool or an AC that keeps beeping, I’m here to walk you through it.