
Replacing the filter in a Whirlpool washer is essential for maintaining optimal performance and preventing clogs. This guide provides a straightforward installation process to ensure your washer operates efficiently.
Whirlpool Washer Filter Replacement Tools Needed
To successfully replace the filter in your Whirlpool washer, having the right tools on hand is essential. This section outlines the specific tools you’ll need to ensure a smooth and efficient installation process. Being prepared will help you tackle the task with confidence and ease.
Before starting the filter replacement, ensure you have all necessary tools and supplies. This preparation will streamline the process and minimize interruptions.
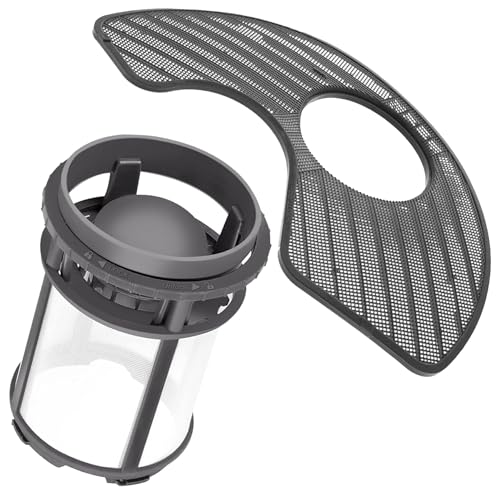
Replacement filter specific to your Whirlpool model
Flathead screwdriver for prying open covers
Towel to catch any water spills
Bucket to collect excess water
Recommended Products
2-in-1 Filter Combo | Wide Compatibility:All-in-one set includes W10872845 dishwasher pump filter cup + WPW10463906 screen filter, eliminating separate purchases. Fully compatible with Whirlpool, Kenmore, Amana, KitchenAid, Maytag, Admiral, Roper & Norge dishwashers. Fits hundreds of models like 66512413N410, ADB1100AWB4, KDTE204EBL2—one kit meets all filtration needs.

Product Information---120V | 60Hz | 0.95A | 0.7W, Complete assembly, including motor, filter, and inlet / outlet plastic housing. Drop-In Replacement Pump 280187 fully encapsulated inside the grey plastic therefore winding wire is not exposed,This is a better & Safer design.

PACKAGE INCLUDES: This washing machine water filter set includes 2 hot (orange) and 2 cold (blue) water filter screens, replacing part numbers 1810261, AP5202486, PS3618281, and EAP3618281 for LG, Kenmore, and compatible models.
Whirlpool Washer Preparation for Filter Change
Before replacing the filter in your Whirlpool washer, proper preparation is essential to ensure a smooth and efficient process. This section outlines the necessary steps to take before beginning the filter change, including gathering tools, turning off the power, and ensuring the area is clean and accessible. Following these guidelines will help you avoid complications during the installation.
Proper preparation is crucial for a smooth filter replacement. Begin by unplugging the washer to ensure safety during the process.
Turn off the water supply to the washer.
Unplug the power cord from the outlet.
Move the washer away from the wall to access the back panel.
Ensure the area is clear of any obstacles to facilitate easy access.
Whirlpool Washer Old Filter Removal Steps
Removing the old filter from your Whirlpool washer is a crucial step in maintaining optimal performance and efficiency. This process ensures that your machine runs smoothly and prevents potential issues caused by clogs or debris. Follow these straightforward steps to safely and effectively remove the filter before installing a new one.
Removing the old filter requires careful handling to avoid damaging any components. Follow these steps to successfully remove the filter.
Locate the filter access panel on the front or back of the washer.
Use the flathead screwdriver to gently pry open the panel.
Twist and pull the old filter out of its housing.
Be prepared for some water spillage. Use the towel to soak up any excess water.
Whirlpool Washer Filter Installation Steps
Replacing the filter in your Whirlpool washer is essential for maintaining optimal performance and preventing clogs. This guide outlines the straightforward steps needed for a successful installation, ensuring your appliance runs efficiently and effectively. Follow these instructions to easily access and replace the filter, keeping your laundry routine hassle-free.
Installing the new filter is straightforward but requires attention to detail. Ensure the new filter is compatible with your specific Whirlpool model.
Align the new filter with the housing.
Push it firmly into place until it clicks.
Close the access panel securely.
Double-check that the filter is seated correctly to prevent leaks.
Whirlpool Washer Post-Installation Testing
After successfully replacing the filter in your Whirlpool washer, it’s essential to conduct post-installation testing to ensure everything is functioning correctly. This step will help you identify any potential issues and confirm that the new filter is installed properly. Follow these straightforward procedures to verify that your washer operates efficiently and effectively.
Testing the washer after installation is essential to confirm that everything is functioning properly.
Reconnect the water supply and plug the washer back in.
Run a short cycle to check for leaks.
Monitor the washer for any unusual noises or issues.
If everything operates smoothly, the installation is complete.
Whirlpool Washer Filter Problems Explained
Whirlpool washers are known for their efficiency, but filter issues can disrupt their performance. Understanding common filter problems is essential for maintaining optimal operation and preventing costly repairs. This section delves into the typical challenges associated with Whirlpool washer filters and how they can affect your laundry routine.
Understanding common issues can help you troubleshoot effectively. Here are some typical problems related to washer filters.
Clogs can cause poor drainage.
Leaks may indicate improper installation.
Unusual noises often stem from debris in the filter.
Address these issues promptly to maintain washer performance.
Recommended Products

𝐎𝐄𝐌 𝐖𝐏𝐖𝟏𝟎𝟕𝟑𝟎𝟗𝟕𝟐 𝐖𝐀𝐒𝐇𝐄𝐑 𝐃𝐑𝐀𝐈𝐍 𝐏𝐔𝐌𝐏-- wpw10730972 W10130913 Front load washer drain pump and motor assembly ,W10130913 Washer Drain Pump removes water from the washer during the drain portion of the cycle,Rated AC 120V,60Hz,Amps: 80W.OEM W10130913 washer drain pump is a reliable replacement for your old or broken whirlpool duet drain pump part.

Excellent Compatibility: 280187 Washer Drain Pump Assembly Compatible Replacement Part Number 1200164 AP3953640 PS1485610 EAP1485610 285998 8181684 8182819 8182821 46197020148 461970201671 461970228511 461970228512 461970228513 Compatible with Whirlpool, Kenmore, Kitchen-Aid, Maytag, etc. When purchasing a new sump pump assembly, make sure it is compatible with your specific machine's make and model.

COMPATIBLE MODEL - W11568579 + W10365897 filter pump- only filter + cap compatible with Maytag Whirlpool Crosley Amana Heavy DUTY for old and new models and serials 50 and 60 hertz for models
Maintenance Tips for Whirlpool Washers
Proper maintenance is essential for the longevity and efficiency of your Whirlpool washer. Regularly checking and replacing the filter can prevent clogs and improve performance. This section provides practical tips to help you keep your washer in optimal condition, ensuring it runs smoothly for years to come.
Regular maintenance can prolong the life of your washer and enhance its efficiency. Consider these tips for optimal care.
Inspect the filter every three months for clogs.
Clean the exterior of the washer regularly.
Check hoses for wear and tear.
Here’s a quick reference table for maintenance frequency:
| Maintenance Task | Frequency |
|---|---|
| Filter inspection | Every 3 months |
| Exterior cleaning | Monthly |
| Hose checks | Every 6 months |
Signs You Need Whirlpool Washer Service
Recognizing when your Whirlpool washer needs service is crucial for maintaining its efficiency and longevity. Look for specific signs that indicate potential issues, such as unusual noises, leaks, or failure to start. Addressing these problems early can prevent more extensive damage and costly repairs down the line.
Sometimes, issues may arise that require professional assistance. Recognize the signs that indicate it’s time to call an expert.
Persistent leaks after filter replacement
Error codes displayed on the washer
Unresolved drainage issues
Addressing these concerns early can prevent further damage and costly repairs.

Hey, I’m Jake. I focus on cooling systems at Appliance Mastery, like fridges, freezers, and air conditioners.
I’ve worked in appliance repair for more than ten years and I’m certified through NASTeC. I’ve seen just about every fridge issue you can imagine.
My goal is to help you fix problems without stress. Whether it’s a freezer that won’t cool or an AC that keeps beeping, I’m here to walk you through it.