
Is your side-by-side freezer not working when you need it most? You’re not alone. Many people face this frustrating issue, and it can lead to spoiled food and wasted money.
Imagine opening your freezer to find it warm and your ice cream melting. It’s a situation no one wants to deal with. But before you panic or call a repairman, there are simple steps you can take to troubleshoot the problem.
Key Takeaways
- Common Culprits: Check temperature settings, blocked vents, and damaged door gaskets as primary reasons for a malfunctioning side-by-side freezer.
- Essential Troubleshooting: Inspect the power supply, clean the freezer’s seals, and verify outlet functionality to mitigate issues before calling for professional help.
- Cleaning is Key: Regularly clean the condenser coils to prevent operational inefficiencies caused by dust and debris buildup.
- Component Replacement: Identify and replace faulty components like the start relay, thermostat, or fan motor if basic troubleshooting fails.
- When to Seek Help: Look for signs like persistent temperature issues, unusual noises, or excessive ice buildup as indicators that professional assistance is needed.
- Aging Appliances: Be mindful that freezers over 10-15 years may require more frequent maintenance or replacement due to wear and tear.
Common Issues Leading To Freezer Not Working On Side By Side
A malfunctioning freezer can stem from several common issues. Identifying these can help you troubleshoot effectively before seeking professional assistance.
Temperature Settings
Inaccurate temperature settings often lead to warm freezers. Check the temperature dial or digital display. Freezers should maintain a temperature around 0°F (-18°C). If the setting’s higher, adjust accordingly. Sometimes, even a slight increase in temperature can affect freezing efficiency.
Blocked Vents
Blocked vents hinder proper airflow. Make sure no food items obstruct the vents inside the freezer. Look for frost buildup or ice accumulation around these areas. If present, it can restrict air circulation, causing temperature fluctuations. Rearranging food to allow for unobstructed airflow can often resolve this issue.
Troubleshooting Steps
Follow these troubleshooting steps to resolve freezer issues effectively. Addressing common problems can restore your side-by-side freezer’s functionality.
Checking Power Supply
- Inspect the Power Cord: Examine the power cord for any visible damage or fraying. A damaged cord may prevent the freezer from receiving electricity.
- Verify Outlet Functionality: Plug another appliance into the same outlet to check if it’s working. If the outlet is dead, reset the circuit breaker or replace any blown fuses.
- Ensure Power is On: Check if the freezer is turned on. If you find it unplugged, plug it back in and monitor for operation.
- Examine Door Gaskets: Look for cracks or damage on the door seals. Damaged gaskets can cause warm air to enter and hinder freezing efficiency.
- Clean the Seals: Wipe the door seals with a damp cloth to remove dirt or debris. Keeping seals clean ensures a tight closure and effective performance.
- Conduct a Simple Test: Close the door on a piece of paper, then pull it out. If the paper slips out easily, consider replacing the seals to improve energy efficiency.
By executing these straightforward checks, you can identify potential issues and restore proper function to your side-by-side freezer.
Solutions To Fix The Freezer
If your side-by-side freezer isn’t working, several solutions can help restore its functionality. Follow these steps closely to pinpoint and resolve the issue.
Recommended Products
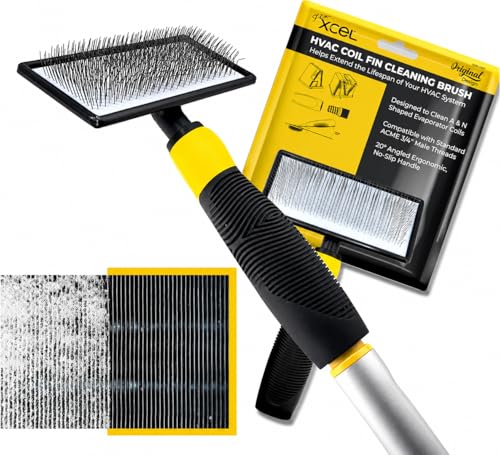
DO THE JOB RIGHT THE FIRST TIME This HVAC coil cleaning brush is designed for deeper, more practical coil maintenance. Stainless steel pins help remove trapped debris between fins, while the bristle side helps clean the surface and support better airflow.

Package Includes: 4 packs air conditioner condenser cleaning brush in package, you can use them to clean different items in your home, enough to satisfy your cleaning needs
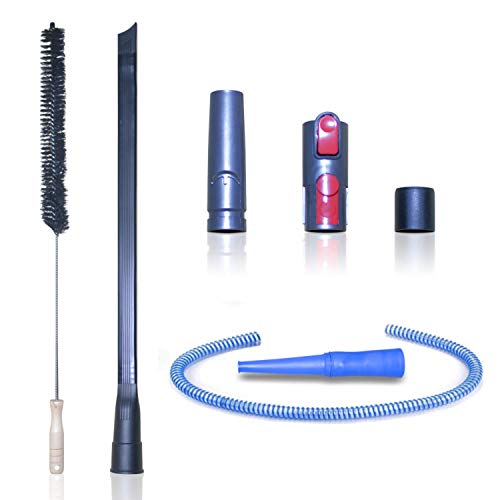
✔ Improve Dryer Efficiency & Preventing Fire Risks of Your Beautiful House: Dryer manufacturers recommend regular lint removal to extend dryer life. By using this tool kit, you can remove years of lint build-up deep within dryer gap, exhaust port and dryer vent so your appliance run more safely and efficiently. Using this dryer lint cleaning brush and flexible vacuum attachment for dryer vent regularly to clean your dryer vent and help prevent deadly dryer vent fires from sparking.
Cleaning the Condenser Coils
Cleaning the condenser coils is a crucial step. Dust and debris can accumulate on the coils, causing the unit to operate inefficiently. Here’s how to clean them:
- Unplug the Freezer: Safety first; always disconnect the power before cleaning.
- Locate the Coils: Usually found on the back or beneath the unit. If they’re hard to access, use a flashlight.
- Use a Vacuum: Attach a brush nozzle to your vacuum cleaner and gently remove dirt from the coils.
- Wipe Down: For stubborn grime, use a damp cloth and mild detergent, then dry thoroughly.
- Reconnect and Test: Plug the freezer back in and monitor its performance over the next few hours.
Replacing Faulty Components
If cleaning the coils doesn’t work, check for faulty components that may need replacing. Common culprits include:
- Start Relay: This part helps the compressor start. If you hear a clicking sound but the compressor doesn’t run, the relay might be defective.
- Thermostat: A malfunctioning thermostat may not signal the compressor to engage. Test the thermostat with a multimeter for continuity.
- Fan Motor: Ensure the evaporator fan motor operates correctly. If it doesn’t spin or makes unusual noises, replacement may be necessary.
- Unplug the Freezer: Always disconnect from the power source first.
- Access the Component: Depending on what you’re replacing, remove panels or covers.
- Disconnect Wires: Take photos of wire connections for reference. Carefully detach them.
- Install New Part: Attach the new component by reversing the removal process.
- Test: Plug the freezer back in and monitor its performance.
By following these steps, you can address specific problems causing your side-by-side freezer not to function properly.
When To Call a Professional
You might encounter situations where troubleshooting won’t solve the issue with your side-by-side freezer. Here are some signs that indicate it’s time to seek professional help:
Persistent Temperature Issues
You notice the temperature fluctuating, even after checking the settings. If the freezer doesn’t maintain an optimal temperature of around 0°F (-18°C) consistently, a technician should evaluate the appliance’s components.
Unusual Noises
You hear strange noises coming from the unit. Loud clunks, grinding sounds, or continuous buzzing suggest internal problems. These noises often indicate that parts like the compressor or fan motor may be malfunctioning.
Ice Buildup
You observe excessive ice buildup inside the freezer. If ice accumulates around the evaporator coils or in other areas, it’s crucial to get it checked. This can lead to airflow issues and affect the freezer’s performance.
Frequent Cycling
You notice the compressor running more often than usual. If it cycles frequently without reaching the required temperature, this might indicate a refrigerant leak or a failing thermostat.
Inability to Turn On
The freezer won’t turn on despite confirmed power supply. If you’ve ruled out external factors and the unit remains unresponsive, a professional should inspect electrical components.
Age of the Appliance
You have an older freezer, typically over 10 to 15 years old. As appliances age, they become less efficient and more prone to failure. Age often necessitates professional maintenance or replacement.
By recognizing these signs, you can address issues promptly. When in doubt, consulting a professional can prevent further damage and ensure your side-by-side freezer functions correctly.
Conclusion
Addressing a malfunctioning side-by-side freezer can feel overwhelming but you have the tools to tackle the issue. By following the troubleshooting steps outlined and keeping an eye on common problems you can often restore your freezer’s functionality without the need for professional help.
If you find that the simple fixes don’t do the trick don’t hesitate to reach out to a technician. Taking prompt action can save your food and prevent further issues down the line. Remember to stay proactive with maintenance to keep your freezer running smoothly for years to come.
Frequently Asked Questions
What should I do if my side-by-side freezer is warm?
Check the temperature setting first. It should be around 0°F (-18°C). Ensure vents are clear of food items and that the freezer is plugged in and receiving power.
How can I troubleshoot a malfunctioning freezer?
Start by examining the power supply, checking for a damaged cord and testing the outlet. Clean the door gaskets to prevent warm air entry and verify that the freezer is turned on.
What are the common causes of a freezer not working?
Frequent causes include incorrect temperature settings, blocked vents, dirty condenser coils, or faulty components like the thermostat or fan motor disrupting functionality.
How do I clean the condenser coils of my freezer?
Unplug the freezer, locate the coils, and use a vacuum or a damp cloth to remove dust and debris. Make sure the coils are completely dry before plugging the unit back in.
When should I call a professional for freezer issues?
Call a professional if you notice persistent temperature problems, unusual noises, excessive ice buildup, or if the freezer won’t turn on despite confirming power supply.
What is a sign that the door gaskets are faulty?
A simple test using a piece of paper placed in the door can reveal faulty gaskets. If the paper can be easily pulled out when the door is closed, the gaskets may need to be replaced.
How often should I maintain my freezer?
Regular maintenance, including cleaning the condenser coils every six months and checking gaskets, is essential for optimal performance and longevity.
Can I fix a faulty thermostat myself?
If you’re comfortable with basic repairs, you can check the thermostat yourself. However, if you’re unsure or uncomfortable, it’s best to consult a professional for safety.

Hey, I’m Jake. I focus on cooling systems at Appliance Mastery, like fridges, freezers, and air conditioners.
I’ve worked in appliance repair for more than ten years and I’m certified through NASTeC. I’ve seen just about every fridge issue you can imagine.
My goal is to help you fix problems without stress. Whether it’s a freezer that won’t cool or an AC that keeps beeping, I’m here to walk you through it.