
Changing the light in a Whirlpool refrigerator is a straightforward task that can enhance visibility and improve your appliance’s functionality. This guide outlines the steps needed to replace the light bulb efficiently and safely, ensuring your refrigerator remains in optimal condition.
Whirlpool Refrigerator Light Replacement Tools
To successfully replace the light in your Whirlpool refrigerator, having the right tools on hand is essential. This section outlines the specific tools you will need to ensure a smooth and efficient light replacement process. With the proper equipment, you can tackle this simple maintenance task with confidence.
Before starting the light replacement process, ensure you have the necessary tools and supplies on hand. This will streamline the task and minimize interruptions.
Required tools and supplies include:
New light bulb (check wattage and type)
Screwdriver (flathead or Phillips based on model)
Soft cloth or paper towel
Safety gloves
| Tool/Supply | Purpose |
|---|---|
| Light bulb | Replacement for burnt-out bulb |
| Screwdriver | To remove light cover |
| Cloth | To clean any dust |
| Gloves | To protect hands |
Recommended Products

NO-HEAT BULB FOR REFRIGERATOR: A waterproof alternative to heat-emitting bulbs, Vgogfly refrigerator light bulb emits not the usual blue-white light, but pure white light. It not only brightens your fridge or freezer but also gives it a new life

【ENERGY SAVING】:ENERGY SAVINGS: 4w refrigerator lamps replace 40w traditional incandescent lamps, enjoy bright lighting while dramatically lowering your electricity bill, saving 90% of energy

W11251749 Freezer Light Bulb Capacity 30-32V, (4.2W/60HZ, 120VAC/52mA ), LED bulb for installation in cabinets to illuminate the inside of a fridge or freezer. It can effectively solve the problems of dimming, flickering, not bright and short-circuit, etc. It is made of high quality material to ensure even light, energy saving, no shadow, strobe to ensure the refrigerator is brighter and more efficient
Whirlpool Refrigerator Light Replacement Safety
When replacing the light in your Whirlpool refrigerator, safety should be your top priority. Understanding the proper procedures and precautions can help prevent accidents and ensure a smooth replacement process. This section outlines essential safety measures to follow, making your maintenance task both effective and secure.
Preparation is crucial for a successful light replacement. Start by unplugging the refrigerator to avoid any electrical hazards.
Safety measures include:
Unplugging the refrigerator
Wearing gloves to protect against sharp edges
Ensuring the new bulb is compatible with your model
Make sure the refrigerator is empty or that items are secured to prevent them from falling during the process.
Whirlpool Refrigerator Light Bulb Replacement Steps
Changing the light bulb in your Whirlpool refrigerator is a straightforward task that can enhance visibility and maintain the appliance’s efficiency. This section outlines the essential steps to safely and effectively replace the light bulb, ensuring your refrigerator remains well-lit and functional. Follow these simple instructions to tackle this common maintenance task with confidence.
Follow these steps to replace the light bulb in your Whirlpool refrigerator. This process is simple and can usually be completed in under 15 minutes.
Unplug the refrigerator to ensure safety.
Locate the light cover inside the refrigerator. This is typically near the top or side of the interior.
Remove the light cover by unscrewing it or gently pulling it off, depending on your model.
Take out the old bulb by twisting it counterclockwise.
Install the new bulb by twisting it clockwise until secure.
Replace the light cover by securing it back in place.
Plug the refrigerator back in and check if the new bulb is functioning.
Recommended Products

Low Heat Refrigerator Light Bulb: This fridge light bulb operates with a surface temperature below 50°C, ensuring it is safe for both people and appliances. It poses no burn risk, making it safer to handle, while also being fridge-friendly by reducing heat buildup and helping maintain optimal cooling efficiency
Compatible Model:W11043011 Refrigerator LED Light replacement compatible with Whirlpool WRX735SDHZ00 WRX735SDBM04 WRX735SDBE02 WRX735SDBH02 WRX735SDHB00 WRX735SDHV00 WRX735SDHW00 WRF555SDFZ03 WRF555SDHV01 WRF555SDFZ04 WRF555SDFZ07 WRF555SDFZ05 WRF555SDFZ08 WRX735SDHZ01 WRF555SDHW00 WRF555SDHB00 WRF555SDHV02.Also compatible with Maytag MFI2570FEB01 MFI2570FEW01 MFI2570FEZ03 MFI2570FEZ04 MFI2570FEZ05 MFI2570FEZ06.For Amana AFI2539ERB02 AFI2539ERM03 AFI2539ERW02,For Ikea IX7DDEXGZ001 IX7DDEXGZ002

Uses 40 watts (415 lumens)
Whirlpool Refrigerator Light Installation Problems
When replacing the light in your Whirlpool refrigerator, you may encounter specific installation challenges that can complicate the process. Understanding these common issues will help you troubleshoot effectively and ensure your refrigerator is well-lit and functioning properly. This section addresses potential problems and offers practical solutions to make your light installation smooth and straightforward.
Sometimes, the new bulb may not illuminate after installation. Understanding common issues can help diagnose the problem quickly.
Common issues include:
Burnt-out bulb
Loose connections
Faulty light socket
If the bulb does not work, double-check the connections and ensure the new bulb is functional.
Recommended Products

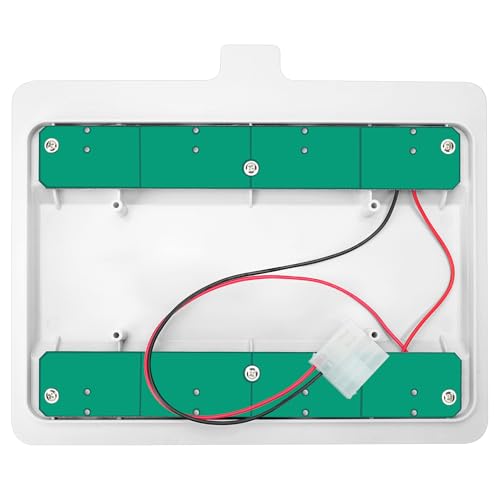
Package includes: W11251749 freezer light bulb module assembly, W11251749 refrigerator LED light module assembly attaches inside the cabinet and illuminates the inside of the refrigerator or freezer..

Cross Reference Part Numbers: W11447232, AP6986466, W10352518, W10134764, WPW10134764, 12570701, 12570701SP, 12570701V, 12570702, 12570705, 67002216, 67002551, 67005016, 67005886, 8170839, W10134763, W10134764V, Y12570701
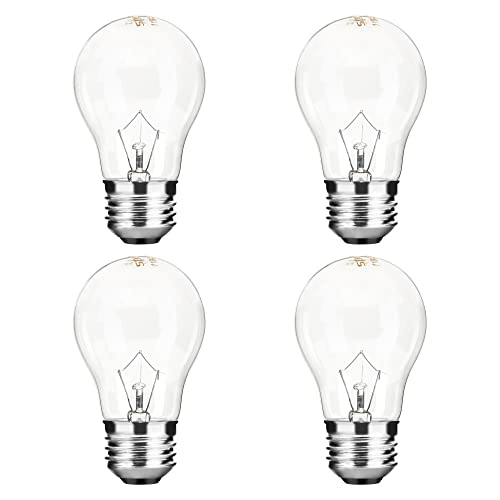
40W A15 appliance light bulb can be used as appliance parts replacement bulb in oven, refrigerator, under microwave, over stove range hood lava lamp, an replacement of OEM bulb item:15206, 48706, 83645, 40A15, 4396822, 8009, 10181, 10034, 9570, 5032-6.
Whirlpool Refrigerator Light Maintenance Strategies
Maintaining the light in your Whirlpool refrigerator is essential for visibility and efficiency. This section outlines straightforward strategies to help you change the light bulb effectively, ensuring your appliance remains in optimal working condition. With these simple maintenance tips, you can easily tackle this task and enhance the functionality of your refrigerator.
Regular maintenance can prolong the lifespan of your refrigerator’s lighting system.
Consider these maintenance tips:
Clean the light cover regularly to prevent dust buildup.
Inspect the bulb for any signs of wear or damage.
Replace bulbs promptly when they burn out to maintain visibility.
Maintaining a clean and functional lighting system enhances the overall efficiency of your refrigerator.
Whirlpool Refrigerator Light Repair Consultation
When your Whirlpool refrigerator light dims or goes out, it can disrupt your kitchen routine. Understanding the repair process can save you time and money, ensuring your appliance remains functional. This section provides expert guidance on diagnosing and addressing common lighting issues in your Whirlpool refrigerator.
If you encounter persistent issues with the refrigerator light after replacing the bulb, it may be time to consult a professional.
Signs to seek help include:
Frequent bulb burnouts
Flickering lights
No power to the light socket
A professional can diagnose underlying electrical issues that may require specialized tools and knowledge.
Whirlpool Refrigerator Light Replacement Checklist
Changing the light in your Whirlpool refrigerator is a straightforward task that can enhance visibility and maintain the appliance’s efficiency. This checklist provides step-by-step guidance to ensure you have all the necessary tools and materials, making the replacement process smooth and hassle-free. Follow these tips to keep your refrigerator well-lit and functioning optimally.
After replacing the light bulb, ensure everything is functioning properly.
Check the light for consistent operation and inspect the bulb for any flickering. If issues persist, consider further troubleshooting or professional assistance.

Hey, I’m Jake. I focus on cooling systems at Appliance Mastery, like fridges, freezers, and air conditioners.
I’ve worked in appliance repair for more than ten years and I’m certified through NASTeC. I’ve seen just about every fridge issue you can imagine.
My goal is to help you fix problems without stress. Whether it’s a freezer that won’t cool or an AC that keeps beeping, I’m here to walk you through it.