
Changing the ice maker filter on a Whirlpool refrigerator is essential for maintaining clean ice and optimal performance. This task can be completed in a few straightforward steps, ensuring your ice maker operates efficiently and lasts longer.
Whirlpool Ice Maker Filter Change Tools
To successfully change the ice maker filter on your Whirlpool appliance, having the right tools at your disposal is essential. This section outlines the specific tools you will need to ensure a smooth and efficient filter replacement process, helping to maintain the longevity and performance of your ice maker. Prepare yourself with these necessary items before diving into the task.
Before starting the filter change, ensure you have the necessary tools and supplies on hand. This preparation helps streamline the process and reduces the risk of interruptions.
Replacement filter compatible with your Whirlpool model
Screwdriver for any necessary panel removal
Towel to catch any water spills
Bucket to collect excess water
Whirlpool Ice Maker Safety Precautions
Before changing the ice maker filter on your Whirlpool appliance, it’s essential to prioritize safety. Understanding the necessary precautions will help prevent accidents and ensure a smooth process. This section outlines key safety measures to keep in mind while performing maintenance on your ice maker.
Taking safety precautions is crucial when working on appliances. Disconnect the refrigerator from the power source to avoid electrical hazards. Additionally, turn off the water supply to prevent leaks during the filter change.
Unplug the refrigerator or switch off the circuit breaker
Locate the water supply valve and turn it off
Keep a towel and bucket nearby for spills
Whirlpool Ice Maker Filter Change Steps
Changing the ice maker filter on your Whirlpool appliance is essential for maintaining optimal performance and ensuring clean, fresh ice. This section outlines the step-by-step process to effectively replace the filter, along with practical tips to enhance the longevity of your ice maker. Follow these guidelines to keep your ice maker running smoothly and efficiently.
Follow these steps to effectively change the ice maker filter in your Whirlpool refrigerator. This process ensures that you maintain the quality of your ice and extend the life of your appliance.
Locate the filter compartment. This is usually found inside the refrigerator or at the back of the appliance.
Remove the old filter. Twist or pull the filter out, depending on the design.
Inspect the filter housing for any debris or buildup. Clean it gently with a damp cloth.
Insert the new filter. Align it properly and push or twist it into place until it clicks.
Turn the water supply back on and check for leaks.
Plug the refrigerator back in and allow it to run for a few minutes before using the ice maker.
| Step | Action | Notes |
|---|---|---|
| 1 | Locate filter | Check user manual if unsure |
| 2 | Remove old filter | Handle with care |
| 3 | Clean housing | Use a damp cloth |
| 4 | Insert new filter | Ensure proper alignment |
| 5 | Check for leaks | Inspect connections |
| 6 | Power up | Wait before using ice maker |
Recommended Products
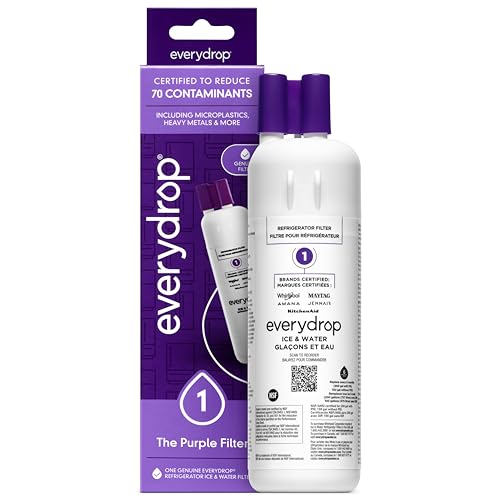
"Certified* to reduce 70 potentially harmful contaminants such as microplastics, heavy metals, pesticides, and pharmaceuticals, everydrop water filters raise the standards for crisp, clean, and refreshing water and ice. *Filters certified by NSF International under NSF/ANSI Standards 42, 53, and 401 to reduce specific contaminants. See everydropwater.com for details."
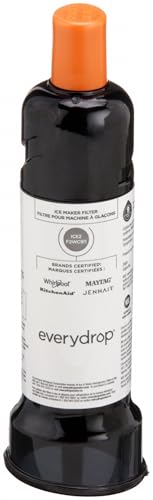
everydrop ICE 2 is the only filter approved by: Whirlpool, Maytag, KitchenAid and JennAir brands.

"Certified* to reduce 70 potentially harmful contaminants such as microplastics, heavy metals, pesticides, and pharmaceuticals, everydrop water filters raise the standards for crisp, clean, and refreshing water and ice. *Filters certified by NSF International under NSF/ANSI Standards 42, 53, and 401 to reduce specific contaminants. See everydropwater.com for details."
Whirlpool Ice Maker Filter Issues Explained
Understanding common issues with your Whirlpool ice maker filter is crucial for maintaining optimal performance and ensuring clean ice production. This section delves into the typical problems users encounter, from clogs to leaks, and offers insights on how to identify and address these challenges effectively. By recognizing these issues early, you can extend the lifespan of your ice maker and enhance its efficiency.
Sometimes, issues may arise even after changing the filter. Understanding these common problems can help you address them quickly.
Low ice production: Check if the water supply is fully turned on and the filter is installed correctly.
Ice with strange taste: This could indicate a need for a filter change or that the water supply has contaminants.
Water leaks: Inspect the filter housing and connections for proper sealing.
Whirlpool Ice Maker Filter Maintenance Tips
Maintaining your Whirlpool ice maker filter is essential for ensuring clean ice production and prolonging the life of your appliance. Proper care and timely replacements can significantly enhance performance and efficiency. Here are key maintenance tips to keep your ice maker running smoothly and effectively.
Regular maintenance can significantly enhance the lifespan of your ice maker. Implement these tips to keep your appliance running smoothly.
Change the filter regularly. Aim for every six months or as recommended by the manufacturer.
Clean the ice maker. Periodically wipe down surfaces to prevent buildup.
Check water supply lines. Look for kinks or clogs that can affect performance.
Monitor ice quality. If you notice changes, it may be time to inspect the filter and water supply.
Whirlpool Ice Maker Filter Change Benefits
Changing the ice maker filter in your Whirlpool appliance offers several advantages that enhance both performance and longevity. Regular filter replacements ensure cleaner ice, improve water quality, and can prevent potential issues related to buildup and contamination. Understanding these benefits can help you maintain optimal functionality and extend the life of your ice maker.
Regularly changing the ice maker filter is vital for optimal performance and ice quality. Following these steps ensures your Whirlpool refrigerator continues to provide clean and fresh ice for your needs.

Hey, I’m Jake. I focus on cooling systems at Appliance Mastery, like fridges, freezers, and air conditioners.
I’ve worked in appliance repair for more than ten years and I’m certified through NASTeC. I’ve seen just about every fridge issue you can imagine.
My goal is to help you fix problems without stress. Whether it’s a freezer that won’t cool or an AC that keeps beeping, I’m here to walk you through it.