
Have you ever cleaned your humidifier only to find it won’t turn on afterward? You’re not alone. Many people face this frustrating issue, especially after giving their device a thorough scrub. It can be disheartening when you expect a fresh start, but your humidifier just won’t cooperate.
Key Takeaways
- Power Supply Issues: Ensure the humidifier is securely plugged in and test the outlet to eliminate power source problems.
- Dry Components: After cleaning, allow all parts to dry completely to avoid interference with electrical connections.
- Proper Cleaning Techniques: Use recommended solutions like white vinegar and distilled water, and always unplug your humidifier before cleaning.
- Regular Maintenance: Establish a routine cleaning schedule to prevent buildup and maintain functionality.
- Inspect for Damage: Look for any visible damage to cords, wires, or control boards that may prevent operation after cleaning.
- Seasonal Checks: Conduct thorough seasonal maintenance to replace filters and inspect for leaks or wear, ensuring long-term performance.
Common Reasons Why Your Humidifier Won’t Turn On After Cleaning
You might find your humidifier unresponsive after a cleaning session. Several factors can contribute to this issue.
Recommended Products

【24V 500mA Power Supply】 Input: AC 100-240V, 50/60Hz; Output: DC 24V 500mA (0.5A), 12W Max; DC plug size: 5.5mm x 2.1mm; Cable length: 5FT; Color: White. Please check...
Issues With Power Supply
Check the power source first. Ensure the humidifier is plugged in securely. Loose connections often lead to power failure. Test the outlet with another device to confirm it’s working. If you’re using an extension cord, consider connecting the humidifier directly to the wall outlet. Faulty cords or plugs may also inhibit operation.
Internal Component Problems
Inspect internal components next. Water may interfere with electrical connections. After cleaning, ensure all parts are dry before reassembling the unit. Look for loose or damaged wires. Sometimes, control boards can malfunction, preventing the humidifier from turning on. If you suspect damage, consider seeking professional help for repairs or replacements.
Troubleshooting Steps to Follow
If your humidifier won’t turn on after cleaning, follow these troubleshooting steps for a swift resolution.
Check the Power Source
- Ensure the humidifier’s plug fits snugly into the outlet.
- Test the outlet by plugging in another device. If it doesn’t work, the outlet may be defective.
- Inspect the power cord for damage. Look for frays or breaks that could interrupt the power supply.
- If applicable, check the machine’s circuit breaker. Reset it if necessary.
- Remove the water tank and any filters. Let all parts dry completely; moisture can hinder functionality.
- Verify that all components are reassembled correctly. Misalignment can block connections and stop operation.
- Examine for any visible debris or mineral buildup, especially around connections. Clean these areas if needed.
- Assess the control board for signs of damage. If damaged wires or circuits are present, consult a technician for repair.
How to Properly Clean Your Humidifier
Cleaning your humidifier correctly ensures efficient operation and longevity. Follow these guidelines for a thorough cleaning.
Recommended Products
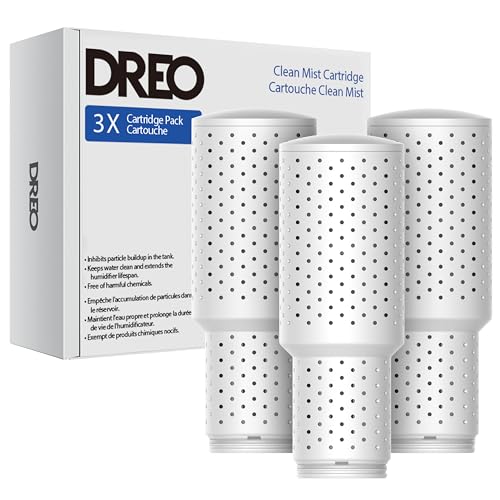
𝗜𝗼𝗻𝗶𝗰 𝗗𝗲𝗺𝗶𝗻𝗲𝗿𝗮𝗹𝗶𝘇𝗮𝘁𝗶𝗼𝗻: Using a large surface hydrogen resin and a 3-layer clearing system, this demineralization cartridge can neutralize heavy metals such as calcium and magnesium ions in water, reducing the white dust buildup of traditional humidifiers.

𝗖𝗢𝗠𝗣𝗔𝗧𝗜𝗕𝗟𝗘 𝗛𝗨𝗠𝗜𝗗𝗜𝗙𝗜𝗘𝗥𝗦 - Our demineralization cartridge for humidifier is specifically designed for 1-gallon or larger ultrasonic humidifiers including UHE-OW14, UHE-WM85, UHE-WM65, UHE-CM25, UHE-CM45, UHE-OC1. Compared to demineralization cartridge UHE-HDC4. (NOTE: This is not a OEM product. Any use of the brand name or model designation for this product is made solely for purposes of demonstrating compatibility)
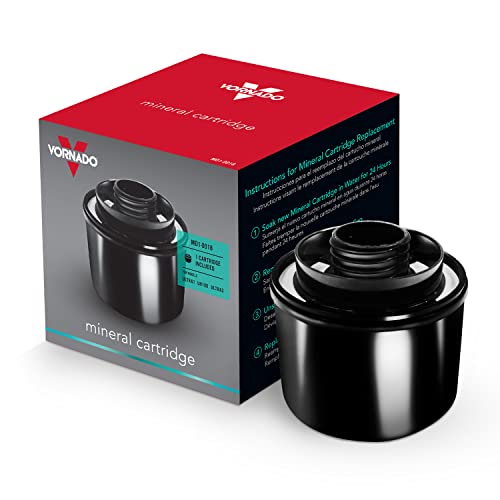
Contains one (1) genuine Vornado Mineral Cartridge
Recommended Cleaning Solutions
Use the following solutions for effective cleaning:
- White Vinegar: A natural disinfectant that removes mineral buildup. Mix equal parts of vinegar and water.
- Distilled Water: Reduces mineral deposits when refilling. Use it to fill your humidifier and keep it clean.
- Hydrogen Peroxide: A powerful bactericide. Mix one part hydrogen peroxide with four parts water for deeper cleaning.
- Mild Soap: Use a few drops of dish soap to clean non-electrical components. Rinse thoroughly to remove any residue.
- Unplug the Humidifier: Always disconnect from the power source before cleaning.
- Disassemble Components: Remove the water tank, filter, and any detachable parts.
- Clean the Tank: Wash the inside of the water tank with the chosen cleaning solution. Use a soft cloth or sponge, avoiding abrasive materials.
- Rinse Thoroughly: Rinse the tank under running water until all cleaning solution is removed.
- Clean Other Parts: Wipe down the base and other non-electrical parts with the cleaning solution. Pay attention to any buildup or debris.
- Dry Completely: Let all components air dry completely before reassembling. Ensure no moisture remains to prevent electrical problems.
- Inspect the Filter: Check for any dirt or mineral deposits. Replace the filter if it appears worn or excessively dirty.
- Reassemble the Humidifier: Put all parts back together securely, ensuring everything is aligned correctly.
By adhering to this cleaning process, you maintain the humidifier’s functionality and enhance its lifespan. Regular maintenance minimizes the likelihood of encountering issues, like the device refusing to turn on after cleaning.
Preventative Maintenance Tips
Maintaining your humidifier ensures proper functionality and reduces future problems. Implementing simple preventative measures can help keep your device working smoothly.
Regular Cleaning Schedule
Establish a regular cleaning schedule for your humidifier. Clean it weekly or bi-weekly, depending on usage. Empty the water tank daily to prevent mold growth. Use a mix of vinegar and water to clean the tank and base, ensuring all residues are removed. Rinse thoroughly with distilled water to avoid mineral buildup.
Seasonal Maintenance Suggestions
Perform thorough seasonal maintenance every few months. During the heating season, check the humidifier’s filter and replace it if it’s dirty. Inspect all hoses and connections for leaks or wear. Empty the tank completely and let all parts dry before storage if you’re not using the humidifier. For long-term care, consider descaling once every few months with a vinegar solution if you notice mineral buildup.
Implementing these tips ensures your humidifier remains in top condition. Regular attention helps avoid common issues, including the device refusing to turn on after cleaning.
Conclusion
Dealing with a humidifier that won’t turn on after cleaning can be frustrating. By following the troubleshooting tips and preventive maintenance suggestions shared, you can get your device back up and running in no time. Remember to check the power source and ensure all components are dry and correctly reassembled.
Regular cleaning and maintenance will not only enhance your humidifier’s performance but also help you avoid future issues. A little care goes a long way in keeping your humidifier functioning smoothly. So take a moment to implement these practices and enjoy the benefits of a well-maintained humidifier.
Frequently Asked Questions
Why won’t my humidifier turn on after cleaning?
Many users experience a humidifier that won’t turn on post-cleaning due to issues like loose power connections, damaged cords, or internal components affected by water. Ensure that the device is securely plugged in, check the power outlet, and confirm all parts are completely dry and properly reassembled.
What should I check first if my humidifier doesn’t start?
Start by inspecting the power supply. Check that the humidifier is plugged into a functional outlet and ensure the power cord is not damaged. You may also want to test the outlet with another device to confirm it’s working.
How do I ensure my humidifier is completely dry after cleaning?
To ensure your humidifier is dry, disassemble all parts like the water tank and filters, then let them air dry completely before reassembling. This prevents water interference with electrical components, which could lead to malfunction.
Can I use any cleaning solution for my humidifier?
It’s best to use recommended cleaning solutions such as white vinegar, distilled water, hydrogen peroxide, or mild soap. Avoid harsh chemicals that can damage the humidifier’s components. Always rinse thoroughly and ensure everything is dry before reassembling.
How often should I clean my humidifier?
To maintain optimal functionality, clean your humidifier weekly or bi-weekly. Additionally, empty the water tank daily to prevent mold growth and ensure better air quality. Following a regular cleaning schedule greatly minimizes the chance of encountering problems.
When should I replace my humidifier filter?
Replace your humidifier filter at least once during the heating season, or more frequently if it appears dirty or clogged. A clean filter ensures efficient operation and healthier air quality in your home.
What preventative measures can I take for my humidifier?
Establish a regular cleaning schedule, empty the water tank daily, and inspect hoses and connections for leaks. Descale with vinegar to address mineral buildup. These proactive measures can help ensure your humidifier remains functional and reduce future issues.

Hey, I’m Jake. I focus on cooling systems at Appliance Mastery, like fridges, freezers, and air conditioners.
I’ve worked in appliance repair for more than ten years and I’m certified through NASTeC. I’ve seen just about every fridge issue you can imagine.
My goal is to help you fix problems without stress. Whether it’s a freezer that won’t cool or an AC that keeps beeping, I’m here to walk you through it.