
Have you noticed water pooling around your water heater? A leak from the top can be a frustrating and stressful situation. It’s not just a minor inconvenience; it can lead to significant damage if left unchecked.
Key Takeaways
- Identify Causes Quickly: Leaks from the top of water heaters can stem from loose connections, faulty valves, corroded tanks, or excess pressure. Timely identification is essential to prevent extensive damage.
- Signs of a Leak: Look for water pooling, unusual sounds, rust stains, and increased water bills as indicators of a leak. These symptoms often suggest the need for immediate inspection.
- Water Heater Types Matter: Different water heater types (tank vs. tankless) have unique characteristics and potential leak sources. Understanding your unit helps in diagnosing issues effectively.
- Diagnose and Resolve: Conduct a thorough visual inspection, check pipe connections, and consider DIY fixes like tightening fittings or replacing faulty valves to address leaks promptly.
- Implement Preventative Measures: Regular maintenance, inspections, and proper insulation can help prevent leaks from occurring and ensure the longevity and efficiency of your water heater.
- Consult Professionals When Needed: If leaks persist or you’re unsure of the diagnosis, consult a plumber for expert evaluation and repairs, especially for older or corroded water heaters.
Understanding Water Heater Leaks
Water heater leaks often stem from various issues, especially when the leak originates from the top. It’s crucial to identify the cause quickly to prevent extensive damage.
Common Causes of Leaks
- Loose Connections: Tighten loose inlet and outlet piping connections. Check for any movement or rust.
- Faulty Temperature and Pressure Relief Valve (T&P Valve): Inspect the T&P valve for signs of failure, as this valve releases excess pressure and can leak if malfunctioning.
- Corroded Tank: Look for rust or corrosion on the tank. If corrosion is present, replacement may be necessary.
- Defective Heater Element: Examine the heating element for leaks. A damaged element can cause water to escape.
- Excess Pressure: Monitor the water pressure in the system. Pressure above 80 psi can lead to leaks from fittings or valves.
- Puddles or Dampness: Notice any water pooling around the base of the heater. This can indicate a leak.
- Hissing or Gurgling Sounds: Listen for unusual noises coming from the water heater. These sounds might suggest water escaping.
- Increased Water Bills: Watch for unexpected spikes in your water bills. Frequent leaks can cause higher usage.
- Rust Stains: Look for rust around fittings or the tank itself. This often signifies a failing component.
- Visible Water: Check for moisture on pipes or around the heater. Visible water indicates an active leak that requires immediate attention.
Types of Water Heaters
Understanding different types of water heaters helps you identify potential issues like leaks and their underlying causes. Here’s a breakdown of the most common types.
Recommended Products

Refrigerator Leak Repair Service Kit:2 drains and covers 1 foam seal 2 foam strips 1 defrost heater clip (includes updated interior duckbill kit),Replacement Parts DA82-01415A, DA97-04049D,AP5957964, PS1005968,DA97-06970A, 3436781,PS1005968
FIX IT FAST: Our multi-purpose solution works in minutes to quickly seal leaks in the radiator, head gasket, freeze plugs, block, heater matrix & water pump. Fixes most leaks in water-cooled engines
Enough Quantity to Use: you will receive 60 pieces of solar pool heater repair plugs (other repair tools not included), they can help you repair your pool solar panels, enough quantity can meet your use and replacement needs, you can also share with your friends
Tank Water Heaters
Tank water heaters store a significant amount of hot water, usually between 20 to 80 gallons, in a tank. These units continuously heat the water to keep it ready for use. Features include:
- Capacity: Available sizes range from small to large. Choosing the right size ensures you meet your household’s needs.
- Recovery Rate: Different models heat water at varying speeds. A higher recovery rate reduces wait time between hot water use.
- Fuel Source: Typically powered by gas or electricity. The source affects efficiency and operating costs.
Watch for leaks near connections or the tank itself. Common causes include:
- Loose Connections: Tighten fittings and ensure there are no gaps.
- Corroded Tanks: Inspect the tank regularly for rust or corrosion. Rust increases the risk of leaks.
- Temperature and Pressure Relief Valves: Check for valve failure. Replacing faulty valves can prevent leaks.
Tankless Water Heaters
Tankless water heaters heat water on demand, eliminating the need for a storage tank. These units are more energy-efficient but come with some distinct features:
- Endless Hot Water: Provides hot water as needed, avoiding the wait associated with tank heaters.
- Space Saving: Smaller and more compact. Ideal for homes with limited space.
- Energy Efficiency: Heats water only when required, reducing monthly energy bills.
Monitor for leaks, particularly around the unit’s inlet and outlet connections. Issues may arise from:
- Loose Pipes: Ensure pipes are securely fastened to prevent movement and leaks.
- Heat Exchanger Problems: Inspect for cracks or blockages in the heat exchanger that could cause leaks.
Identifying the type of water heater in use helps you diagnose leaks more effectively and maintain your system properly.
Diagnosing the Leak
Diagnosing a leak from the top of your water heater involves a systematic examination. Identifying the source quickly helps prevent further damage.
Recommended Products

HUMIDITY SENSOR: Our handy meter tool can quickly determine what level of remediation is needed to keep your family safe from black mold. High levels of dampness that go untreated are the leading cause of harmful fungus growth in the home.

WATER LEAK DETECTOR detects relative moisture content from leaks and flooding
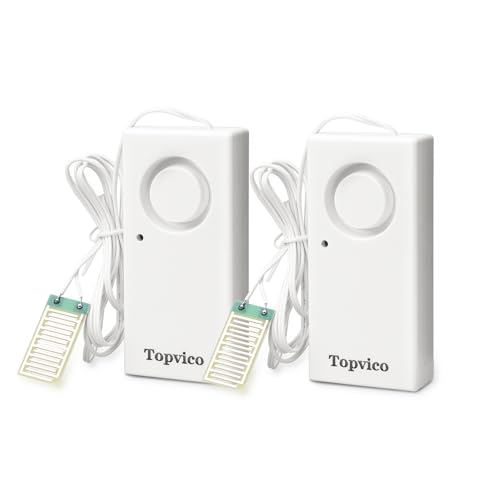
Loud 120dB Alarm for Immediate Alerts -- The powerful 120dB alarm notifies you and your neighbors as soon as a leak is detected. The alarm continues until the water dries or the sensor is turned off, ensuring you don’t miss a potential flood, even from the basement. A cost-effective solution to prevent water damage in homes and businesses.
Visual Inspection
Start with a thorough visual inspection. Look for any signs of water pooling around the base of the heater. Check all visible joints, connections, and valves for moisture, corrosion, or rust. Pay attention to the temperature and pressure relief valve, as leaks often originate here. If you spot drops of water or dampness, note their location, as this can indicate where the leak is happening.
Checking for Pipe Issues
Next, check your pipes. Examine all supply lines and fittings that connect to the water heater. Look for loose connections, which are a common cause of leaks. If you see any cracks or damage on the pipes, consider replacing those sections. Ensure that the inlet and outlet pipes are secure and free from leaks.
If the heater isn’t insulated properly, condensation may form on the exterior, mimicking a leak. Confirm that tanks and pipes are adequately insulated to prevent issues related to temperature changes. For more advanced detection, consider using a moisture meter to identify hidden leaks behind walls or insulation, ensuring you address the problem promptly.
Resolving the Leak
Addressing a leak from the top of your water heater involves both temporary fixes and long-term solutions. You can manage the issue effectively by following systematic steps.
Recommended Products
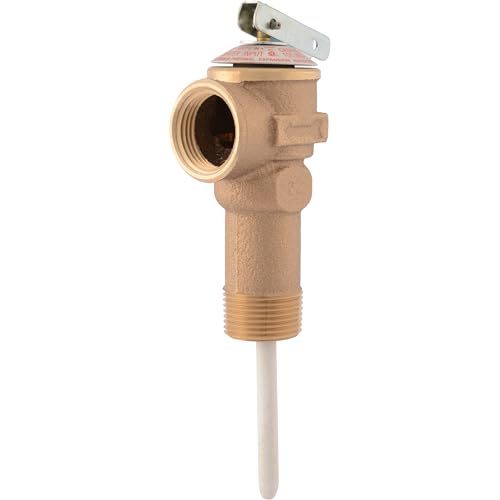
CASH ACME RELIEF VALVE: Cash Acme NCLX Combination Temperature and Pressure Relief Valves are designed for the protection of water heaters and storage tanks; incorporate an inert thermal element coating that provides effective isolation from mineral deposits (liming) and galvanic corrosion

Provides Protection: Helps protect your RV or home water heater from excess temperature and water pressure

Size: Small.For best results, use only Rheem replacement parts for repairing your Rheem Water Heater
DIY Solutions
- Turn Off the Power Supply: For electric heaters, switch off the power at the breaker. For gas heaters, turn the gas supply off.
- Shut Off the Water Supply: Locate the water supply valve above your heater and turn it clockwise to stop water flow.
- Inspect the Connections: Check all visible connections, including the inlet and outlet pipes. Tighten any loose fittings using a wrench.
- Replace the Temperature and Pressure Relief Valve: If this valve leaks, it’s essential to replace it. Use a pipe wrench to remove the old valve and install a new one following the manufacturer’s instructions.
- Seal Minor Leaks: If you spot a small leak, use plumber’s tape or joint compound as a temporary seal on threaded connections. This can provide a short-term fix until a permanent solution is implemented.
- Monitor for Condensation: Insulation around pipes can prevent condensation. Ensure insulation is intact or wrap exposed pipes to reduce moisture accumulation.
- Persistent Leaking: If leaks continue after DIY fixes, it’s time to consult a plumber. Continuous water leakage can indicate deeper issues.
- Structural Damage: Water pooling around the heater or damage to surrounding areas often requires professional intervention to assess and repair.
- Uncertainty in Diagnosis: If you’re unsure about the source of the leak or the right fix, call an expert. They have the tools and experience to identify hidden problems.
- Old or Corroded Heaters: If your water heater shows significant corrosion or is older than 10-15 years, replacement may be a better option. A professional can guide the decision and safely install a new unit.
Addressing a leak promptly minimizes damage and maintains the efficiency of your water heater.
Prevention Tips
Preventing leaks from the top of your water heater involves routine checks and proper installations. These practices help maintain efficiency and minimize damage.
Regular Maintenance
Conduct regular maintenance checks on your water heater. Inspect all visible connections and valves for signs of leaks or corrosion. Tighten loose fittings to eliminate potential gaps. Flush the tank periodically to remove sediment buildup, which can lead to corrosion. Schedule professional inspections at least once a year to identify early signs of wear. Keeping records of maintenance also helps in tracking the unit’s health over time.
Installing Proper Insulation
Install proper insulation around your water heater and pipes. Insulation reduces temperature fluctuations, preventing condensation that can mimic leaks. Use foam pipe insulation for exposed pipes, ensuring it’s secured tightly. Consider a water heater blanket to improve overall efficiency, retaining heat and minimizing the risk of condensation. This simple measure not only saves energy but also protects your flooring and surrounding areas from moisture.
Conclusion
Addressing a leak from the top of your water heater is crucial to preventing damage and maintaining efficiency. Regular inspections and maintenance can go a long way in catching potential issues before they escalate.
If you notice any signs of a leak don’t hesitate to take action. Whether it’s tightening connections or calling in a professional you’ll want to ensure your water heater stays in great shape.
By being proactive you can enjoy peace of mind knowing your home is protected from water damage. Keep an eye on your water heater and take those small steps to prevent bigger headaches down the road.
Frequently Asked Questions
What causes water to pool around my water heater?
Water pooling around your water heater can be caused by various issues, including loose connections, faulty temperature and pressure relief valves, corroded tanks, or defective heater elements. Excess pressure in the system may also lead to leaks.
How can I tell if my water heater is leaking?
Signs of a leaking water heater include puddles or dampness around the unit, unusual sounds, increased water bills, rust stains, and visible moisture. If you notice any of these signs, it’s important to investigate further.
What should I do if my water heater is leaking?
If your water heater is leaking, first turn off the power and water supply. Inspect connections and valves for issues. For minor leaks, you can use plumber’s tape to seal them temporarily. If leaks persist or you see structural damage, consult a plumber.
How do I prevent leaks in my water heater?
To prevent leaks, conduct routine maintenance checks, inspect connections and valves, tighten loose fittings, and flush the tank periodically to remove sediment. Install proper insulation and consider scheduling annual professional inspections.
Are tank and tankless water heaters different in terms of leaks?
Yes, tank and tankless water heaters may have different leak issues. Tank heaters commonly face problems from loose connections, corroded tanks, and faulty valves. Tankless units often experience leaks around inlet and outlet connections due to loose pipes or heat exchanger issues.
When should I call a professional plumber for my water heater?
You should call a professional plumber if you’re unsure about diagnosing leaks, notice structural damage, or if your water heater is old and corroded. A plumber can help ensure safe and effective repairs.

Hey, I’m Jake. I focus on cooling systems at Appliance Mastery, like fridges, freezers, and air conditioners.
I’ve worked in appliance repair for more than ten years and I’m certified through NASTeC. I’ve seen just about every fridge issue you can imagine.
My goal is to help you fix problems without stress. Whether it’s a freezer that won’t cool or an AC that keeps beeping, I’m here to walk you through it.