
A Whirlpool dishwasher not draining at the end of its cycle often indicates a clogged filter or a malfunctioning drain pump. Addressing these issues promptly can prevent further damage and ensure your appliance operates efficiently.
Whirlpool Dishwasher Drainage Failure Symptoms
When your Whirlpool dishwasher fails to drain at the end of a cycle, it can lead to standing water and unsanitary conditions. Recognizing the symptoms of drainage failure is crucial for timely troubleshooting and effective repairs. This section outlines the key indicators that signal your dishwasher may be experiencing drainage issues.
Understanding the symptoms of a Whirlpool dishwasher that fails to drain can help you pinpoint the problem. Common signs include:
Water pooling at the bottom of the dishwasher
Dishes remaining dirty or wet after a cycle
Unusual noises during operation
Identifying these symptoms early can save time and effort in troubleshooting.
Essential Tools for Whirlpool Dishwasher Repair
To effectively troubleshoot and repair a Whirlpool dishwasher that isn’t draining at the end of its cycle, having the right tools on hand is crucial. This section outlines the essential tools you’ll need to diagnose and fix the issue, ensuring a smoother repair process and restoring your dishwasher’s functionality.
Before starting any repairs, gather the following tools and supplies to ensure a smooth process. Having everything on hand minimizes interruptions.
| Tool/Supply | Purpose |
|---|---|
| Screwdriver | Remove panels |
| Towels | Clean spills |
| Bucket | Catch water |
| Replacement parts | Fix broken components |
Ensure you have the right replacement parts for your specific Whirlpool model.
Whirlpool Dishwasher Repair Safety Guidelines
When addressing issues with a Whirlpool dishwasher that isn’t draining, safety should be your top priority. Understanding the necessary precautions can help prevent accidents and ensure a smooth repair process. This section outlines essential safety guidelines to follow before and during your troubleshooting efforts.
Safety is paramount when working on appliances. Before beginning repairs, follow these steps:
Unplug the dishwasher from the power source to avoid electrical shock.
Turn off the water supply to prevent leaks.
Clear the area around the dishwasher for easy access.
Taking these precautions will protect you and your appliance during the repair process.
Whirlpool Dishwasher Drainage Troubleshooting Steps
If your Whirlpool dishwasher isn’t draining at the end of its cycle, it can be frustrating and inconvenient. This section provides a clear, step-by-step guide to troubleshoot and resolve common drainage issues, ensuring your appliance operates efficiently and effectively. Follow these instructions to identify and fix the problem quickly.
Follow these steps to troubleshoot and fix the drainage issue in your Whirlpool dishwasher.
Whirlpool Dishwasher Filter Cleaning Steps
A clogged filter can often be the culprit behind a Whirlpool dishwasher not draining properly at the end of its cycle. Cleaning the filter is a straightforward task that can significantly improve your dishwasher’s performance. Follow these step-by-step instructions to ensure your appliance runs efficiently and effectively.
The filter can easily become clogged with food debris. To clean it:
Remove the bottom rack to access the filter.
Twist and lift the filter out.
Rinse it under running water to remove debris.
Reinstall the filter securely.
Whirlpool Dishwasher Drain Pump Inspection Steps
If your Whirlpool dishwasher isn’t draining properly at the end of its cycle, inspecting the drain pump is a crucial step in troubleshooting the issue. This guide will walk you through the specific steps to assess the drain pump’s condition, ensuring you can effectively identify and resolve any problems impacting your dishwasher’s performance.
A malfunctioning drain pump can prevent water from exiting the dishwasher. To check it:
Locate the drain pump, usually at the bottom of the appliance.
Remove any visible debris blocking the pump.
Test the pump by running a short cycle to see if it operates correctly.
Whirlpool Dishwasher Drain Hose Inspection
If your Whirlpool dishwasher isn’t draining properly at the end of its cycle, a thorough inspection of the drain hose is essential. This component can often become clogged or kinked, leading to drainage issues. Understanding how to check and address these problems can help restore your dishwasher’s functionality.
A kinked or clogged drain hose can also cause drainage issues. To inspect it:
Disconnect the hose from the dishwasher and the sink.
Check for any blockages and clear them.
Ensure the hose is not kinked when reattaching.
Whirlpool Dishwasher Air Gap Cleaning Steps
If your Whirlpool dishwasher isn’t draining properly, one common culprit could be a clogged air gap. Cleaning the air gap is a straightforward process that can help restore proper drainage. Follow these step-by-step instructions to ensure your dishwasher functions efficiently again.
If your dishwasher has an air gap, it can become clogged. To clean it:
Remove the cap from the air gap.
Clear any debris inside.
Reassemble the air gap and test the dishwasher.
Whirlpool Dishwasher Electrical Troubleshooting Steps
If your Whirlpool dishwasher isn’t draining properly at the end of its cycle, electrical issues may be to blame. This section outlines essential troubleshooting steps to diagnose and resolve potential electrical problems, ensuring your appliance functions efficiently. Follow these guidelines to identify the source of the issue and restore your dishwasher’s performance.
If the dishwasher still does not drain, electrical issues may be at play. Check the following:
Ensure the dishwasher is plugged in and the outlet is functioning.
Inspect the wiring for any visible damage.
Test the control board for faults.
Whirlpool Dishwasher Drainage Verification Steps
If your Whirlpool dishwasher isn’t draining properly at the end of its cycle, it’s essential to follow a systematic approach to identify and resolve the issue. This section outlines key verification steps to help you diagnose the drainage problem effectively, ensuring your appliance operates smoothly and efficiently.
After completing repairs, run a short cycle to verify that the dishwasher drains properly. Regular maintenance helps prevent future issues. Consider these tips:
Clean the filter monthly to avoid clogs.
Inspect the drain hose regularly for kinks.
Run a cleaning cycle with a dishwasher cleaner every few months.
If issues persist after following these steps, consult a professional technician for further diagnosis.
Recommended Products

HELPS POWER AWAY SMELLS created by odor causing bacteria, foggy limescale and mineral deposits hiding deep inside the dishwasher’s pump, filter, tub, valve, drain, washer arms and recirculation hoses to help optimize appliance performance.

Designed for Dishwasher Cleaning & Maintenance - Helps clean the inside of the dishwasher, including the tub, filter, spray arms, and drain where buildup can collect over time.
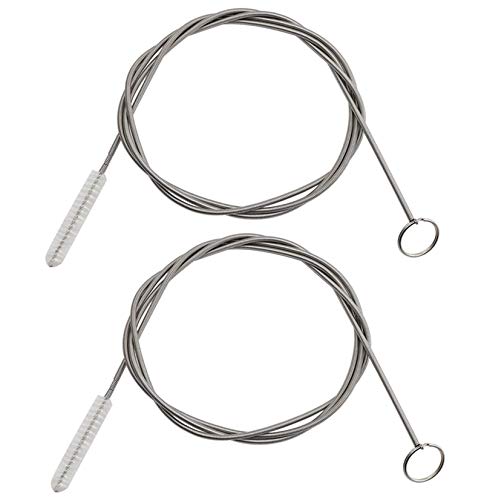
This tube cleaner brush is made from stainless steel and nylon bristles head,which can softly scrub away buildup and avoid destroying the tubing.

Hey, I’m Jake. I focus on cooling systems at Appliance Mastery, like fridges, freezers, and air conditioners.
I’ve worked in appliance repair for more than ten years and I’m certified through NASTeC. I’ve seen just about every fridge issue you can imagine.
My goal is to help you fix problems without stress. Whether it’s a freezer that won’t cool or an AC that keeps beeping, I’m here to walk you through it.